HTC One M8 更换电池

What you need

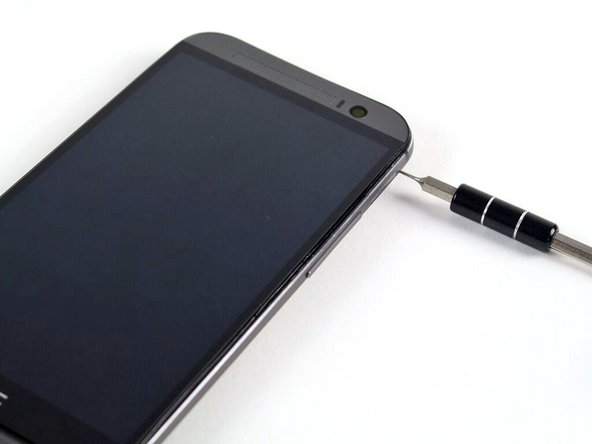
  1. HTC One M8 更换电池, SIM(Subscriber Identity Module用户身份模块)卡: step 1, image 1 of 2 HTC One M8 更换电池, SIM(Subscriber Identity Module用户身份模块)卡: step 1, image 2 of 2
    • 将卡针或一个回形针插入SIM卡槽边的小孔,该孔位于手机左上侧。

    • 向孔内按下弹出卡槽。

    • 此操作可能需要施加较大的力量。

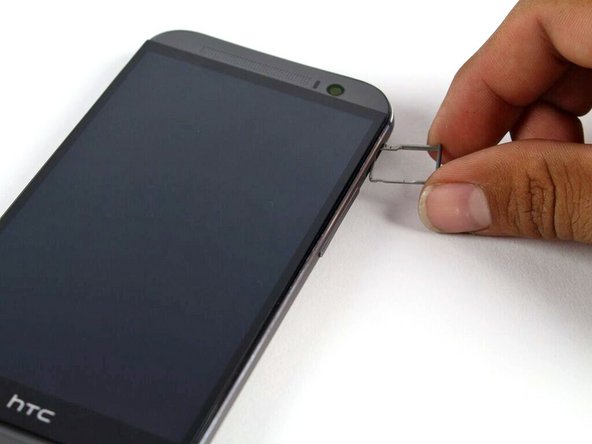
  2. HTC One M8 更换电池: step 2, image 1 of 1
    • 将SIM卡槽从手机充抽出。

    • 在重新安装SIM卡时,注意SIM卡的朝向与卡槽匹配。

  3. HTC One M8 更换电池, MicroSD卡: step 3, image 1 of 2 HTC One M8 更换电池, MicroSD卡: step 3, image 2 of 2
    • 用取卡针插入放置SIM卡或microSD卡附近的小口里,位于手机的右上方。

    • 按下弹出托盘。

    • 这可能需时一定的力度,但也不要用力过大。

  4. HTC One M8 更换电池: step 4, image 1 of 1
    • 从HTC One M8中将microSD卡托盘组件取出。

    • 当插入的microSD卡,确保它是相对于托盘的合理位置。

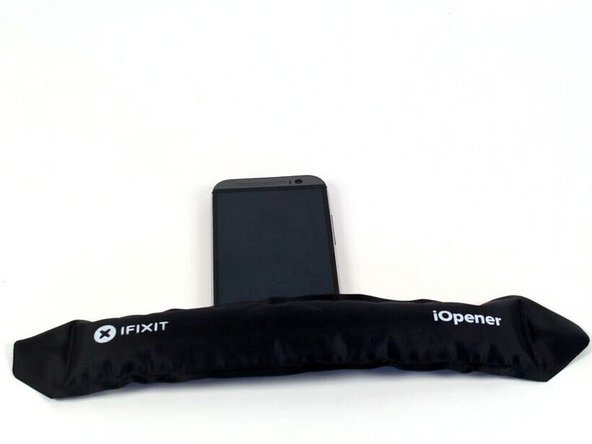
  5. HTC One M8 更换电池, 后盖: step 5, image 1 of 2 HTC One M8 更换电池, 后盖: step 5, image 2 of 2
    • 使用 iOpener 或热风枪来让扬声器上下网罩上胶水融化一些。

    • 参考iOpener 指南 来使用iOpener。

  6. HTC One M8 更换电池: step 6, image 1 of 3 HTC One M8 更换电池: step 6, image 2 of 3 HTC One M8 更换电池: step 6, image 3 of 3
    • 使用塑料撬棒工具来轻轻撬起手机底部扬声器网罩。

    • 黏胶到处都是,可以使用专门去除黏胶的工具Goo-gone。

  7. HTC One M8 更换电池: step 7, image 1 of 2 HTC One M8 更换电池: step 7, image 2 of 2
    • 使用塑料撬棒工具轻轻撬起手机顶部的扬声器网罩。

  8. HTC One M8 更换电池: step 8, image 1 of 1
    • 移除顶部两颗银色 3 mm 菲利普十字 #00 螺丝。

    • 移除底部四颗黑色 T5 Torx 螺丝。

  9. HTC One M8 更换电池: step 9, image 1 of 3 HTC One M8 更换电池: step 9, image 2 of 3 HTC One M8 更换电池: step 9, image 3 of 3
    • 使用撬棒和撬片配合,来打开固定手机壳四周的夹扣。

    • 虽然图中使用的是金属撬棒,但最好使用塑料或尼龙质地的撬棒,避免损坏手机。

    • 注意不要碰到电源键:它在手机后壳上。

    • 大力才能撬开手机!

  10. HTC One M8 更换电池, 主板: step 10, image 1 of 2 HTC One M8 更换电池, 主板: step 10, image 2 of 2
    • 移除把电池接口固定到母版的银色 2 mm 菲利普斯 #00 螺丝。

    • 使用塑料开机工具温柔地撬开电池接口。

  11. HTC One M8 更换电池: step 11, image 1 of 3 HTC One M8 更换电池: step 11, image 2 of 3 HTC One M8 更换电池: step 11, image 3 of 3
    • 使用撬棒撬开两条(四条)天线。

    • 使用撬棒的尖端撬开七个 ZIF 接口。

    • 使用镊子轻轻地从接口拉出七条电线。

  12. HTC One M8 更换电池: step 12, image 1 of 1
    • 使用 T5 螺丝刀移除三颗银色 3mm 螺丝。

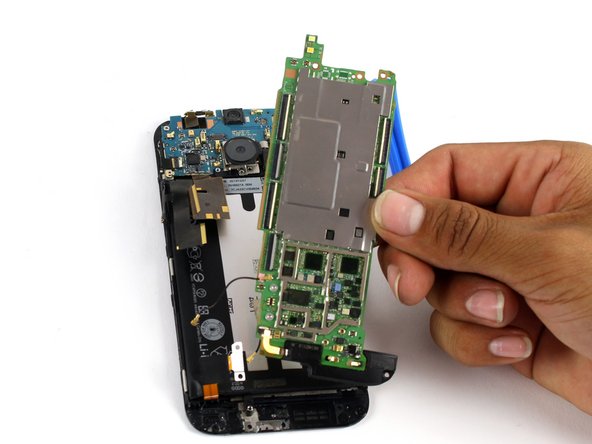
  13. HTC One M8 更换电池: step 13, image 1 of 3 HTC One M8 更换电池: step 13, image 2 of 3 HTC One M8 更换电池: step 13, image 3 of 3
    • 使用 iOpener 或热风枪来融化把母版固定到显示屏组件上的胶水。

    • 使用塑料开机工具轻轻地撬动母版,脱离显示屏。

    • 这个时候,底部扬声器仍然连在主板上。如果你只是替换主板的话,参考底部扬声器 指南来把现有的扬声器替换到新的主板上面。

  14. HTC One M8 更换电池, 电池: step 14, image 1 of 3 HTC One M8 更换电池, 电池: step 14, image 2 of 3 HTC One M8 更换电池, 电池: step 14, image 3 of 3
    • 小心地将电缆拨离到电池两侧。

    • 使用 iOpener 或者加热枪将固定电池的粘合剂加热使之松开。

    • 使用塑料撬棍从屏幕上轻轻地撬起电池。

Conclusion

要重新组装您的设备,请按照相反的顺序执行这些说明。

125 other people completed this guide.

Special thanks to these translators:

en zh

100%

SaveCat is helping us fix the world! Want to contribute?
Start translating ›

Mitchell Keller

Member since: 04/14/15

1,723 Reputation

1 Guide authored

Team

Cal Poly, Team 5-9, Maness Spring 2015 Member of Cal Poly, Team 5-9, Maness Spring 2015

CPSU-MANESS-S15S5G9

4 Members

18 Guides authored

33 Comments

thanks for the instructions. i dropped my m8 and the power button wasnt responding at all and volume down wasnt either . i dissassembled the phone ( maybe i shouldnt have used my swiss army blade, left dents in plastic) using this guide..and pushed all the connectors into firmly and it worked again . thanks a bunch

drocheit - Reply

Do we need to replace the adhesive when replacing the battery?

iarinaga - Reply

I did not replace the adhesive: there's enough left to keep everything secure

Karl Horton -

zoccola zoccola

giovanni antise - Reply

Hi, if there is a lot of tape is it necessary to replace it with new tape and copper shielding, and where can you get it please ?

Toby Murcott - Reply

Add Comment

View Statistics:

Past 24 Hours: 3

Past 7 Days: 31

Past 30 Days: 117

All Time: 154,079