Introduction
Follow this guide to replace the charging assembly for the Pixel 3. The charging assembly contains the USB-C port as well as some antenna connectors, and is layered underneath the loudspeaker. This requires removing the loudspeaker first, which will compromise the loudspeaker’s ingress gasket.
What you need
-
-
Heat an iOpener and apply it to the bottom of the phone for one minute.
-
-
-
Apply a suction cup to the heated bottom edge of the back cover.
-
Lift on the suction cup with strong, steady force to create a gap.
-
Insert an opening pick into the gap.
-
-
-
Slice the adhesive along the bottom edge of the phone and around the right corner.
-
Leave a pick in the bottom edge to prevent the adhesive from re-sealing.
-
-
-
Continue heating and slicing through the rest of the phone perimeter. Leave a pick in each edge to prevent the adhesive from resealing.
-
-
-
Once you have sliced around the perimeter of the phone, carefully lift the left edge of the back cover.
-
Flip the back cover along its long axis and rest it so that the fingerprint sensor cable is not strained.
-
-
-
Remove the two 4.1 mm-long Phillips screws securing the fingerprint connector bracket.
-
-
-
Use the point of a spudger to slide the fingerprint connector bracket out from under the NFC coil.
-
Remove the fingerprint connector bracket.
-
-
-
Use the point of a spudger to pry up and disconnect the fingerprint connector from its socket.
-
-
-
-
Remove the five Phillips screws securing the wireless charging coil:
-
Two 1.9 mm screws
-
Two 4.2 mm screws
-
One 4.3 mm screw
-
-
-
Use the point of a spudger to pry up and disconnect the battery press connector from its socket near the right edge of the phone.
-
-
-
Use the point of a spudger to pry up and disconnect the loudspeaker connector from its motherboard socket near the right edge of the phone.
-
-
-
Remove the following four Phillips screws:
-
One 1.9 mm screw
-
One 4.3 mm screw
-
Two 4.3 mm screws with thinner shanks
-
Remove the tiny grounding clip from the left screw hole. Be careful not to lose it.
-
Remove the small plastic insert from the right side of the USB-C port.
-
-
-
Insert the point of a spudger under the bottom right corner of the loudspeaker.
-
Pry up to loosen the loudspeaker from the phone.
-
-
-
Insert the point of a spudger under the top left corner of the loudspeaker.
-
Pry up to loosen the loudspeaker.
-
-
-
Insert the flat end of the spudger under the top edge of the loudspeaker, towards the left edge.
-
Pry up to loosen the loudspeaker.
-
-
-
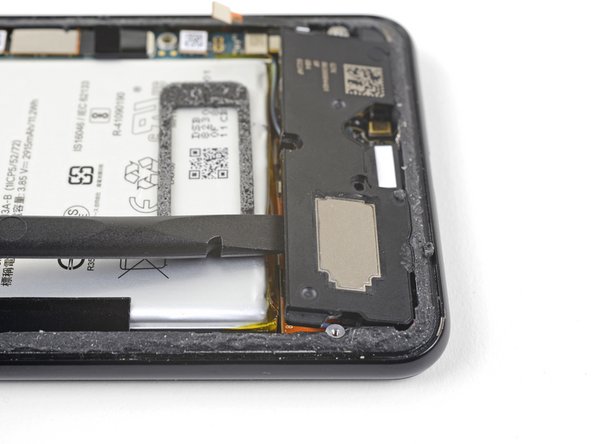
Remove the loudspeaker.
-
If it is in good condition, you can re-use the gasket. Make sure that the gasket does not cover the exit hole.
-
If the gasket is pulled out of place, remove it and replace the adhesive with a pre-cut strip or Tesa tape.
-
-
-
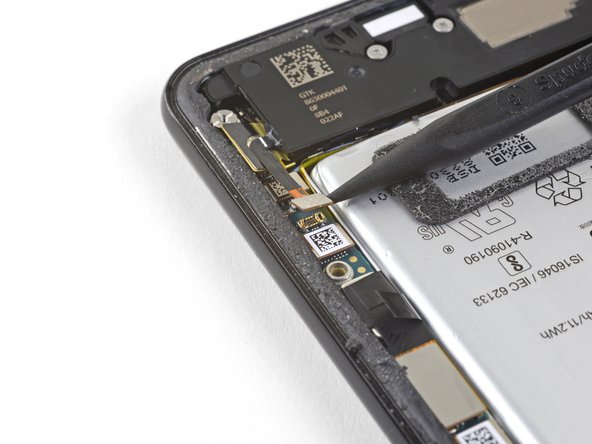
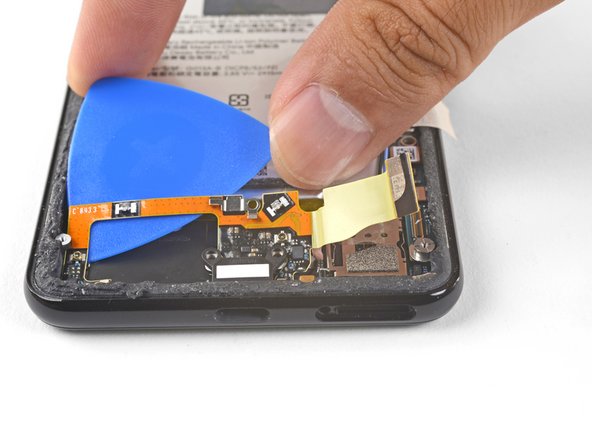
Use the point of a spudger to pry up and disconnect the blue antenna cable from its socket on the charging assembly.
-
-
-
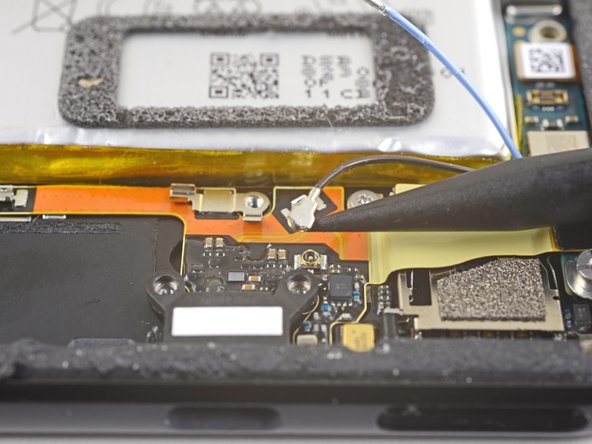
Use the point of a spudger to carefully pry up and release the blue antenna cable from its grounding clip.
-
-
-
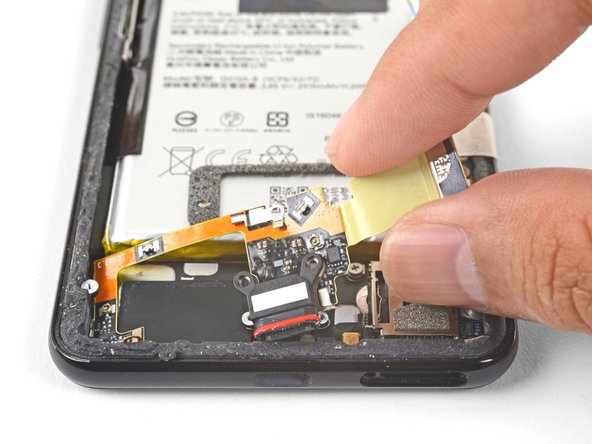
Use the point of a spudger to pry up and disconnect the black antenna cable from its socket near the USB-C port.
-
-
-
Use the point of a spudger to pry up and disconnect the charging assembly's connector from its motherboard socket, near the right edge of the phone.
-
Carefully peel the flex cable from the top of the SIM card reader.
-
-
-
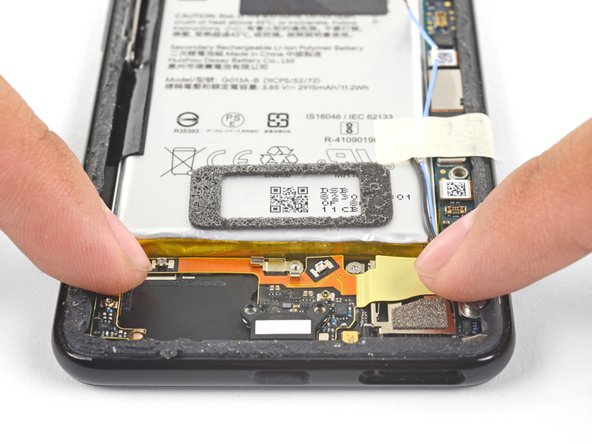
Remove the two 1.9 mm Phillips screws securing the charging assembly to the bottom edge of the phone.
-
-
-
Apply a heated iOpener to the bottom edge of the phone for a minute to loosen the adhesive holding the charging assembly in place.
-
-
-
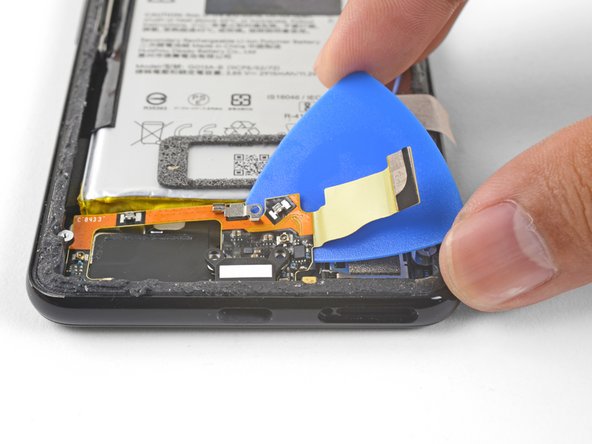
Insert an opening pick underneath the charging assembly's flex cable.
-
Slide the opening pick below the charging assembly to loosen it from the phone.
-
-
-
Be sure to remove all plastic liners from the assembly to expose the adhesive.
-
Line up the assembly's bottom left corner into place.
-
Carefully lay the rest of the assembly in place, making sure that the USB-C port is correctly seated in its respective cutout.
-
Use your fingers to press the assembly onto the frame.
-