
Free Shipping on Domestic Orders $75+

Framework Laptop 12 Mainboard Installation

Prerequisite Only
This is a prerequisite-only guide! This guide is part of another procedure and isn’t meant to be used alone.

What you need

  1. Framework Laptop 12 Mainboard Installation, Install the Mainboard: step 1, image 1 of 2 Framework Laptop 12 Mainboard Installation, Install the Mainboard: step 1, image 2 of 2
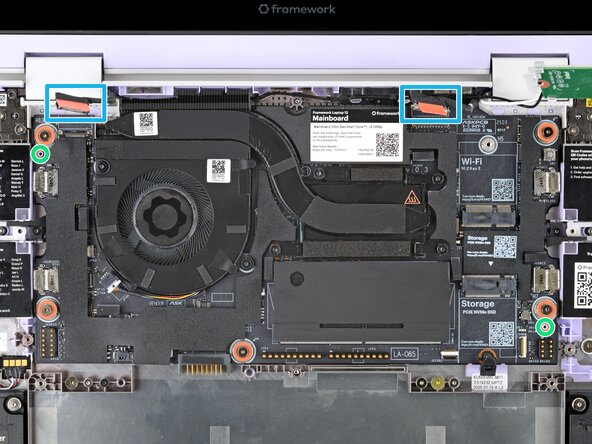
    • Carefully lay the Mainboard in the laptop.

    • Use the two alignment pins to help align the Mainboard to the laptop.

    • Be careful not to trap the webcam or display cables under the Mainboard as you set it in place.

  2. Framework Laptop 12 Mainboard Installation: step 2, image 1 of 1
    • Use your Framework Screwdriver to tighten the five captive T5 Torx screws to secure the Mainboard.

    • Tighten the screws until they're snug. Don't over-tighten them, or you may strip the screws.

  3. Framework Laptop 12 Mainboard Installation: step 3, image 1 of 2 Framework Laptop 12 Mainboard Installation: step 3, image 2 of 2
    • Use your fingers to grab the display cable by its orange tab.

    • Align and press the display cable straight down onto its connector.

  4. Framework Laptop 12 Mainboard Installation: step 4, image 1 of 2 Framework Laptop 12 Mainboard Installation: step 4, image 2 of 2
    • Use your fingers to grab the webcam cable by its orange tab.

    • Align and press the webcam cable straight down onto its connector.

  5. Framework Laptop 12 Mainboard Installation, Install the Wi-Fi card: step 5, image 1 of 2 Framework Laptop 12 Mainboard Installation, Install the Wi-Fi card: step 5, image 2 of 2
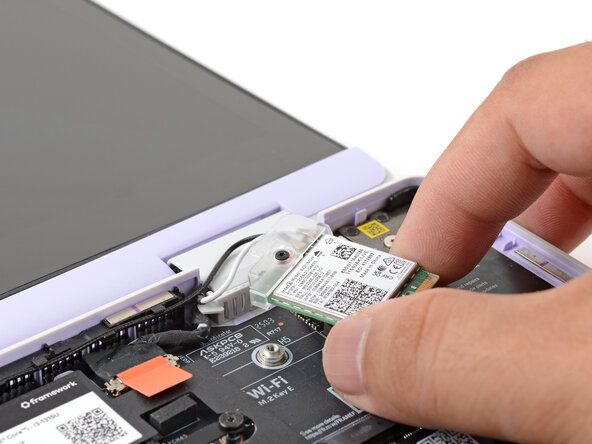
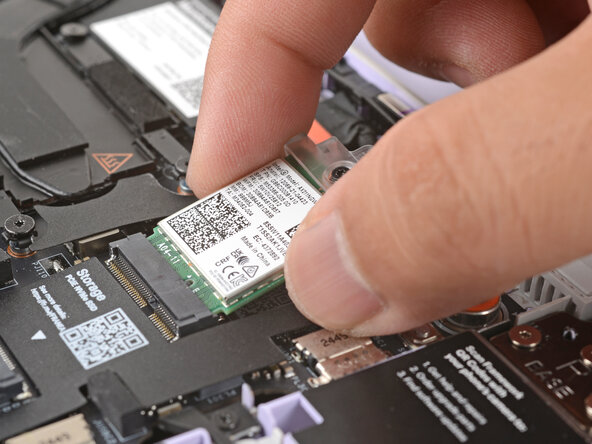
    • Use your fingers to carefully move the Wi-Fi card over the Mainboard.

  6. Framework Laptop 12 Mainboard Installation: step 6, image 1 of 2 Framework Laptop 12 Mainboard Installation: step 6, image 2 of 2
    • Hold the Wi-Fi card by its edges. Don't touch the gold contacts with your fingers. If you do, wipe the contacts with a clean, lint-free cloth to remove any finger oils.

    • Align the Wi-Fi card's gold contacts and notch with the socket on the Mainboard.

    • Insert the Wi-Fi card into the socket at a shallow angle. The gold contacts should mostly be covered by the socket.

    • If the clear Wi-Fi card bracket or antenna cables got disconnected during the repair, go to the next step. If they're still attached, skip down three steps.

  7. Framework Laptop 12 Mainboard Installation, Reconnect a disconnected antenna cable: step 7, image 1 of 3 Framework Laptop 12 Mainboard Installation, Reconnect a disconnected antenna cable: step 7, image 2 of 3 Framework Laptop 12 Mainboard Installation, Reconnect a disconnected antenna cable: step 7, image 3 of 3
    • Follow the next two steps if an antenna cable disconnected from the Wi-Fi card.

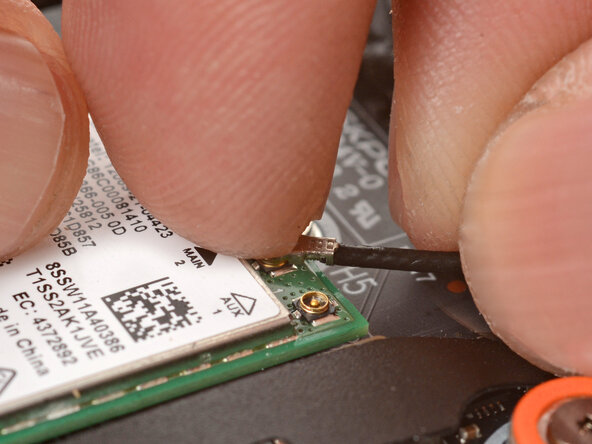
    • Hold the Wi-Fi card down with your finger.

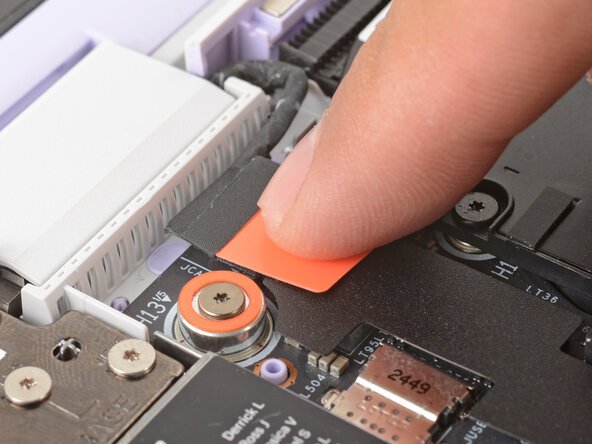
    • Position the black antenna cable connector over the left Wi-Fi card's coaxial socket.

    • Tweezers can help position the connector.

    • Use your finger to press the connector into place. You should feel a faint click, and the cable will stay attached to the socket by itself.

    • These connectors are very delicate! If the connector doesn't feel like it's clicking in place, reposition the connector and try again.

    • Repeat the procedure with the white antenna cable.

  8. Framework Laptop 12 Mainboard Installation: step 8, image 1 of 2 Framework Laptop 12 Mainboard Installation: step 8, image 2 of 2
    • Slide the Wi-Fi bracket over the top edge of the Wi-Fi card.

  9. Framework Laptop 12 Mainboard Installation, Tighten the Wi-Fi card screw: step 9, image 1 of 1
    • Use your Framework Screwdriver to tighten the captive T5 Torx screw to secure the Wi-Fi card.

Finish Line

Arthur Shi

Member since: 01/03/18

324,413 Reputation

802 Guides authored

0 Guide Comments

Add Comment

View Statistics:

Past 24 Hours: 0

Past 7 Days: 0

Past 30 Days: 4

All Time: 40