
Fairphone 3 Bottom Module Replacement

What you need

  1. Fairphone 3 Bottom Module Replacement, Back Cover: step 1, image 1 of 2 Fairphone 3 Bottom Module Replacement, Back Cover: step 1, image 2 of 2
    • Power off your phone before beginning disassembly.

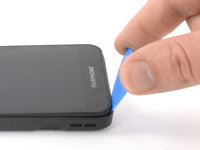
    • Insert a thumbnail, or a prying tool like a spudger, into the notch at the bottom right of the back cover.

    • Pry the back cover up to start separating its plastic clips.

  2. Fairphone 3 Bottom Module Replacement: step 2, image 1 of 3 Fairphone 3 Bottom Module Replacement: step 2, image 2 of 3 Fairphone 3 Bottom Module Replacement: step 2, image 3 of 3
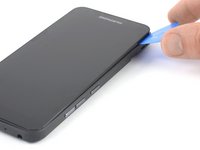
    • Slide around the bottom right corner of the back cover to loosen the lower plastic clips.

    • Lift the back cover to release the rest of the plastic clips and remove it.

    • To reinstall the back cover press it firmly into place until you hear a snap from the plastic clips to form a seamless connection with the rear side of the phone.

  3. Fairphone 3 Bottom Module Replacement, Battery: step 3, image 1 of 2 Fairphone 3 Bottom Module Replacement, Battery: step 3, image 2 of 2
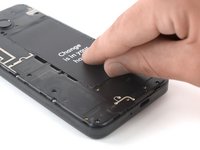
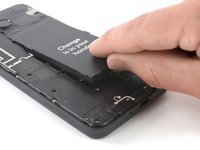
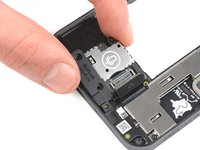
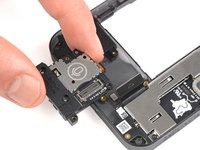
    • Use a fingernail or a prying tool at the marked notch to lever the battery out of its recess.

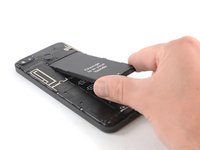
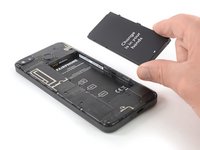
    • Lever the battery up until you can get a good grip.

  4. Fairphone 3 Bottom Module Replacement: step 4, image 1 of 2 Fairphone 3 Bottom Module Replacement: step 4, image 2 of 2
    • Lift the battery out of its recess and remove it.

  5. Fairphone 3 Bottom Module Replacement, Display Assembly: step 5, image 1 of 1
    • Whenever a Phillips #00 screw is mentioned you can also unfasten it with a size #0 bit/screwdriver.

    • Remove the thirteen Phillips #00 screws (4 mm length).

  6. Fairphone 3 Bottom Module Replacement: step 6, image 1 of 3 Fairphone 3 Bottom Module Replacement: step 6, image 2 of 3 Fairphone 3 Bottom Module Replacement: step 6, image 3 of 3
    • Make sure to insert the opening pick between the midframe and the display module and not into the small gap next to the screen. Otherwise you're going to pry up the screen instead of the whole display module.

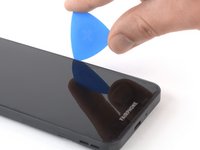
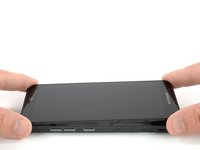
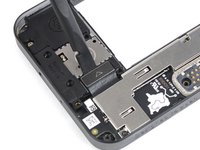
    • Insert an opening pick between the midframe and the display module on the right edge of the phone.

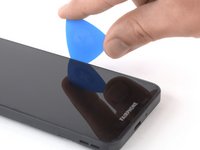
    • Slide the opening pick down to the bottom right corner to pry open the plastic clamps of the display module.

  7. Fairphone 3 Bottom Module Replacement: step 7, image 1 of 2 Fairphone 3 Bottom Module Replacement: step 7, image 2 of 2
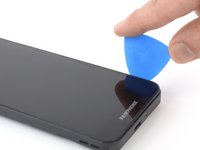
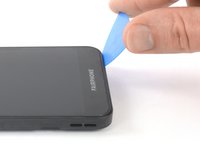
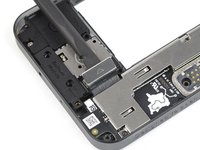
    • Slide the opening pick around the bottom right corner and use it to disengage the plastic clamps at the bottom of the display module.

  8. Fairphone 3 Bottom Module Replacement: step 8, image 1 of 2 Fairphone 3 Bottom Module Replacement: step 8, image 2 of 2
    • Slide the opening pick along the left side to pry the display module up.

    • The display module should pop out of the midframe during this process. In case it doesn’t, check for remaining clamps you might have missed.

  9. Fairphone 3 Bottom Module Replacement: step 9, image 1 of 2 Fairphone 3 Bottom Module Replacement: step 9, image 2 of 2
    • Remove the display assembly.

    • To reinstall the display-module press it into place on all sides until you can hear a snap from the plastic clamps to make sure it sits flush with the frame.

    • If you install a new display: The new display module comes with a white plastic cover held by 2 screws over the processor and the connectors. This needs to be taken off.

  10. Fairphone 3 Bottom Module Replacement, Bottom Module: step 10, image 1 of 1
    • Remove the four 4.1mm-longPhillips #00 screws.

  11. Fairphone 3 Bottom Module Replacement: step 11, image 1 of 2 Fairphone 3 Bottom Module Replacement: step 11, image 2 of 2
    • Use a spudger to pry up and disconnect the bottom module connecting cable.

  12. Fairphone 3 Bottom Module Replacement: step 12, image 1 of 2 Fairphone 3 Bottom Module Replacement: step 12, image 2 of 2
    • Use your fingers to remove the bottom module.

Conclusion

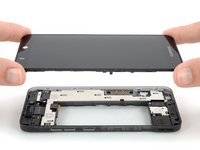
To reassemble your device, follow these instructions in reverse order.

Information on what to do with the old module can be found on the FairPhone support page and in the FairPhone forum.

Take your e-waste to an R2 or e-Stewards certified recycler.

Repair didn’t go as planned? Try some basic troubleshooting, or ask our Answers community for help.

26 other people completed this guide.

Adriana Zwink

Member since: 12/18/19

47,656 Reputation

167 Guides authored

Team

iFixit Member of iFixit

Staff

136 Members

16,562 Guides authored

11 Comments

Spitze, jetzt lädt mein Fairphone 3 wieder tadellos. Tolle Anleitung!!!

Petra Breit - Reply

Super, das freut uns!

Adriana Zwink -

Thanks for the guide, it was very helpful. However, I'm pretty sure we don't need to remove so many screws on Step 5.

I for one had a hard time removing one, and I left it in place, and I could achieve the repair without any problem.

I think only the 6 screws on the very outside edge, that correspond with the screen's locations for the screws.

mll - Reply

Hello @mll, thank you for sharing your experience with us! We're glad that the repair worked out. I've rechecked the display and the phone assembly. All screws should be removed to make sure not to damage components of the phone. Feel free to check Fairphone's video on replacing the display unit: https://www.youtube.com/watch?v=hG6OVPTn...

Adriana Zwink -

@adrianazwink , you are right indeed, and I stand corrected.

mll -

Add Comment

View Statistics:

Past 24 Hours: 14

Past 7 Days: 80

Past 30 Days: 352

All Time: 13,116