Introduction
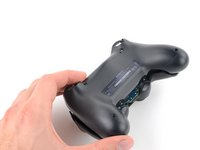
Follow this guide to replace the front case, also called a front panel or shell, in your DualShock 4 model CUH-ZCT1U controller.
What you need
-
-
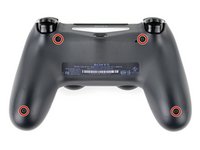
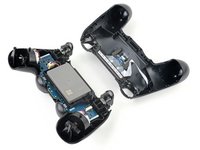
Check the model number on the back of your controller. This guide was written using model CUH-ZCT1U. If you have another model, the guide procedure and replacement parts may differ slightly.
-
-
Tool used on this step:Microfiber Cleaning Cloths$3.99
-
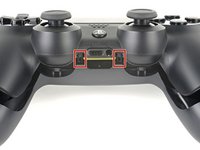
Use a Phillips screwdriver to remove the four 6.4 mm-long screws securing the rear case.
-
-
-
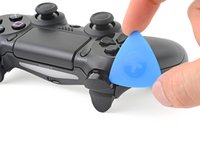
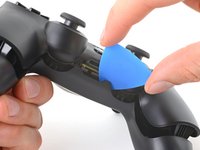
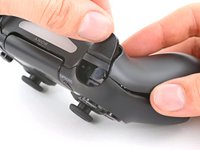
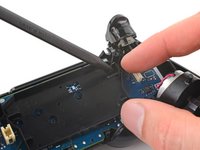
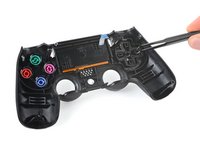
Use an opening pick to pry each corner of the L1 button from the front case.
-
Remove the button.
-
-
-
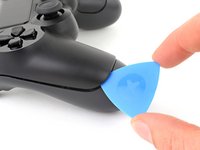
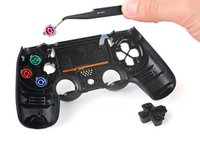
Use your opening pick to pry and remove the R1 button, just as you did for the L1 button.
-
-
-
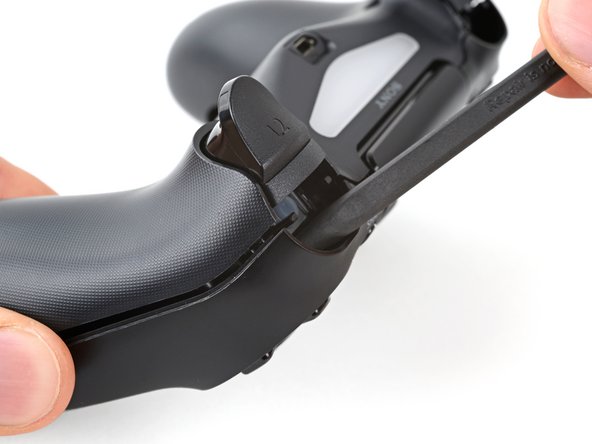
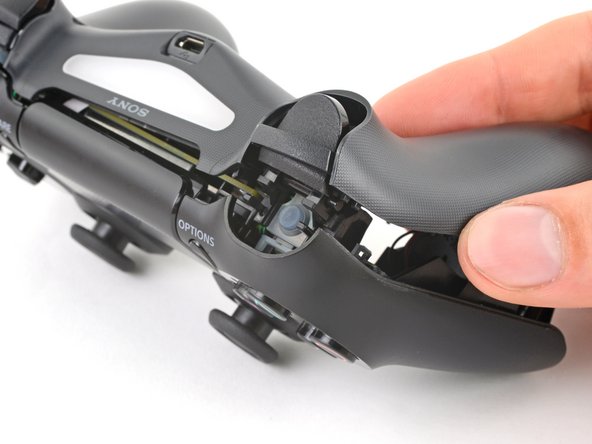
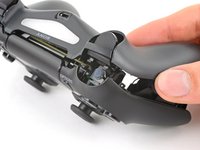
Insert your opening pick at a downward angle between the front case and rear case, halfway between the handle and the action buttons.
-
Slide your pick toward the handle and pry up to release the first clip.
-
Repeat this procedure on the other side of the controller to release the second clip.
-
-
-
Tool used on this step:Tweezers$4.99
-
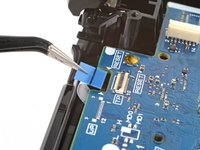
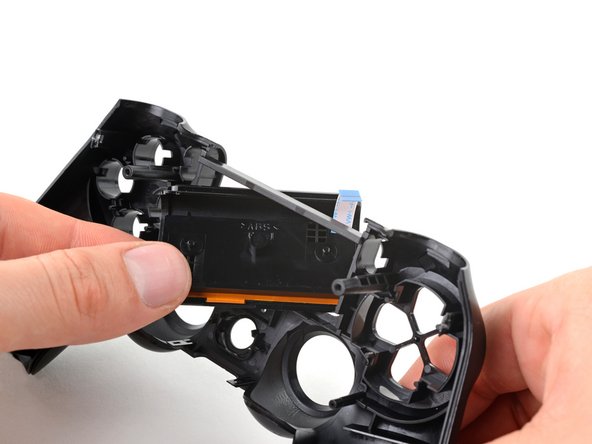
Use tweezers or your fingers to remove the interconnect cable by pulling its blue pull tab straight out of the socket.
-
-
Tool used on this step:Tweezers$4.99
-
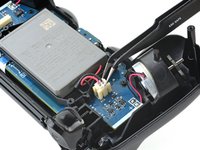
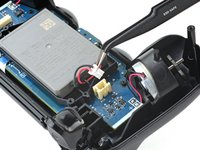
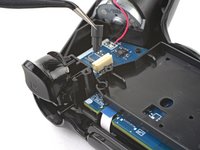
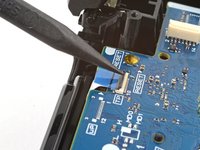
Use tweezers or your fingers to grab and disconnect the head of the battery cable from the motherboard.
-
-
-
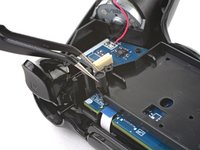
Grab and remove the reset button extension from its recess in the battery bracket.
-
-
-
Locate the two clips securing the battery bracket to the motherboard.
-
Insert the point of your spudger into the opening behind the right bracket clip.
-
Depress the clip to disengage it from the motherboard.
-
Lift up the right edge of the battery bracket.
-
-
Tool used on this step:Tweezers$4.99
-
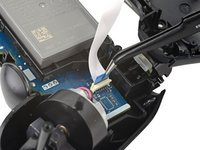
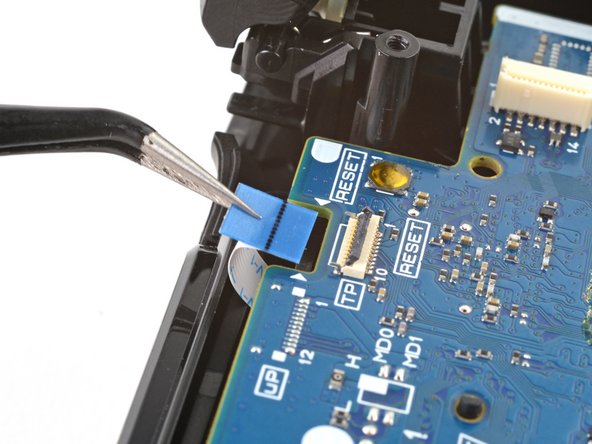
Use the point of your spudger to flip up the locking flap securing the touch pad cable ZIF connector.
-
Use tweezers or your fingers to disconnect the cable using its blue pull tab.
-
-
-
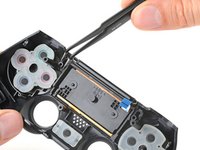
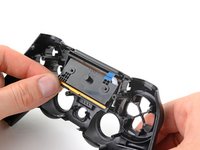
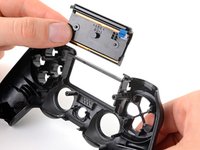
Use your Phillips screwdriver to remove the 6.4 mm screw securing the motherboard.
-
-
-
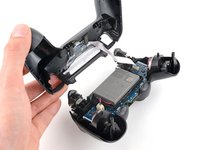
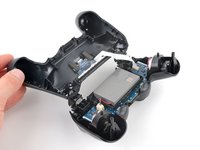
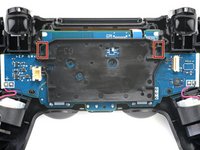
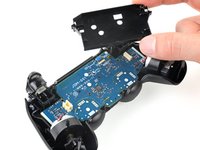
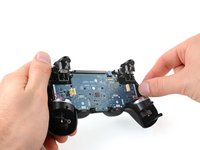
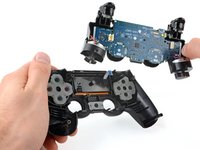
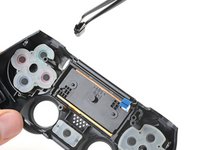
Grab the midframe by its plastic protrusions or the vibration motors and remove it.
-
-
-
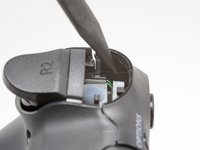
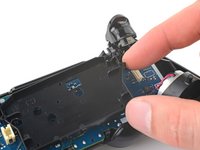
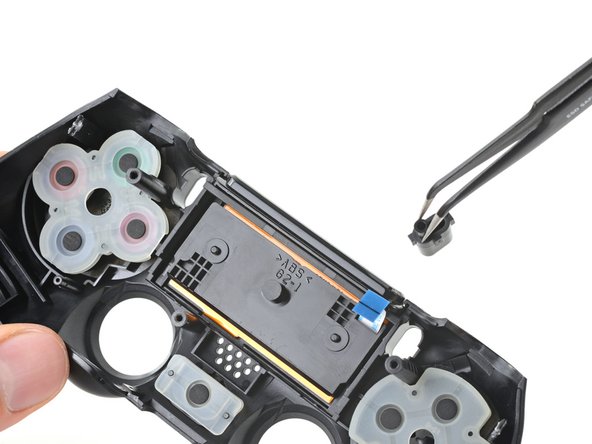
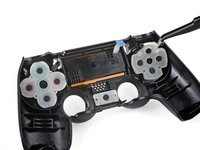
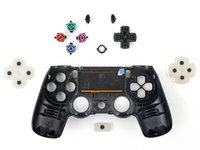
Remove the Share and Options buttons from the front case.
-
-
-
Remove the three silicone button pads from their buttons in the front case:
-
The squared off pad for the directional pad
-
The rounded pad for the action buttons
-
The small pad for the home button
-
If you wish to remove the silicone button pads for the touch pad, Share, and Options buttons, follow this step. Otherwise, continue for the standard set of buttons.
-
-
-
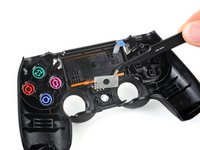
Remove the directional pad, action buttons, and home button from the front case.
-
-
-
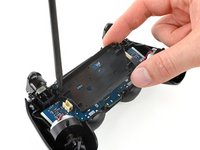
Lift the bottom edge of the touch pad.
-
Rotate the touch pad and slide it through its cutout in the front case to remove it.
-
You're now left with the front case.
-


To reassemble your device, follow these instructions in reverse order.
Take your e-waste to an R2 or e-Stewards certified recycler.
Repair didn’t go as planned? Try some basic troubleshooting, or ask our Answers community for help.
Cancel: I did not complete this guide.
32 other people completed this guide.

1 Guide Comment
As of March 14, 2023, this guide has been updated! Comments regarding step procedures may no longer be relevant.