
Dell XPS 15 9520 Battery Replacement

Alex Diaz-Kokaisl and 3 other contributors
Last updated on Sep 21, 2026
Views: 11K
View statistics:
- Past 24 Hours:
- 24
- Past 7 Days:
- 179
- Past 30 Days:
- 695
- All Time:
- 11,120
Comments: 5
1 comment on steps, 4 guide comments.
Go to guide commentsCompleted: 6 7
6 people have marked this guide "completed." Will you be next?
7 people have marked this guide "completed." Including you — great job!
Favorites: 0 1
No one has favorited (and subscribed to) this guide. Will you be the first?
1 person has favorited (and subscribed to) this guide — and that's you!
Introduction
Go to step 1 ↓Use this guide to replace the battery in your Dell XPS 15 9520 Laptop.
For your safety, discharge the battery below 25% before disassembling your device. This reduces the risk of fire if the battery is accidentally damaged during the repair. If your battery is swollen, take appropriate precautions.
What you need
Fix Kit
This kit contains all the parts and tools needed to complete this guide.

Parts

Tools
-
-
Spudger4.9


-
-
-
Use a Torx T5 screwdriver to remove the eight 3.3 mm-long screws securing the back cover.
 Ask FixBot
-
-
-
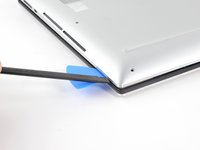
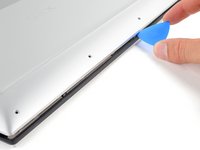
Insert an opening pick between the bottom-left corner of the aluminum back cover and the chassis.
-
Leave the pick inserted before continuing to the next step.
-
-
-
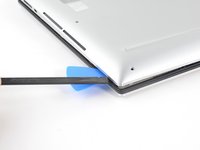
Insert the flat end of the spudger into the gap you just created.
-
Pry up to release the corner clips.
-
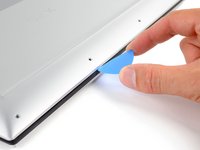
Repeat this process for the opposite corner of the back cover.
-
-
-
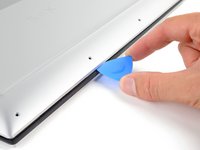
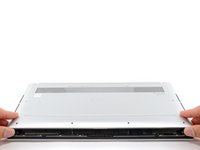
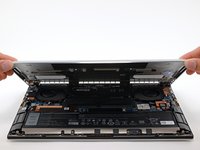
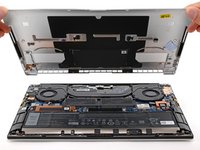
Reinsert your opening pick under the aluminum cover at the front edge of the laptop.
-
Pry to loosen the cover.
-
-
-
-
-
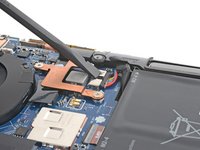
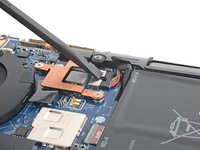
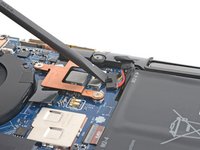
Use the flat end of a spudger to push the battery connector's square tab away from the socket and disconnect it.
-
-
-
-
-
Tool used on this step:Tweezers$4.99
-
Use tweezers, or your fingers, to peel back the tape connecting the speaker cable and the battery.
-
Repeat for the three other tape segments.
-
-
-
Use a Phillips screwdriver to remove the eight screws securing the battery:
-
Four 4.4 mm-long screws
-
Four 3.4 mm-long screws
-
-
-
Lift the battery straight out of its recess and remove it.
-
-










To reassemble your device, follow these instructions in reverse order.
For optimal performance, calibrate your newly installed battery after completing this guide.
Take your e-waste to an R2 or e-Stewards certified recycler.
Repair didn’t go as planned? Try some basic troubleshooting, or ask our Answers community for help.
Cancel: I did not complete this guide.
6 other people completed this guide.

Team

4 Guide Comments
Thanks Alex, easy to follow
I need to remove the cable from the battery because my new battery did not have one. Do you know how to get this connector to let go? I didn't want to force it.
The cable for the battery seems to pull straight up from the battery to disconnect it, after which it can be attached to the new battery by just pressing it onto the battery.
I did not notice the absence of the connector on the new battery until after [I screwed all 8 battery screws in, scrolled up to reverse the battery removal instructions, realize I was not able to find the connector, and unscrewed all 8 battery screws again]. After that, I realized the old battery had a connector that I could use with the new battery.
This guide is less than ½ of a battery replacement guide; knowing how to remove the battery is quite helpful, but the guide, as is, is not foolproof.
Please, please improve this guide.
I plan [[to check the comments section of future part-replacement guides that I follow] and [to think much more carefully, fool that I am, before doing any actual replacement] whenever I notice the guide skipped everything after removal].
