Free Shipping on Domestic Orders $75+

Charging Port Removal

Prerequisite Only
This is a prerequisite-only guide! This guide is part of another procedure and isn’t meant to be used alone.

What you need

    1. Charging Port Removal, Remove the right earpad: step 1, image 1 of 2 Charging Port Removal, Remove the right earpad: step 1, image 2 of 2
      • The earpads are secured with magnets

      • Lift the right earpad (labeled R) straight up and remove it.

      Ask FixBot

      Add Comment

    1. Charging Port Removal, Remove the right ear cup: step 2, image 1 of 3 Charging Port Removal, Remove the right ear cup: step 2, image 2 of 3 Charging Port Removal, Remove the right ear cup: step 2, image 3 of 3
      • Removing the ear cup isn’t required, but can make the repair easier. You can leave the cup attached and remove it later if needed.

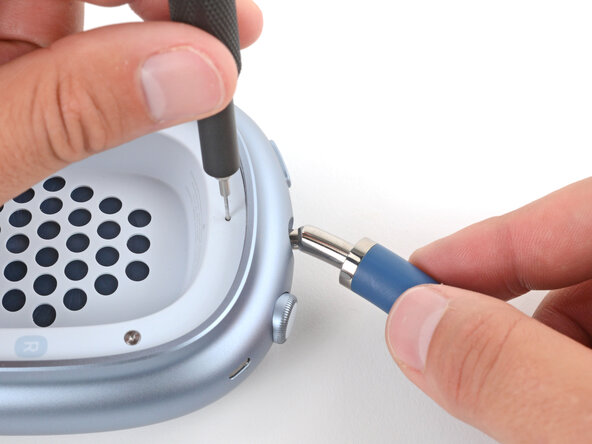
      • Insert a SIM eject tool, bit, or a small, straightened paperclip into the hole on the top edge of the right ear cup (labeled R).

      • Push down with your tool and pull the headband connector straight out of its socket.

      • The headband connector should slide out easily. If you're having trouble, reposition the tool and try again—you may need to angle the bit slightly.

      Ask FixBot

      Add Comment

    1. Charging Port Removal, Set the right ear cup down: step 3, image 1 of 1
      • Set the right ear cup down on a soft, clean cloth to prevent scratches and help stabilize the cup during your repair.

      Ask FixBot

      Add Comment

    2. Charging Port Removal, Turn the housing screws to the open position: step 4, image 1 of 2 Charging Port Removal, Turn the housing screws to the open position: step 4, image 2 of 2
      • Turn these screws slowly and gently, stopping when you feel resistance—about 1/4 turn. If turned too far, the locking mechanism will break.

      • Use a P5 pentalobe screwdriver to turn (not remove) the four speaker housing screws to the unlocked position:

      • Turn the top left and bottom right screws counterclockwise.

      • Turn the top right and bottom left screws clockwise.

      Ask FixBot

      Add Comment

    3. Charging Port Removal, Soften the speaker housing adhesive: step 5, image 1 of 3 Charging Port Removal, Soften the speaker housing adhesive: step 5, image 2 of 3 Charging Port Removal, Soften the speaker housing adhesive: step 5, image 3 of 3
      Tool used on this step:
      iOpener
      $14.95
      Buy
      • The perimeter of the speaker housing is secured to the cup with adhesive. This step shows a few methods to soften the adhesive so you can pry up the housing. If one isn't working, try a different method.

      • Option 1: Apply a few drops of high-concentration isopropyl alcohol (>90%) in the gap around the perimeter of the speaker housing. Wait one minute to allow the alcohol to soften the adhesive.

      • Option 2: Heat the speaker housing with an iOpener or hair dryer. Focus the heat around the perimeter, applying small amounts for short periods of time.

      • Don't heat the center of the speaker housing, or you'll damage the fragile mesh under the speaker cutouts and possibly the speaker.

      • For a detailed look at best practices for using a hair dryer, check out this guide.

      Ask FixBot

      Add Comment

    4. Charging Port Removal, Pry up the speaker housing: step 6, image 1 of 3 Charging Port Removal, Pry up the speaker housing: step 6, image 2 of 3 Charging Port Removal, Pry up the speaker housing: step 6, image 3 of 3
      Tool used on this step:
      iSesamo Opening Tool
      $10.99
      Buy
      • The gap between the speaker housing and ear cup is extremely small. You'll need a thin tool such as a metal opening pick, iSesamo, or iFlex to pry up the housing.

      • Don't grip the iFlex or similar metal tools by the edges—they're sharp and may cut you. Consider wearing gloves to protect yourself.

      • Insert the flat side of your opening tool into the gap between the left side of the speaker housing and the lip of the ear cup (opposite the R marking).

      • Pry up the speaker housing until you can grip it with your fingers, applying constant pressure to allow the adhesive to separate.

      • If the housing isn't coming up, repeat the previous step and try again. Don't try and force the housing out or you may damage it.

      Ask FixBot

      Add Comment

    5. Charging Port Removal: step 7, image 1 of 3 Charging Port Removal: step 7, image 2 of 3 Charging Port Removal: step 7, image 3 of 3
      • Don't try to fully remove the speaker housing yet—a delicate ribbon cable still connects it to the ear cup.

      • Lift the speaker housing out of the ear cup to fully separate the remaining adhesive.

      • Flip the housing over the side of the cup and prop it up so you can access the cable.

      Ask FixBot

      Add Comment

    6. Charging Port Removal, Remove the speaker housing cable cover: step 8, image 1 of 2 Charging Port Removal, Remove the speaker housing cable cover: step 8, image 2 of 2
      Tool used on this step:
      FixMat
      $36.95
      Buy
      • Don’t let any screws snap onto the speaker driver diaphragm or they'll damage it. The screws will be drawn towards the center by the speaker's magnet.

      • Use a Torx Plus 1IP screwdriver to remove the 1.7 mm‑long screw securing the speaker housing cable cover.

      • Throughout this repair, keep track of each screw and make sure it goes back exactly where it came from.

      Ask FixBot

      Add Comment

    7. Charging Port Removal: step 9, image 1 of 2 Charging Port Removal: step 9, image 2 of 2
      • Use tweezers to remove the cover.

      Ask FixBot

      Add Comment

    8. Charging Port Removal, Disconnect the speaker housing: step 10, image 1 of 2 Charging Port Removal, Disconnect the speaker housing: step 10, image 2 of 2
      • Use a spudger to pry up and disconnect the speaker housing press connector.

      Ask FixBot

      Add Comment

    9. Charging Port Removal, Remove the speaker housing: step 11, image 1 of 1
      • Remove the speaker housing.

      Ask FixBot

      Add Comment

    1. Charging Port Removal, Remove the speaker driver screws: step 12, image 1 of 3 Charging Port Removal, Remove the speaker driver screws: step 12, image 2 of 3 Charging Port Removal, Remove the speaker driver screws: step 12, image 3 of 3
      • Grip the screws with tweezers while loosening and removing them. Don’t let the screws snap onto the diaphragm.

      • Use a Torx Plus 3IP screwdriver to remove three speaker driver screws:

      • Two 6.0 mm‑long screws

      • One 6.0 mm‑long screw that's slightly thicker than the other two

      • Remove the 5.1 mm‑long standoff screw using one of the two methods below:

      • Apply constant downward force to avoid damaging the screw.

      • Option 1: Stick a small flathead screwdriver into one of the four notches on top of the screw and use it to slowly turn the screw.

      • Option 2: Use a Torq-Set 6 screwdriver to remove the screw, applying constant downward force to avoid damaging the screw.

      Ask FixBot

      Add Comment

    2. Charging Port Removal, Remove the speaker driver: step 13, image 1 of 3 Charging Port Removal, Remove the speaker driver: step 13, image 2 of 3 Charging Port Removal, Remove the speaker driver: step 13, image 3 of 3
      • Lift the top edge of the speaker and remove it, being careful not to touch the diaphragm.

      • If you're having trouble, use the point of a spudger to start lifting the speaker.

      • Set the speaker aside in a place where it won't attract small metal objects.

      Ask FixBot

      Add Comment

    1. Charging Port Removal, Remove the battery connector cover: step 14, image 1 of 2 Charging Port Removal, Remove the battery connector cover: step 14, image 2 of 2
      • Remove the two connector cover screws:

      • One 7.0 mm‑long Torx Plus 3IP screw

      • You may need tweezers to remove this screw.

      • One 1.7 mm‑long Torx Plus 1IP screw

      Ask FixBot

      Add Comment

    2. Charging Port Removal: step 15, image 1 of 3 Charging Port Removal: step 15, image 2 of 3 Charging Port Removal: step 15, image 3 of 3
      • Two tabs slot into place and secure the cover.

      • Slide the cover out of the slots and remove it.

      Ask FixBot

      Add Comment

    3. Charging Port Removal, Disconnect the battery: step 16, image 1 of 2 Charging Port Removal, Disconnect the battery: step 16, image 2 of 2
      • Use the point of a spudger to pry up and disconnect the battery press connector (the smaller one, not the one that folds under the board).

      Ask FixBot

      Add Comment

    4. Charging Port Removal, Remove the battery screws: step 17, image 1 of 3 Charging Port Removal, Remove the battery screws: step 17, image 2 of 3 Charging Port Removal, Remove the battery screws: step 17, image 3 of 3
      Tool used on this step:
      Flexible Extension
      $6.99
      Buy
      • Use a Torx Plus 5IP screwdriver to remove the two screws securing the sides of the battery cells.

      • Depending on your screwdriver, you may need to use a flexible extension to get a proper fit in the screw.

      • If the screw isn't coming out once fully loosened, use tweezers to pull it out.

      Ask FixBot

      Add Comment

    5. Charging Port Removal: step 18, image 1 of 3 Charging Port Removal: step 18, image 2 of 3 Charging Port Removal: step 18, image 3 of 3
      • Use a Torx Plus 3IP screwdriver to remove the three screws securing the battery cells:

      • Two 4.0 mm‑long screws

      • One 7.0 mm‑long screw

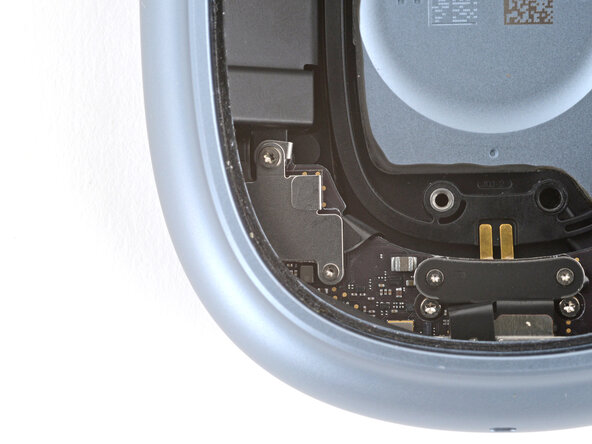
      • Make sure you remove the correct screw (which goes through the board), and not the one just to the left of it.

      • You may need to use tweezers to remove this screw.

      Ask FixBot

      Add Comment

    6. Charging Port Removal, Remove the battery: step 19, image 1 of 3 Charging Port Removal, Remove the battery: step 19, image 2 of 3 Charging Port Removal, Remove the battery: step 19, image 3 of 3
      • Slide the battery cells out of their recesses one at a time and remove them.

      • If either of the battery cells are swollen, take appropriate precautions.

      Ask FixBot

      Add Comment

    1. Charging Port Removal, Remove the power board connector cover: step 20, image 1 of 2 Charging Port Removal, Remove the power board connector cover: step 20, image 2 of 2
      • Use a Torx Plus 1IP screwdriver to remove the two 1.7 mm‑long screws securing the power board connectors cover.

      Ask FixBot

      Add Comment

    2. Charging Port Removal: step 21, image 1 of 2 Charging Port Removal: step 21, image 2 of 2
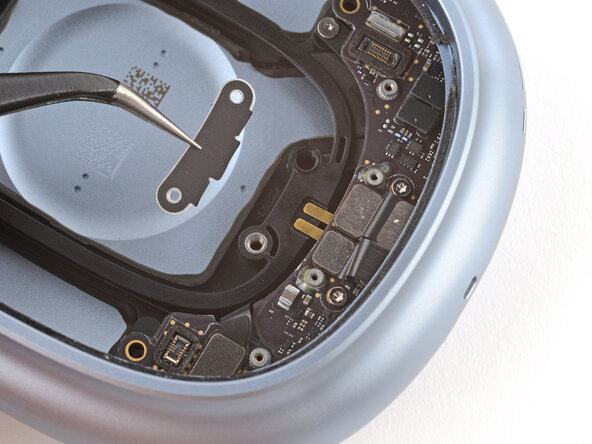
      • Use tweezers to remove the cover.

      • The cover may be lightly secured with adhesive.

      Ask FixBot

      Add Comment

    3. Charging Port Removal, Disconnect the power board: step 22, image 1 of 3 Charging Port Removal, Disconnect the power board: step 22, image 2 of 3 Charging Port Removal, Disconnect the power board: step 22, image 3 of 3
      • Use a spudger to pry up and disconnect the three press connectors on the power board.

      Ask FixBot

      Add Comment

    4. Charging Port Removal, Remove the power board screws: step 23, image 1 of 3 Charging Port Removal, Remove the power board screws: step 23, image 2 of 3 Charging Port Removal, Remove the power board screws: step 23, image 3 of 3
      • Use a Torx Plus 3IP screwdriver to remove the two 5.7 mm‑long screws securing the power board.

      • Make sure not to lose the small rubber gasket on the screws.

      Ask FixBot

      Add Comment

    5. Charging Port Removal, Reposition the power board: step 24, image 1 of 3 Charging Port Removal, Reposition the power board: step 24, image 2 of 3 Charging Port Removal, Reposition the power board: step 24, image 3 of 3
      • Be careful not to grip any of the small, surface-mounted components on the power board.

      • Slowly pull the power board out of its recess and flip it over the side of the ear cup, giving you access to the connector on the underside.

      • Make sure the cables that connect to the board don't get snagged.

      Ask FixBot

      Add Comment

    6. Charging Port Removal, Disconnect the power board: step 25, image 1 of 3 Charging Port Removal, Disconnect the power board: step 25, image 2 of 3 Charging Port Removal, Disconnect the power board: step 25, image 3 of 3
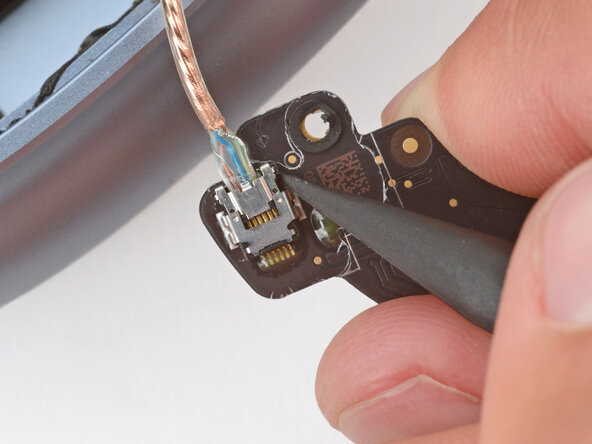
      • Disconnecting the power board cable is tricky and may take a few tries. Don't try to disconnect it by pulling on the cable, or you may cause damage.

      • Use the point of a spudger to press on alternating sides of the sliding connector tabs to "walk" it out of the socket.

      Ask FixBot

      Add Comment

    7. Charging Port Removal, Remove the power board: step 26, image 1 of 1
      • Remove the power board.

      Ask FixBot

      Add Comment

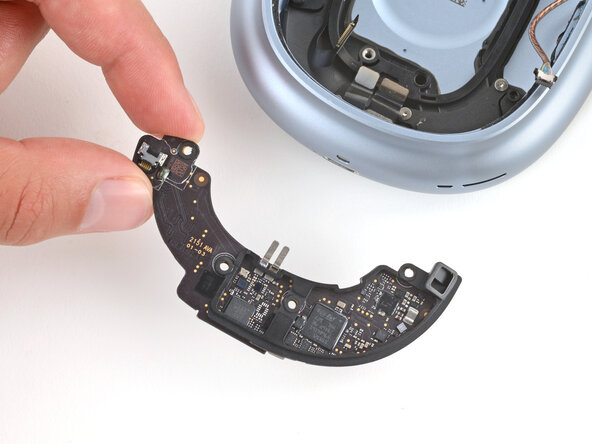
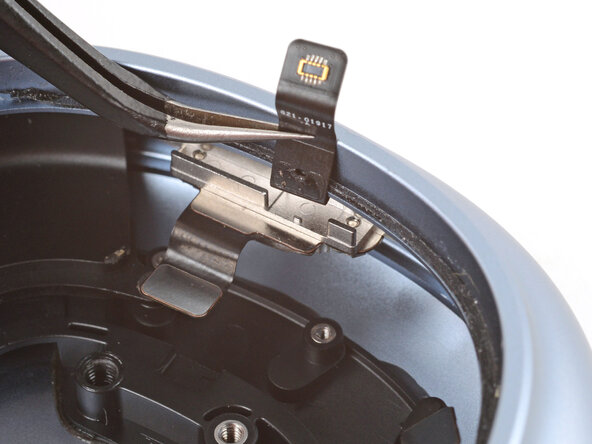
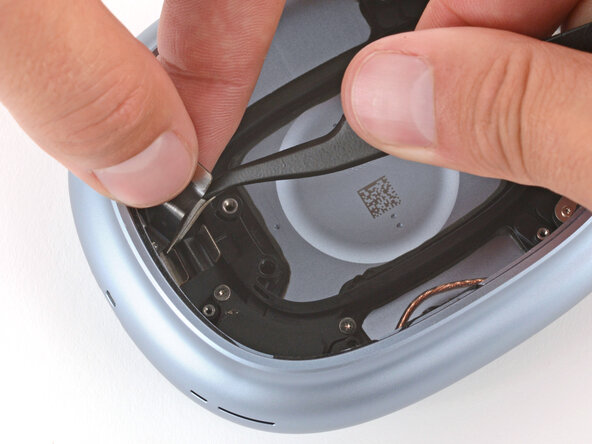
    1. Charging Port Removal, Detach the mic cable: step 27, image 1 of 2 Charging Port Removal, Detach the mic cable: step 27, image 2 of 2
      • Use tweezers or your fingers to gently lift the mic cable off the top of the charging port.

      • Be careful not to crease or tear the cable.

      Ask FixBot

      Add Comment

    2. Charging Port Removal, Remove the charging port screws: step 28, image 1 of 3 Charging Port Removal, Remove the charging port screws: step 28, image 2 of 3 Charging Port Removal, Remove the charging port screws: step 28, image 3 of 3
      Tool used on this step:
      iFixit Precision 4 mm Screwdriver Bit
      $2.99
      Buy
      • Given the location of the screws, getting a proper fit with your driver is difficult—and these screws strip easily. A flexible extension works well for the upper screws. You may need to put your bit in a nut driver of the corresponding size to remove the lower screws.

      • Remove the four screws securing the charging port:

      • Two 3.7 mm‑long Torx Plus 3IP screws

      • Two 2.2 mm‑long Torx Plus 1IP screws

      Ask FixBot

      Add Comment

    3. Charging Port Removal, Remove the charging port: step 29, image 1 of 2 Charging Port Removal, Remove the charging port: step 29, image 2 of 2
      • While holding the microphone cable out of the way, use tweezers to slide the charging port out of its recess and remove it.

      • If you're having trouble, it may be easier to hold the ear cup at an angle while removing the port.

      Ask FixBot

      Add Comment

Finish Line

Cancel: I did not complete this guide.

Spencer Day

Member since: 09/14/22

205,890 Reputation

1,267 Guides authored

0 Guide Comments

Add Comment

View Statistics:

Past 24 Hours: 0

Past 7 Days: 5

Past 30 Days: 11

All Time: 67