
Apple Wireless Keyboard Battery Replacement

rab777hp and
Last updated on Sep 4, 2013
Views: 123K
View statistics:
- Past 24 Hours:
- 19
- Past 7 Days:
- 114
- Past 30 Days:
- 511
- All Time:
- 122,830
Comments: 8
3 comments on steps, 5 guide comments.
Go to guide commentsCompleted: 35 36
35 people have marked this guide "completed." Will you be next?
36 people have marked this guide "completed." Including you — great job!
Favorites: 20 21
20 people have favorited (and subscribed to) this guide. Will you be next?
21 people have favorited (and subscribed to) this guide — including you!
Featured Guide
This guide has been found to be exceptionally cool by the iFixit staff.
Community-Contributed Guide
An awesome member of our community made this guide. It was not created by iFixit staff.
Introduction
Go to step 1 ↓This guide shows how to replace the batteries on the Apple Wireless Keyboard
What you need
Tools

-
-
-
-
Slide the two (three on the previous generation) replacement AA batteries into the battery compartment. Verify the positive and negative terminals are facing the correct orientation.
-

 Ask FixBot
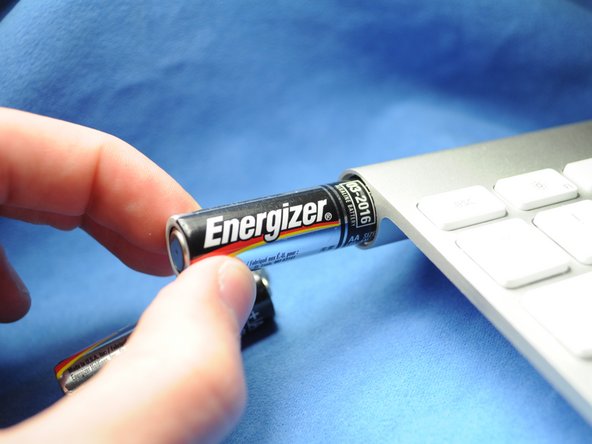
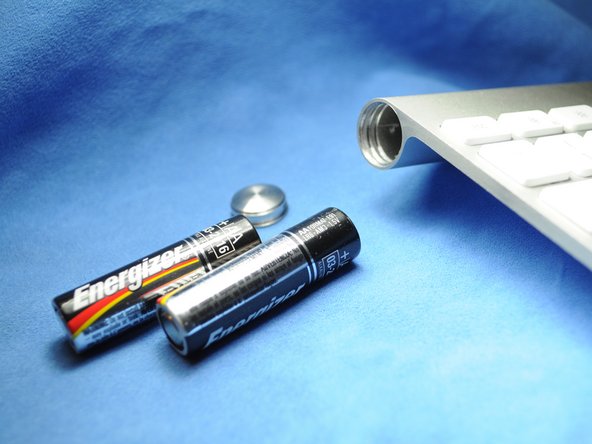

To reassemble your device, follow these instructions in reverse order.
Cancel: I did not complete this guide.
35 other people completed this guide.


5 Guide Comments
This works great - as long as the batteries inside did not leak and create a permanent seal for the cap. I managed to get the keyboard working again by removing the batteries through the electronics compartment (remove grey center cover, slide electronics out). It did take some effort (including driving a screw into the stuck battery and yanking it out with pliers) to remove the stuck batteries and all the remains of the leakage, but I ended up with a working keyboard. Only thing is that I need to use the 'backdoor' every time my batteries need replacing, since the battery cover is permanently sealed...
Also have a perma sealed battery cover. Poured vinegar in from middle and let soak over night. Wanna drill into coin slot to try and remove cover but need to get batteries out first. Can I just remove the one screw from logic board and disconnect ribbon cable, to have it slide out the power button end? How careful w cable? Looks like it has 2 tiny clips, do these need to be addressed or can I just pry it off?
