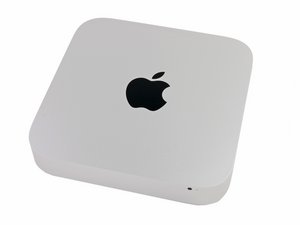
Add SSD to lower bay?
I have a late 2012 Mac mini (Macmini6,1) that has one hard drive, which is installed in the upper bay, if you are looking at the machine right side up (apple logo on top). I wanted to swap this for an SSD, but having watched many videos here on IFixIt and elsewhere, and looked at the Guides, I am not sure I'm up to the task. (Judging from the comments, many users have messed this up, often by ruining the IR connector.)
I was wondering if I could leave the existing HD in place, in the upper bay, and put an SSD in the lower bay (without moving the logicboard), after buying the appropriate SATA cable from this website. I would like to install MacOS (probably Monterey or Ventura) on the SSD using the OpenCore Legacy Patcher method (first booting from the USB drive, then transferring the OS to the SSD). Then, I would erase the HD, and use it for storage.
Does this sound like a workable plan? (No one else seems to have posted about doing it this way.) Would anything else besides the SATA cable have to attach to the SSD? Any other parts needed?
Alternatively, if the above wouldn't work, would it be possible to put the SSD in a USB-A enclosure, and boot and run MacOS from the external SSD? Or would that be way too slow? The Mac mini late 2012 has USB-A gen 3.0 (up to 5 Gb/s). I plan to use the mini for photo storage, photo and video editing, and web browsing.
Oh, one additional question - when formatting the new SSD, should I choose APFS?
Thank you!
Update (03/03/24)
Hi, @danj , and thank you for your response. I tried to post this reply as a comment, but it was too long, so I am posting it as an "answer", which, of course, it is not.
I have looked at the guides you linked to.
My 2012 Mac mini currently has one HD, and it is in the less accessible bay (the upper bay, with the machine upright). While you are clearly highly skilled, and have never never damaged a Mac mini, many other site users have not been as fortunate (judging from the comments on the Hard Drive Replacement Guide), and since I have never done this sort of thing before, I don't want to push my luck.
We have opened my machine, and partly disassembled it - the fan and the antenna plate have been moved aside (though we opted to leave them connected), and the cowling has been removed. I just do not want to go further with disconnecting things from the logic board, so that it can be moved. Instead, I would like to leave the existing HD in place, in its current location, the upper bay (when the machine is upright). It still works, by the way.
While the Hard Drive Replacement Guide that you linked to shows moving the logic board to replace this HD in the lower bay, there are videos (eg, https://www.youtube.com/watch?v=JnBtXrof... and https://www.youtube.com/watch?v=BP3oPq1I...) that show that you can replace a drive in the lower bay WITHOUT moving the logic board. (See also the comments to Step 10 of this Guide.)
I would like to slide an SSD into the lower bay (the one that is accessible without moving the logic board). Since I am not replacing an existing drive, I will need to buy a SATA cable and two screws and maybe some tape.
The SATA cable for the lower bay is available on this website (Part Number 821-1500).
Do you know where can I buy two T8 torque screws to use as mounting pins for the SSD (since I am not removing those from an existing drive)? Can I get them at a local hardware store?
Polyimide tape is what I need to put over the SATA cable connector where it connects to the SSD, right? (Since I don't have any tape to transfer from an existing drive.)
Then, my plan is to use OpenCore Legacy Patcher, via a USB stick, to format the SSD and install Monterey or Ventura on it, following this guide: https://www.intego.com/mac-security-blog... . I believe I can prepare the USB installer from my 2018 mac mini (since the 2012 is partially disassembled), and work on the SSD after it has been installed inside the Mac min. (But I'm not entirely sure; I need to re-read this guide carefully.) And then I would reformat the existing HD, erasing all its content. (I don't need the data files, and don't want the current Mac OS.)
Daunting, but hopefully not impossible! Thank you for your help.
Is this a good question?


 35
35  338
338  974
974 
