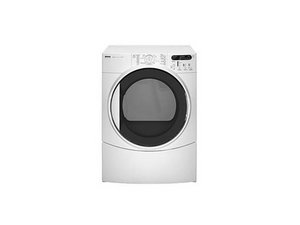
The Kenmore Elite HE3 is 7.2 cu. ft. capacity electric dryer by Kenmore.

316 Questions View all

Error code on dryer F01

My dryer showed Error code F01. I called professional who said I needed to replace the control board, but the repair estimate was $461! Can I replace the control board myself? If so, how? The part is # W10174745 for Kenmore H3 electric dryer. Apparently it is a Whirlpool part made for a Kenmore dryer.

Thanks, Pat

Answered! View the answer I have this problem too

Is this a good question?

Score 26
32 Comments

what's its mean with just an F code no #

by

Here is a great Youtube video that helped me and saved hundreds of dollars.

https://youtu.be/eWqrn5klxm0

by

Thanks guys - was able to open mine up, see the obvious short and solder it. Works again...

by

Had this problem too, fix worked like a hot %#*@, obvious blowout of the solder join and only 50 bucks to get a soldering iron to fix it!! Money well spent and a fun experiment. First time soldering and started too slow w the heat, worked fine once I turned it up! Used bernzomatic detail torch w basic electrical rosin core solder.

by

had same problem and could not find a new board. used this to fix the problem and it work's like a charm.

by

Show 27 more comments

Add a comment

7 Answers

Chosen Solution

The F01 indicates a failed electronic machine control board. This error code can sometimes be caused by a glitch or power surge through the electrical lines. You may be able to clear this code by unplugging the washer for 5 minutes. If the code returns after plugging the washer back in, then the electronic machine control board will need to be replaced.

You can order a new control board from the Sears PartsDirect website.

http://www.searspartsdirect.com/partsdir...

Here's how to do it: http://media.fotki.com/1_p,wkwdftgtbkdgf...

Be sure to unplug the washer before accessing internal components. When you access the control board, I recommend transferring the wires from the old control board to the new replacement control board one connection at a time. Once you have all of the wires transferred, remove the old control board and mount the new control board in the washer. Reassemble and test the washer.

Was this answer helpful?

Score 16

12 Comments:

thank you

by

I have just replaced board and now it is making a rattling noise when running. Ideas?

by

I just had the F01 error. Took the board out, looked just like your pictures. soldered the relay and the dryer worked. We shall see how long it lasts. The control board listed for $158.00 as of this posting plus a $125.00 service fee. Thanks for the tutorial!

by

This solution is best for those who don't wan't to mess with soldering. For my dryer, I google searched "Kenmore Dryer Main Control Board WPW10111606" and found the control board ranges between $65-$200, depending on where you buy it.

by

If you have replaced the board and still get the same error code, check the main power connection. I had the same problem and the issue turned out to be a loose neutral connection. Be sure to unplug first!

by

Show 7 more comments

Add a comment
Most Helpful Answer

As with many appliance boards, relays that switch 120 VAC tend to create surge currents through the solder connections that attach the relays to the PC board. My dryer displayed a F01 also. After taking the control board out and examining the solder side of the board, it was immediately apparent that the solder joint for one of the relays had worn away and was causing arcing on the underside. I simply soldered a piece of 16 AWG wire in its place and the F01 issue is now resolved. Don't pay hundreds if dollars for a simple repair like this.

Was this answer helpful?

Score 28

50 Comments:

THANK YOU so much for this repair! Our dryer was exhibiting the same error, and we were able to diagnose and repair it with the suggestions found here -- replaced the worn-away solder with a piece of wire and it's good as new. Awesome - we saved so much money :)

by

My original post was about not being able to find the model and serial numbers on the back of my dryer.

The type, model and serial numbers will be printed on stickers on the "rim" of the dryer's drum opening. just open the door, and you will find this info around the dryer's opening. hope that helps someone in the future.

A question to MRFIxIT66: the wire you used, AWG16, what material was it made of? I know different materials have different resistances, my concern is what material wire to use: copper, aluminum, steel, etc?

by

Took care of my dryer, however I did end up having to buy the replacement electronic control board. After having soldered a wire as per the post above, the dryer still would not work. It's possible that while soldering, there may have been too much heat/too long on the board. Do solder if you are confident with your skills; I am passable at soldering, and may have damaged a nearby circuit.

Replacing the circuit board is as simple as adding a PCI card to your computer, simply an issue of snapping power connectors to it. There was one connector in particular that was difficult to remove: the top-left beige blade connector. It snaps deep up inside itself, and could not be removed without using a flat blade screw driver to leverage it out.

Thanks for these posts, it saved me from possibly spending even more than for the board.

by

Thank you so much. I had to make an account just to thank you. I am currently unemployed and could not afford a new board.

by

Thank you. Thank You! THANK YOU! MrFixIt66. You saved me a ridiculous amount of money and probably four days waiting for a repair guy to show up. Took apart the dryer (easy), found the blown relay in exactly the place you said and was able to repair it. I did not use a wire jumper, but instead took a small wire brush, cleaned the area where it was burned out and then simply soldered the pin back to the trace on the board. It works perfectly.

Should it happen again I'll try the jumper.

My total cost was $17 (for a soldering iron and solder from RadioShack)! Also good to see that someone else listed the actual replacement relay part number in one of the posts below in case you need to replace the whole thing.

Thanks again for the help!

by

Show 45 more comments

Add a comment

Great information folks. Am sure many others as well, but I appreciate the time taken to share. Sadly, I have no "obvious" broken soder points. I have removed the Control board, and everything looks in tact. But if you zoom in on the "notch" (right centre) there appears to be some scarred section of the board... Either way, i suspect my only next choice is to by a replacement and install it. (just to note, I saw the F01 error, tried unplugging, nothing).

Board image

Now that I think about it, is there anyway of confirming the F01 indicates this control board, or could it also be an issue with the control board on the front/UI part of the Dryer?

Final update, wasn't the Control board, was the Thermal cut-off switch. Located underneath the base, up behind the lint-trap. A bit of a pain to get at, and get off, but a quick meter check confirmed. I then (temporarily for testing) put both wires together, and voila: the Dryer came to life and the drum began spinning... :)

I know there wasn't any back-and-forth but this site was started me thinking that this was something I could resolve myself.

Thanks,

Trevor.

PART Number: G4AP0500 TF091C ($3.99)

Dryer: Kenmore HE2 Electric Dryer
Was this answer helpful?

Score 2
Add a comment

I had F 01 code and followed the directions which revealed a bad solder point on one side of the relay. I was able to clean the point and the foil adjacent which i bent to 90 degrees off the board. I then dropped solder onto the point and bridged it to the foil. Getting the foil hot enough to stick was no problem but then I went back and heated the post to insure the entire bridge was secure. Worked like a charm and I thank you all for your comments leading to a no cost fix for me as I had everything needed. Disassembling dryers is never a problem but the discharge hose back to the wall mount is always a struggle…I hate those flex hoses and clamps!

Was this answer helpful?

Score 1

1 Comment:

I noticed some wires that were not attached. I found out it was the dampness wires . I hooked them up. Reset the power. Still same issue. I took the controll panel out. Everything looked fine. I took a closer look and noticed two of those tiny holes looked black. They don't seem to go anywhere to connect to another point. Could this be the issue?

by

Add a comment

I had the F01 error but the circuit board was fine. Eventually after taking the back and sides off the dryer I noticed the light came on every time the dryer stopped. Then I figured out that the door switch was the problem as pushing the door in made the light go out. So in the end all I did was add some sticky velcro to the switch to pad it out enough to make contact with door to keep the switch closed when the door was closed. Hope this helps someone.

Was this answer helpful?

Score 0
Add a comment

read blogs on F1 code. took top off control panel and made sure electric plug connections were tight. pulled them off and reset them as suggested in a blog I read. worked fine. this has happened a few times over the past couple of years. resetting the connectors does the job. particularly the two on the left side. those are the ones that cause the code. the cause is opening and closing and possibly slamming the dryer door effects them after a while. sometimes I get the code and it goes away right away usually after slamming the door closed. I'm sure there are other causes for the code without a simple fix like this but this is one cause for the code

Was this answer helpful?

Score 0
Add a comment

Put a hose clamp on the hose coming from the board. This solved my F1 problem.

Was this answer helpful?

Score 0
Add a comment

Add your answer

pat wright will be eternally grateful.
View Statistics:

Past 24 Hours: 16

Past 7 Days: 123

Past 30 Days: 535

All Time: 365,570