Free Shipping on Domestic Orders $75+

First Steps
Along with displaying the F3E1 code, it is likely you are here because your washer won't fill with water, or it is overflowing.
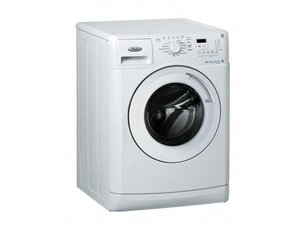
This troubleshooting page applies to some Whirlpool Duet front load washers, generally those with a model number beginning with WFW##HE with the ## ranging from 70 to 97. There are also two models with 4 digits the WFW8640 and WFW8740. These are the middle-aged Whirlpool Duets introduced from around 2009-2014.
Further, on some Whirlpool Cabrio top load washers (from around 2014) you can use the methods indicated for the Duet front load washers with the numerical user interface. Sad to say, Whirlpool calls the washers by the same model name but varies the internal components, so it's really a look-and-see situation.
It also applies to Whirlpool top load washers with controls that have a row of 6 lights on the control panel, usually right below the cycle knob or selector dial. Note: Many post-2007 Maytag top loaders use this same design. (They were made by Whirlpool as well)
This code indicates a problem with the water level measurement system. These machines generally use a pressure switch, as a separate component, or a transducer integrated into the control board. The system consists of the pressure switch, and a hose connecting the pressure switch to an air dome on the tub or drum. The pressure switch is triggered by the increasing air pressure in the air dome as the washer fills with water. There are three main areas of failure, the air chamber, the connector hose or tube, and the pressure switch or transducer.
Before you do anything else, though, reset your machine.
- On your front load machine, just unplug it for one minute. Then plug it in again and turn it on. Check if the code is still displayed.
- On your top load machine, rotate your cycle selector dial to the 12 o" clock position (the dial marker pointing straight up
- )Then unplug the machine for one minute.
- Next, plug it in again, and wait 30 seconds.
- Try the machine, and see if the code is still displayed. If it is, go to Diagnostic Test Mode.
- An alternative reset on your top load machine.
- Unplug your machine (knob straight up)and wait one minute
- Plug the machine back in and open and close the lid six (6) times rapidly in succession (Within 12 seconds). This is sometimes a "deeper" reset for some models.
- If the code is gone, run a cycle, If it is still present, move to the next item.
Diagnostic Test Mode
Front loaders and Cabrio Top Loaders:
These machines will display the error code by alternating the F# with the E#, showing F with a number and E with a number, alternately in their displays.
To enter the Diagnostic Test:
- Make sure the machine is in standby mode, plugged in but with no lights lit.
- Choose 3 buttons (except power or start) and press them in succession 3 times (Button1-Button2-Button3-Button1-Button2-Button3-Button1-Button2-Button3)
- Don’t look for a button 1 or a button 2 or a button 3 that’s just the order you push them.
- For convenience (and better results) choose three buttons that are right next to each other because you need to do this sequence in 8 seconds
When the entire display and all the lights on the control panel come on you know you have entered the Diagnostic Test mode.
- Press the 3rd button again to view the code or codes. The machine will cycle the display of all the codes.
- You can check if there's anything else amiss at this point. If there are other codes, note them down.
Assuming you get the F3-E1 code we can move on to the next step. We can start to try to fix the problem. Go on to the next item if you have a top-load machine. if not, skip to Clear The Codes
Top Loaders:
Note: Clockwise or to the right is abbreviated CW, Counter Clockwise or to the left is abbreviated CCW. The cycle knob turns with steps or bumps so it will stop in different places more readily. To enter this mode:
- Set the dial or knob to the straight-up (Normal) position
- Unplug your machine for one minute.
- Plug it in again. (just like a reset) and wait 30 seconds.
- Turn the cycle control knob as follows.
- One full CCW turn to 12 o’clock, or straight up position,
- Then three steps CW,
- Then one step CCW
- Then 1 step CW.
- If 5 lights blink (Locked won't) you are in diagnostic mode. Congratulations! there are a lot of things you can do in this mode.
Here's how to get the error code. You will be using a blinking light system.
- One more step CW will give you the error codes mode.
- Press the start button to prepare to display the codes.
- Turn the knob one more step CW to see the first code.
Here's how to read them.
The codes have a letter/number format corresponding to which light is lit. The code is F with a number followed by E with a number.
The Sensing/Fill light (left-most light) lit indicates F. Number is indicated by which of the next four lights are lit. The E light could be remembered as Empty since no other light but the number of lights will be on when the second group of lights flashes.
If there is more than one code you can read them by rotating the knob 1 step CW and pausing to see if it displays a code. If all that happens is the leftmost light flashes with no other lights, there is no other code.
You add the values up from the next to leftmost light which is Wash (8) then Rinse (4) then Spin (2) and Done(1) So if Wash and Done are lit 8+1=9 is the value. If Rinse Spin and Done are lit 4+2+1=7 is the value.
In the case of this error you would expect the Fill light on (for F) and the Spin (2) and Done (1) lights to be lit as well. F(2+1)=F3, then no lights except the Done light which equals 1 for E1 Total: F3E1
- If you have this code only, go to the next step.
- If there are other codes, you should note them down. then go to the next step
Clear The Codes
To clear the codes on these machines do the following:
Front Loader and Cabrio Top Loader
- To clear the codes hold down the 3rd button you used to enter Diagnostic Test mode for 5 seconds.
- Press the power key to exit the Diagnostic Test mode.
- Go on to Air Chamber and Connector Hose, below.
Top Loader
- Enter diagnostic mode as described above.
- While in diagnostic mode, turn the knob to enter the error code mode as written above
- Then turn the knob to the 9 o'clock position and press the start button again. this will clear the code. You can then go to Recalibration
Recalibration (Top Load)
You can also run a Recalibration of your top load machine. You will do this again if you end up replacing any parts so it isn't wasted effort to learn how. And it might solve your problem. Here's how.
- If you aren't already in diagnostic mode from the previous steps, enter it now (see above).
- Once you have all the lights blinking at once, turn the knob 4 steps clockwise for recalibration mode.
- Press the start button.
Recalibration takes about 3 minutes and you may hear all kinds of noises. once it finishes, all the lights will go off. The machine is now ready to use. If it works you are done, if not you should go to Air Chamber and Connector Hose below.
Causes
The air chamber and the hose can become clogged with debris. You can clean it with a reverse flow procedure. This does no harm to your machine and even if everything is flowing well it is worth taking the time to clean the tube and chamber.
- Access the hose or tube that connects the air chamber to the pressure switch and disconnect it at the switch.
- Check to see that it is still connected to the air chamber on the side of the tub. If it has come off, put it back on and then test the machine.
- Inspect the tube for kinks or cracks or pinches, and flex the tube to make sure it hasn't hardened.
- If it has problems, replace it then test the machine.
- If it is connected, and in good condition go to the next point.
- Get a very small funnel and connect it to the hose.
- Make at least 1 liter or 1 quart of a solution of 1 part water to 1 part white vinegar.
- Pour the solution slowly through the funnel and tube and into the tub. Note if the solution backs up.
- If it does back up, remove the funnel and use small puffs of compressed air (if possible) to force it through the tube and into the air chamber. This will help to remove the clogs.
- Be careful that you don't blow the tube off of the air chamber nipple.
- You might want to attach the hose with a hose clamp at the air chamber connection, if it doesn't have one on it already, to prevent it from being dislodged in the future.
* If you don't have compressed air, you can try blowing through the tube.
- If the tube is clogged so that it won't let water through and you can't blow through it you may need to remove it to physically clean it. You can try using a small dowel (about 3mm or 1/8") to push debris through the tube.
- If you use the dowel, it's best to disconnect the pressure hose so you don't push debris into the air dome or chamber. This will require more disassembly of your machine.
- Check the air dome as well for debris if the hose is clogged.
- This can also help just to "freshen" your machine as well.
- If you found a clog and cleared it. reconnect the hose. Test your machine for proper operation.
- If no clog, reconnect the hose and go on to the next step.
To check this component, you can first enter the Diagnostic Test mode and run one of the quick Functional Tests.
Front Loaders
- Enter the Diagnostic Test Mode as described under Diagnostic Test Mode.
- Press the Second Button you used to enter the mode, this will enter the Functional Test. The start button will blink, press it.
- You will see a series of C0# displays as the machine moves through the tests.
- You can skip to C:06 which is testing the fill system and pressure switch by pressing the Start button to scroll to it. You Can't skip C:00 (Door Lock) and C:03 (detergent dispenser)
- Check the water level in the machine, or if it even tries to fill.
- If they are incorrect, go on to the next point.
- If it does fill then press the start button again to pump out the machine, and try operating it. if it throws a code again, go to Control Board
- Press the power button to exit this mode.
You can often test the separate pressure switches by blowing into them and listening for a click. If you hear one, you can also check the switch contacts with a multimeter. If there's no click, replace the switch.
You will probably need someone to help, and likely another piece of hose so you can operate the switch by blowing and checking the operation of the contacts.
- You can use a multimeter set to continuity check the setting and operate the switch as described above for integrated switches with the meter connected to it.
- You may need to disconnect the switch from the control board as many of the switches have integral wiring harnesses.
- Check for continuity and also check that the switch breaks the circuit when operated. If it doesn't show continuity or doesn't operate, replace it.
- You should also inspect the wiring from the pressure switch to the control board for insulation cuts, pinches kinks shorts, or any other potential problem.
- If you find a defect, repair it, or replace the switch if the wiring is integral to the switch.
- If you can't get conclusive readings, It is usually worthwhile to replace the pressure switch at this point.
- If it checks out, go on to Control Board.
Top Loaders
A number of these machines of the top load variety have their pressure switches or sensors integrated into the main control board. You will see the pressure hose runs up into the control console and connects to a port on the main control board. These are difficult to test, and if defective the control board will need to be replaced.
If there is a separate pressure switch (the hose doesn't connect to the control board in the console, you can test it as described above in the front loader section.
You can run a diagnostic functional test. You can fool the machine so that you can observe the fill level or lack of it You do this by removing the strike (the little piece that goes in the hole for the latch) from the lid Note which way it is facing. Then put it in the latch hole in the top just as if it was on the lid still.
Keep in mind that this is DANGEROUS. The lid is locked for a reason, so keep arms and hands out of the washer basket, Especially in spin portions of the cycle. Here's how to run this:
- Get into the diagnostic mode as shown previously
- Once in diagnostic mode, rotate the cycle knob in two steps. Then press Start.
The machine will run through a sequence of tests. You are most interested when the machine shows the following lights (besides Lock which will always be on in this test) there are a few steps before these that are pauses
- Rinse, Spin, and Done (4+2+1=7) (Hot and Cold flowing together)
- Wash (8) (Shifts to Agitating, and may fill the machine more. If possible you want to see the water level; this is why you override the lid lock and switch.)
- Wash and Done (8+1=9) (Agitating) May also fill more.
If there's a problem the machine will set a new error code, so it is good to run this after having erased the code.
- When you want to stop the test press Start and hold it. Pressing Start quickly will just skip the steps.
- REMEMBER to reattach the strike to the lid when you're done.
If the machine won't fill properly and has a code again, go to the next step.
You're seeing solutions for Whirlpool Washing Machine. Select your model to find parts for your device.
Related Problems


11 common problems
View allDescribe your problem in your own words