Introduction
This is one of three iPod teardowns this week: We've also taken apart the new iPod Touch and Shuffle. Stay in the loop on twitter for the latest teardown shenanigans.
In case you missed it, last week we celebrated a major milestone. In addition to enabling Apple repair, we now have parts and repair manuals for most game consoles! We decided to celebrate by taking a trip through time and ripping apart five retro consoles.
Shameless plug: We fund teardowns like this by selling iPod Nano Parts! We've also got free open-source repair manuals for every iPod Nano but this one, and we're working on that.
What you need
-
-
We finally have our hands on the new multi-touch iPod Nano!
-
The shiny new Nano graced our doorstep early this morning, and we can't wait to see what's inside.
-
Unlike the iPod Shuffle 4th Generation that we tore down yesterday, the Nano arrived in a more appropriately-sized shipping box.
-
Apple Model Number: A1366
-
-
-
iPod Nano, meet iPod Nano.
-
Despite keeping the same price tag as its predecessor, ($149 and $179 for the 8GB and 16GB models, respectively) the new Nano is a bundle of trade offs.
-
Gone are the days of click wheels, cameras, and video playback.
-
Now is the time for a multi-touch screen [!]. The Nano also features volume control buttons and a sleep/wake button.
-
There were a few minor form factor revisions as well.
-
The 5th Gen Nano sizes up at 3.6" x 1.5" x 0.24", and weighs 1.28 oz.
-
The 6th Gen Nano sizes up at 1.48" x 1.68" x 0.35", and weighs 0.74 oz.
-
-
-
The new Nano is more like a Shuffle with a screen than a Nano with multi-touch. The iPod's case design is very similar to iPod Shuffle we took apart yesterday.
-
Since there were no visible screws, our first inclination was to turn up the heat.
-
Our lovely heat gun managed to loosen the glue holding the display in place.
-
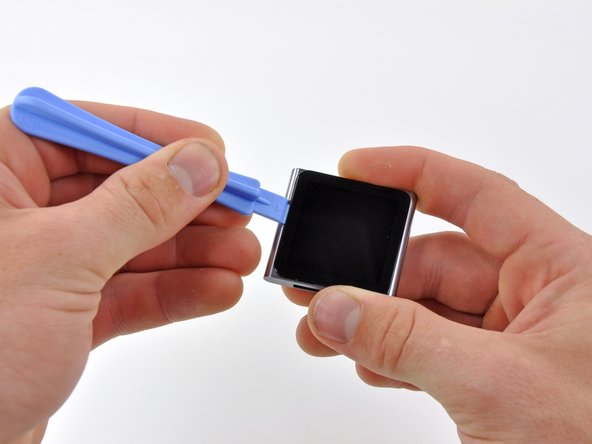
Gentle prying with an iPod Nano opening tool around the perimeter allowed us to separate the display from the rest of the device.
-
-
-
With the display still dangling off the side by its ribbon cable, our trusty #00 Phillips screwdriver makes short work of the two screws securing the EMI shield to the Nano.
-
The inside of the Nano looks very similar to that of the new Shuffle; a tiny logic board and battery sharing the space 50/50.
-
-
-
-
The display can be removed after detaching the digitizer and display data cable connectors.
-
The 1.54" LCD screen is equipped with multi-touch, although how anyone is supposed to comfortably fit more than one finger on the display is a mystery.
-
This LCD features a resolution of 240 x 240 pixels. That's a rather boring 1:1 aspect ratio. It's also a big reduction in size from the 2.2" 240 x 376 pixel LCD from the Nano 5th Generation.
-
Like its cousins the iPhone 4 and the iPod Touch, the touchscreen, LCD, and front glass are inseparably bonded.
-
-
-
The display assembly of the Nano measures 2.27 mm thick. That's even thinner than the 2.93 mm display on the new iPod Touch and the 3.05 mm iPhone 4 display.
-
The Nano has a 220 pixels-per-inch (PPI) screen, the highest pixel density on an Apple device aside from the iPhone 4 / iPod Touch 4th Gen. That's almost double the iPad's paltry 132 PPI density!
-
-
-
Yet another connector. This time it's for the headphone jack and power/volume button ribbon cable.
-
Using connectors instead of soldering greatly increases the repairability of the device. Thank you Apple.
-
After removing the single logic board screw, we're finally ready to pull the logic board out.
-
-
-
The battery can be pried out of the case with an iPod Nano opening tool, but unfortunately, it is soldered to the logic board.
-
The 3.7 V lithium-ion battery has a listed capacity of .39 Watt-hours that provides up to 24 hours of continuous music playback.
-
This iPod Nano's battery only has two wires, one red and one black. All the other iPod Nanos we've taken apart have included three battery wires. That third battery wire typically ties into a thermistor, a resistor whose value changes with temperature (a poor man's thermometer). Presumably the iPod Nano's battery is small enough and the charge rate is slow enough that overheating is not a concern.
-
-
-
The headphone jack and button contacts are connected via a long, thin ribbon cable which runs along the inside edge of the Nano.
-
Four very small screws secure the button contacts to the top edge.
-
After removing yet another screw, the headphone jack pops out of place with the help of an iPod Nano opening tool.
-
-
-
The headphone jack, volume buttons, and sleep/wake button are all found on the same ribbon cable that snakes around the inner perimeter of the Nano.
-
Like its 5th generation predecessor, the new Nano utilizes the headphones as the FM radio antenna. Any headphones will work as an antenna.
-
Having a hardware based volume control on the exterior of the case is a new, albeit convenient, addition for the Nano.
-
-
-
iPod Nano 6th Generation Repairability: 5 out of 10 (10 is easiest to repair)
-
Good: The ribbon cable connectors make it easy to disconnect the display and headphone jack from the logic board.
-
Good: Once the display is removed, the rest of the disassembly is relatively straightforward.
-
Bad: Removing the display is very difficult without using a heat gun.
-
Bad: The battery is soldered to the logic board, making replacement more cumbersome than necessary.
-


13 Comments
I needed to perform this teardown in order to fix a volume button. It seems now that the hold button is non-functioning. Any ideas??
the guide is not detailed. I damaged my headphone jack wiring while removing the board. Be careful, below the board, lies wires. While taking out board, i broke those. Its dead officially now. :(
Hi there! A teardown is meant for entertainment purposes only, it is not a guide to be followed! Be sure to read all warnings, like this one: "This teardown is not a repair guide. To repair your iPod Nano 6th Generation, use our service manual."
Why is there not a guide for replacing the battery? I understand that it involves some soldering, but surely it can still be done with a certain level of beginners skill.
This is a teardown, a fun look at the interior, not a repair guide. You can follow our logic board assembly guide to remove the logic board and battery, and with some fairly simple soldering, you can swap the battery.