Introduction
The phablet wars continue. Today we welcome the Nexus 6. A joint collaboration between Google and Motorola, the Nexus 6 is being hailed as the iPhone 6 Plus's brother from an Android mother. What innovations lay hidden inside the Nexus 6? Join us as we find out!
For the latest tech and teardown news, follow us on Facebook, Instagram, and Twitter.
What you need
Video Overview
-
-
Nexus 6 Tech Specs:
-
5.96" display with a resolution of 1440 x 2560 pixels (493 ppi)
-
2.7 GHz Quad core Krait 450 CPU (Qualcomm Snapdragon 805 SOC) + Adreno 420 GPU, with 3 GB RAM
-
32 or 64 GB of internal storage
-
Android 5.0 Lollipop
-
802.11ac 2x2 (MIMO) + Bluetooth 4.1 + NFC
-
3220 mAh "non-removable" battery
-
13 MP rear-facing camera with Optical Image Stabilization + 2 MP front-facing camera
-
-
-
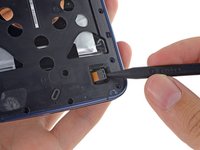
The Nexus 6 has a central rear-facing camera that looks like it might have some interesting flash action hidden alongside.
-
More on this later...
-
The top of the phone is decked with a 3.5 mm headphone jack and a seemingly out-of-place nano SIM card slot.
-
The bottom houses the Micro USB port, along with the obligatory FCC markings, leaving the back of the phone jargon free.
-
-
-
Three companies produce two phablets and we hold them up in the same hand to compare their size. Thanks to a thinner bezel, you get more screen real estate with the Nexus 6, with only a slightly larger chassis.
-
Nexus 6: 82.98 mm x 159.26 mm x 10.06 mm
-
iPhone 6 Plus: 77.8 mm x 158.1 mm x 7.1 mm
-
-
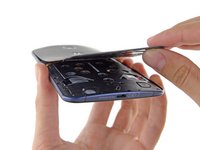
With no visible screws on the rear cover, we resort to opening picks to pry or slide our way in.
-
The bad: No simple clips on this cover, looks like your fingernails won't be enough for this job.
-
The good: The adhesive securing the cover is relatively mild, once the pick sneaks into the seam, the cover can be peeled up.
-
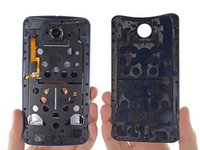
The ugly: Removing the rear cover still doesn't provide access to internal components. At least we now have visual confirmation of screws, a whole legion of them.
-
-
-
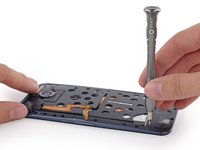
Time to take out the (oh-so-many) screws. 22 T3 Torx screws present themselves, and silently await our precision driver.
-
We've spotted a secret door! With a secret connector!
-
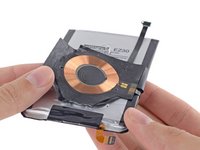
A shiny copper coil catches our eye through the holey midframe. We'll be sure to investigate that once we get it cracked...
-
-
-
-
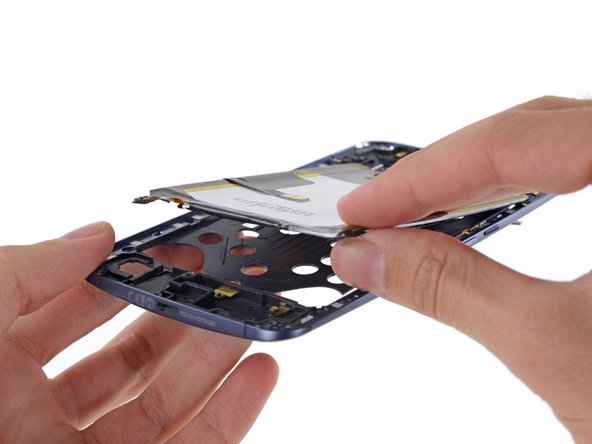
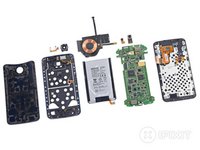
The Nexus is finally ready to reveal its secrets. Looks like that mystery connector belonged to the battery!
-
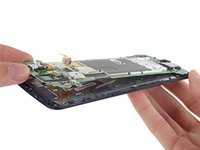
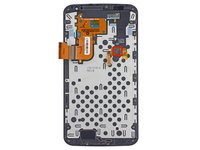
With cables decoupled, it's suddenly delightfully apparent why there were so many screws in the midframe. The Nexus 6 practically falls apart into two halves; the midframe/battery assembly, and the display/motherboard assembly.
-
-
-
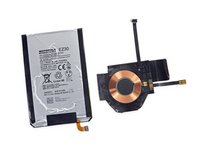
Would you look at that! The shiny copper from before is an inductive charging coil! (Maybe this'll catch on after all).
-
Peeling the coil off lets us get a look at the 3.8 V, 3220 mAh (12.2 Wh) battery.
-
That's a step above the iPhone 6 Plus's 11.1 Wh, but it looks like the Nexus battery life doesn't benefit much.
-
-
Tool used on this step:Tweezers$4.99
-
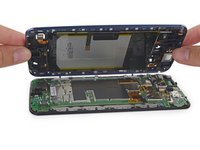
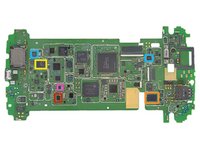
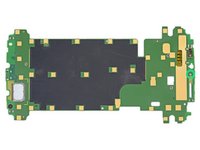
First peek at the motherboard brings back memories of the Moto X; big, green and lots of tiny EMI shields.
-
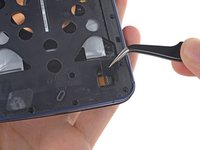
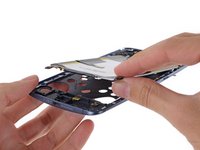
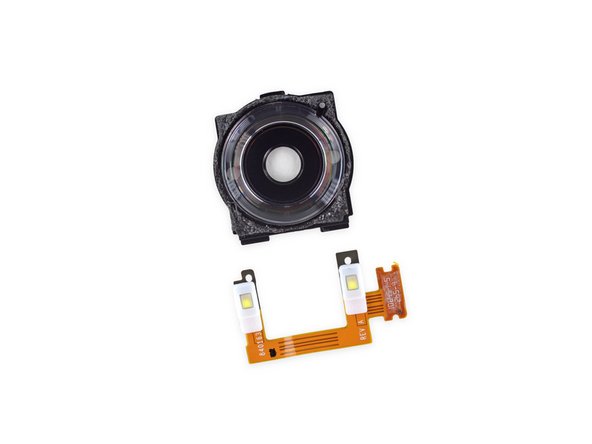
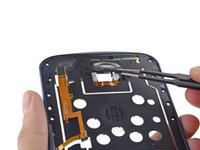
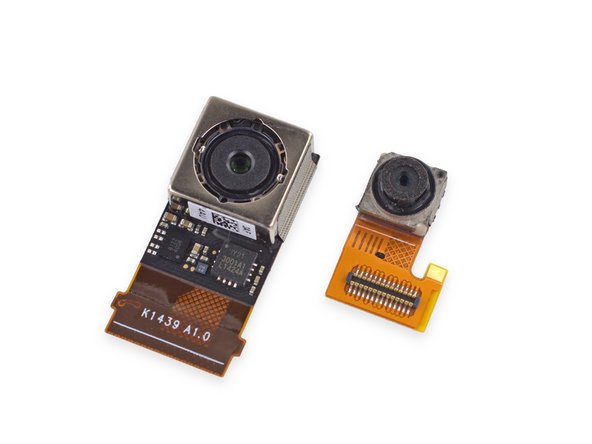
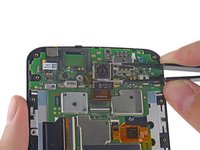
We easily pluck out the rear- and front-facing cameras with a pair of tweezers.
-
The Nexus 6 is certainly no slouch when it comes to cameras. The 13 MP rear-facing camera sports a Sony Exmor IMX 214 CMOS image sensor (Also found in the OnePlus One).
-
-
-
Finally, the part we've all been waiting for! Let's identify some of the ICs that power this Nexus:
-
SK Hynix H9CKNNNDBTMTAR 24 Gb (3 GB) LPDDR3 RAM, with Qualcomm Snapdragon 805 SoC layered underneath
-
Qualcomm PMA8084 Power Management IC
-
SanDisk SDIN9DW4-32G 32 GB eMMC NAND Flash
-
Qualcomm MDM9625M LTE Modem
-
Qualcomm WTR1625L RF Transceiver
-
Qualcomm WFR1620 Receive-Only Companion Chip
-
Texas Instruments TMS320C55 Digital Signal Processor
-
-
Tool used on this step:Rotary Tool$49.99
-
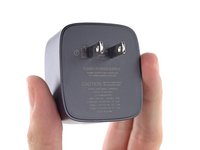
But wait there's more! Motorola is touting its Turbo Charger, boasting enough charge for 6 hours of use in just 15 minutes of charging.
-
Compatible with Qualcomm's new Quick Charge 2.0 tech, the Motorola Turbo Charger lists three different output options: 5 V at 1.6 A, 9 V at 1.6 A, and 12 V at 1.2 A.
-
Sounds like there's nothing snailish about this Turbo, but really there's only one way to find out...
-
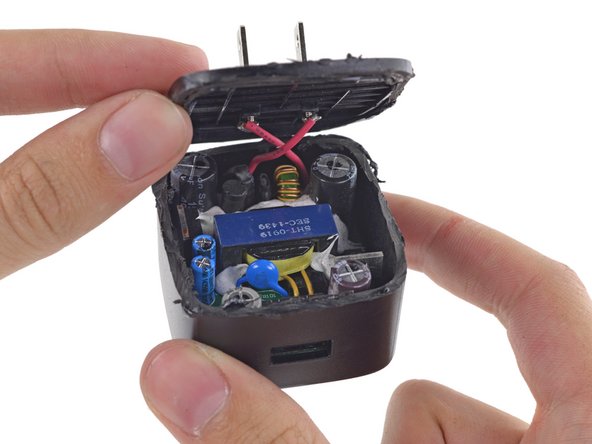
...And that's by slicing our way in with a rotary tool!
-
-
-
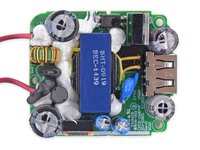
On the one side, amidst wads of epoxy, we find a transformer surrounded by some plain jane capacitors, voltage regulators, and a USB port.
-
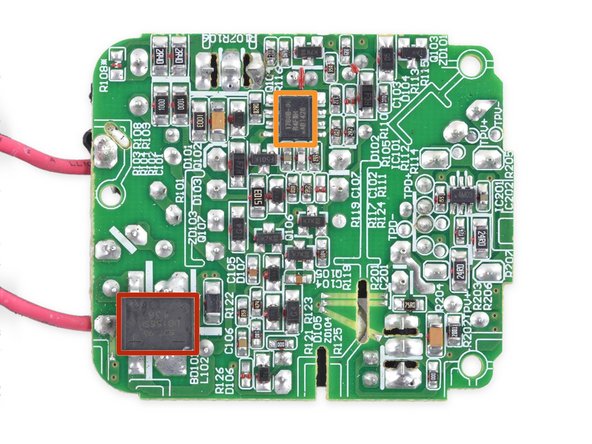
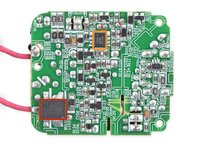
On the other side, amid a sea of solder and surface mount components:
-
A bridge rectifier, responsible for converting AC to DC
-
Dialogue iW1760B Power Supply Controller, clearly the brains of the operation
-
-
-
Motorola Nexus 6 Repairability Score: 7 out of 10 (10 is easiest to repair).
-
Pressure contacts and cable connectors make the modular components (cameras, buttons, headphone jack) easy to replace.
-
The Nexus 6 uses a single kind of screw, although it's a fairly uncommon size (T3).
-
Many many screws hold the midframe in place—this makes its removal somewhat tedious, but also means no clips or adhesive are needed to secure it to the front panel.
-
The glued-in battery is less accessible than we'd like, but it can be replaced.
-
Several components (vibrator, SIM slot, speaker, USB port) are soldered directly to the motherboard and will be more difficult to replace than if they were connected by cable.
-
The digitizer is fused to the display, increasing repair costs for a cracked screen, but it is easy to get to the bare display assembly.
-


42 Guide Comments
Step 12, the chip above the orange one, Broadcom BCM20795 NFC controller chip.
So is it possible to put back the back cover or it need some kind of glue ?
It's still pretty sticky, so it ought to go back on and stay without any additional adhesive.
I'm struggling to stick mine back on, what adhesive can I use?
Is it possible to upgrade to upgrade the storage?