
Video Overview

This teardown is not a repair guide. To repair your LG KE970, use our service manual.

  1. LG KE970 Teardown, Remove the bottom plate: step 1, image 1 of 2 LG KE970 Teardown, Remove the bottom plate: step 1, image 2 of 2
    • Press this button to unlock and remove bottom plate

  2. LG KE970 Teardown, Disconnect Battery (Follow this guide until that step, if you need battery replacement): step 2, image 1 of 3 LG KE970 Teardown, Disconnect Battery (Follow this guide until that step, if you need battery replacement): step 2, image 2 of 3 LG KE970 Teardown, Disconnect Battery (Follow this guide until that step, if you need battery replacement): step 2, image 3 of 3
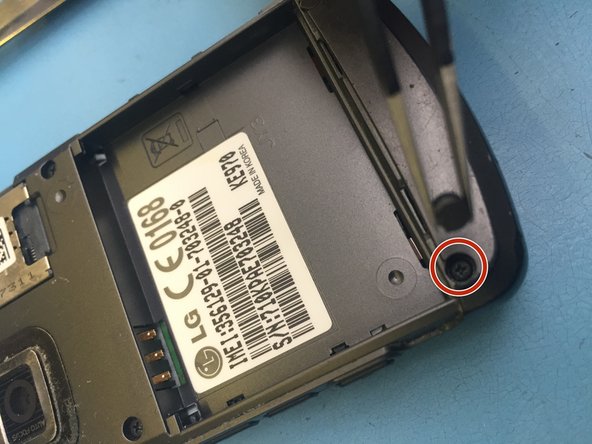
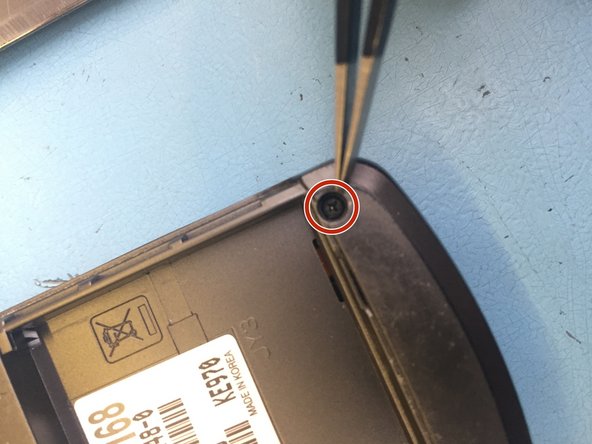
    • Insert your blackstick and remove the battery

  3. LG KE970 Teardown, Remove rubber screw covers: step 3, image 1 of 3 LG KE970 Teardown, Remove rubber screw covers: step 3, image 2 of 3 LG KE970 Teardown, Remove rubber screw covers: step 3, image 3 of 3
    • Find the hidden screws under the rubber covers.

  4. LG KE970 Teardown, Remove 6 screws from the back: step 4, image 1 of 2 LG KE970 Teardown, Remove 6 screws from the back: step 4, image 2 of 2
    • 6 same size screws should be removed.

  5. LG KE970 Teardown, Separate front and back part: step 5, image 1 of 3 LG KE970 Teardown, Separate front and back part: step 5, image 2 of 3 LG KE970 Teardown, Separate front and back part: step 5, image 3 of 3
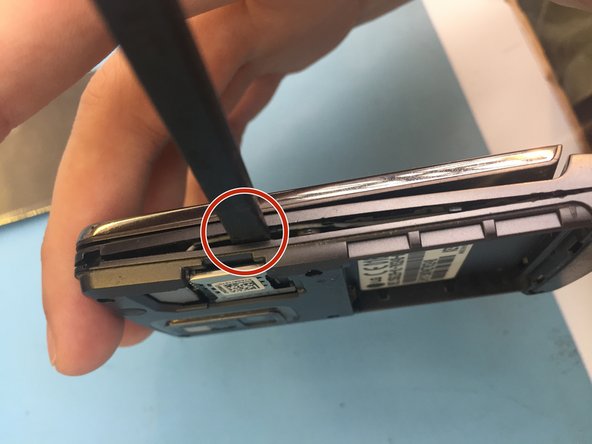
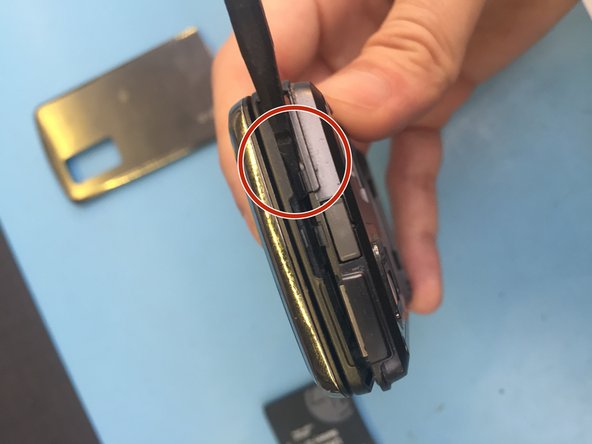
    • Insert your blackstick and try to slide it from the one side to the other. At some point you can hear the "click" sound. It's really fragile so be careful. Don't put the blackstick too much inside because you might damage other parts. Try to be as gentle as you can. If you don't feel it, take your time. It's better if you do a break.

  6. LG KE970 Teardown, Disconnect the antenna: step 6, image 1 of 3 LG KE970 Teardown, Disconnect the antenna: step 6, image 2 of 3 LG KE970 Teardown, Disconnect the antenna: step 6, image 3 of 3
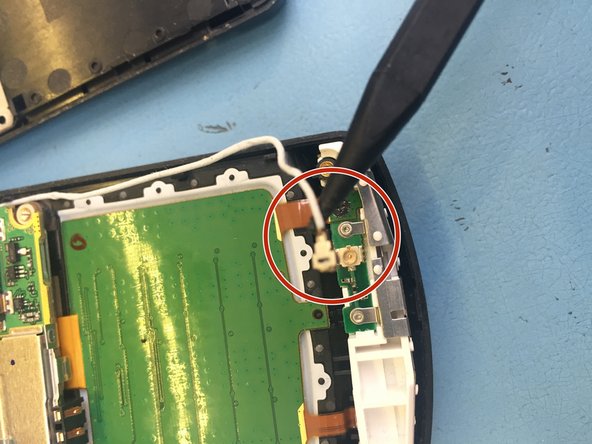
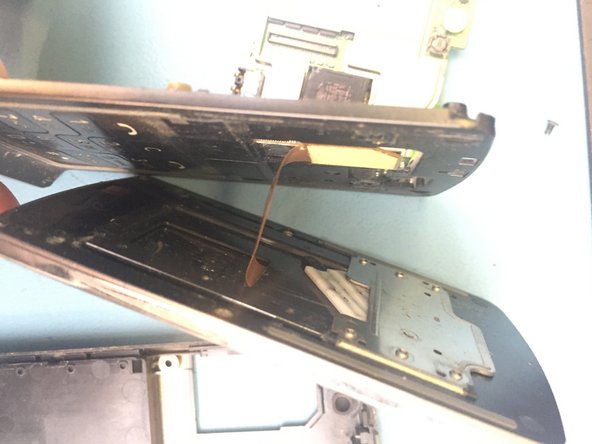
    • Once the two parts are separated we should disconnect the antenna to proceed further. Insert your blackstick under the antenna and push it up very gently.

  7. LG KE970 Teardown, Unscrew the front part: step 7, image 1 of 3 LG KE970 Teardown, Unscrew the front part: step 7, image 2 of 3 LG KE970 Teardown, Unscrew the front part: step 7, image 3 of 3
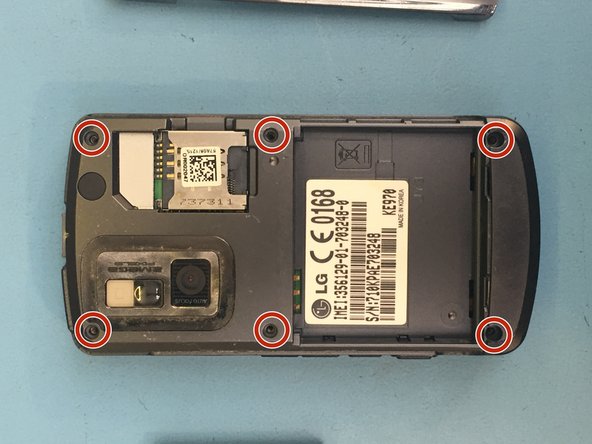
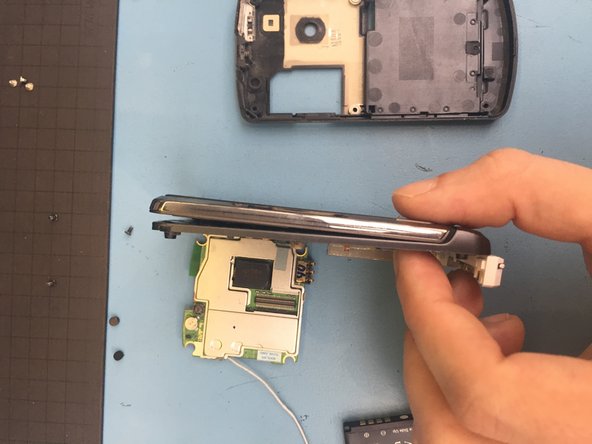
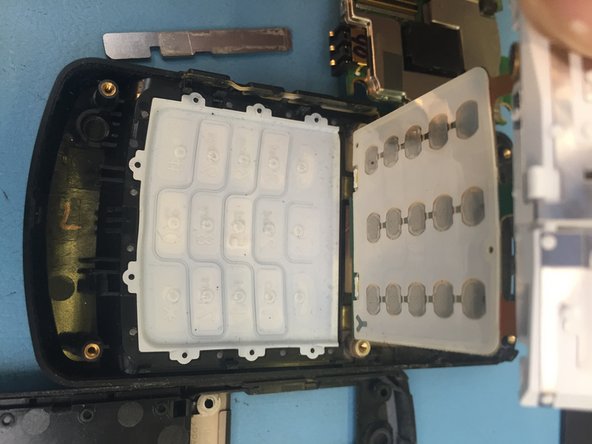
    • The display can be unscrewed. 6 silver screws are holding it on the main body. Although soldering required to replace this part, since the flex cable is attached on the Motherboard. So I leave it here.

  8. LG KE970 Teardown, Find the keyboard: step 8, image 1 of 3 LG KE970 Teardown, Find the keyboard: step 8, image 2 of 3 LG KE970 Teardown, Find the keyboard: step 8, image 3 of 3
    • Remove the last screw and you have access to the keyboard underneath.

Kosmar

Member since: 06/23/21

492 Reputation

4 Guides authored

Team

ksmr.repair Member of ksmr.repair

Business

1 Member

4 Guides authored

0 Comments

Add Comment

View Statistics:

Past 24 Hours: 0

Past 7 Days: 2

Past 30 Days: 10

All Time: 502