Introduction
This is the Amiga that started it all. Released in 1985 the Amiga 1000 is a classic vintage computer. The inside of the Amiga 1000 case is engraved with the signatures of the engineers that worked on the project.
What you need
-
-
This Amiga has some yellowing on the case from age.
-
The first step is to remove the phillips head screws from beneath the Amiga.
-
Carefully turn the machine over and unclip the lid.
-
-
-
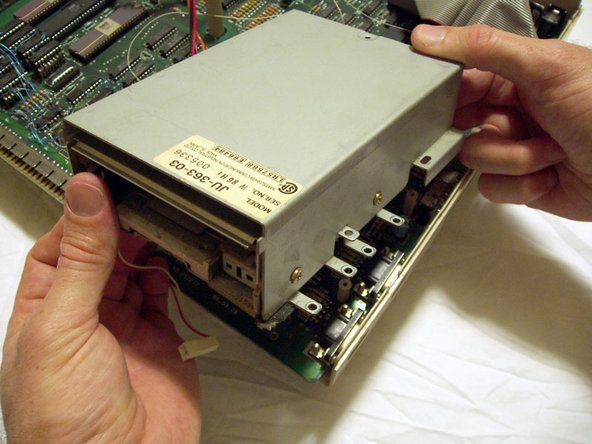
Remove the RAM expansion board by gently pulling it towards you.
-
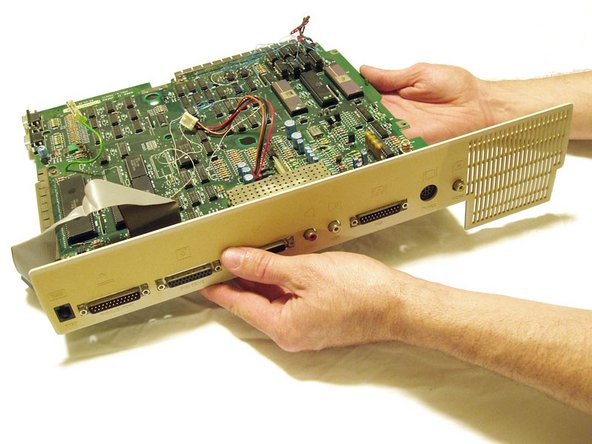
The front panel of the computer can then be clipped off. Be careful with the power and disk drive LED's. It is easy to clip them off from the inside of the panel.
-
Remove the Phillips screws holding the metal shield in place.
-
-
-
-
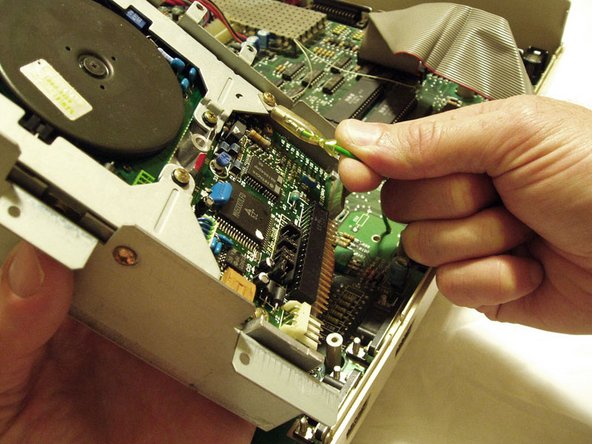
On this Amiga you will notice that there are lots of delicate hook up wires on the board. I am not sure if this is standard however you should exercise care when working around these deilcate connections.
-
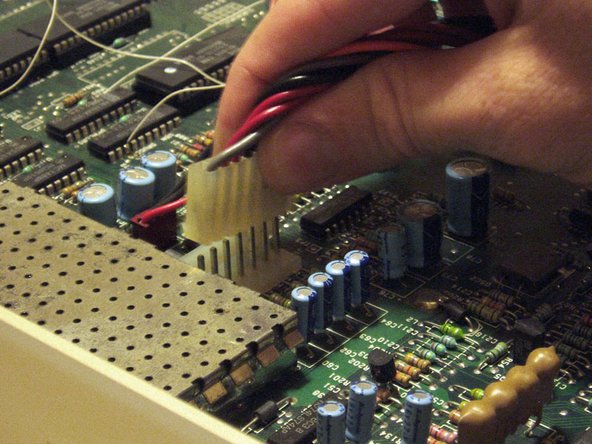
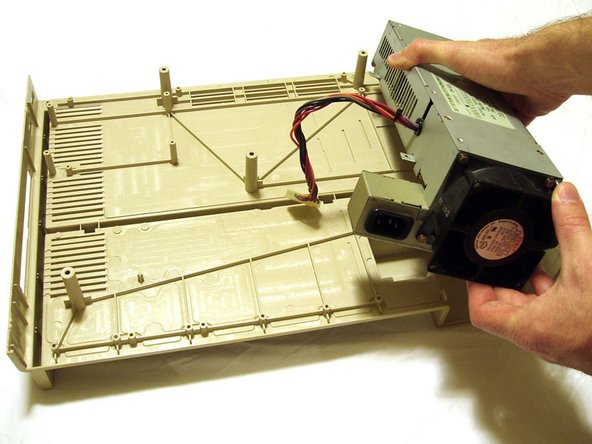
Remove the screws holding the power supply in place and unclip the connector from the main board.
-


7 Comments
AMIGA FOREVER!!!! Only Amiga makes it possible!!!! I own A1000, A500, A600, A1200, A4000 and AMIGA CD32 :D
This is a PAL Unit from the UK. The NTSC Units from the USA and Canada Have/had a daughter board on them. Also, the Commodore logo on the front is a dead give-away. None of the US versions had any Commodore labeling on them. Inside the top cover on all NTSC models is the signatures of the team, including Jay Minner's dog's paw print (misty) and "Joe Pillow"
I used to own two PAL machines in the Netherlands which both also had the daughterboard, the CVBS Output also did not give colour output. The signatures, including the paw print, were also present, there have been different revisions around, the ones with the daughterboard were the older revisions as far as I remember.
I have a PAL 1986 version here in Australia. It too has the signatures of the A-Team Moulded into the Top Case Lid. And does have the Commodore name on the Front Cover. Mine also has the Doughter Board inside and a Plate on the Left Rear Side of Top Case stating INSIDER ONE MEG RAM. I am currently having the Power Supply Re-Capped and giving Her a Good Clean and Service. Darren D&D Retro Computers.
There has been 3 final revisions of the Amiga 1000. This one is Rev. B. Here are the details :
- Rev.6, fall 1985 : motherboard with 256 KB RAM, “mezzanine” dautherboard with 256 KB RAM, Denise 8362-R5 without EHB graphic modes, Agnus 8361 NTSC, black&white CVBS output, no Commodore logo, sold mainly in USA
- Rev.A, spring 1986 : motherboard with 256 KB RAM, “mezzanine” dautherboard with 256 KB RAM, “front” extension board with 256 KB RAM, Denise 8362-R6 with EHB graphic modes, Agnus 8361 NTSC or Agnus 8367 PAL, black&white CVBS output, no Commodore logo, sold in USA, imported in Europe and Australia
- Rev.B, summer 1986 : motherboard with 512 KB RAM, “front” extension board with 256 KB RAM, Denise 8362-R8 with 256/512 lines PAL graphic modes, Agnus 8367 PAL, color CVBS output, blue Commodore logo, sold in Europe, imported in Australia
All these revisions have the signatures.
The previous revisions (Rev1-5) were prototypes with chicken-lips-Commodore logo instead of A-logo on command keys.