Shop the Holiday Gift Guide
Free Shipping on Domestic Orders $75+

iPhone 7 Display Assembly Replacement

Views: 3.2K

View statistics:

Past 24 Hours:
2
Past 7 Days:
7
Past 30 Days:
23
All Time:
3,235
Comments: 58

58 comments on steps.

Completed: 4

4 people have marked this guide "completed." Will you be next?

Favorites: 3

3 people have favorited (and subscribed to) this guide. Will you be next?

Time Required: 30 minutes - 1 hour
Difficulty: Moderate
Prerequisite Only

This is a prerequisite-only guide! This guide is part of another procedure and isn’t meant to be used alone.

iPhone 7 Display Assembly Replacement

Introduction

Go to step 1 ↓

Prereq-only guide for detaching the display assembly en route to other repairs.

What you need

Fix Kit

This kit contains all the parts and tools needed to complete this guide.

Parts

Tools

    1. iPhone 7 Display Assembly Replacement, Display Assembly: step 1, image 1 of 3 iPhone 7 Display Assembly Replacement, Display Assembly: step 1, image 2 of 3 iPhone 7 Display Assembly Replacement, Display Assembly: step 1, image 3 of 3
      • Make sure the battery is disconnected before you disconnect or reconnect the cables in this step.

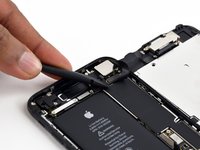
      • Use a spudger or a fingernail to disconnect the two lower display connectors by prying them straight up from their sockets on the logic board.

      • To reconnect these cables, press down on one end until it clicks into place, then repeat on the opposite end. Do not press down on the middle. If the connector is even slightly misaligned, the connector can bend, causing permanent damage.

      • If you have a blank screen, white lines on the display, or partial or complete lack of touch response after reassembling your phone, try disconnecting and carefully reconnecting both of these cables and make sure they are fully seated.

      Ask FixBot

      Add Comment

    2. iPhone 7 Display Assembly Replacement: step 2, image 1 of 3 iPhone 7 Display Assembly Replacement: step 2, image 2 of 3 iPhone 7 Display Assembly Replacement: step 2, image 3 of 3
      • Remove the two 1.3 mm Phillips #000 screws securing the bracket over the front panel sensor assembly connector.

      • Some phones could be Y000. Apple started using Y000 for these at some point in the middle of the product's lifecycle.

      Ask FixBot

      Add Comment

    3. iPhone 7 Display Assembly Replacement: step 3, image 1 of 2 iPhone 7 Display Assembly Replacement: step 3, image 2 of 2
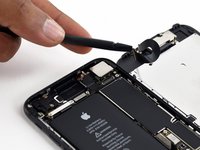
      • Disconnect the front panel sensor assembly connector from its socket on the logic board.

      • This press connector should also be reconnected one end at a time to minimize the risk of bending.

      Ask FixBot

      Add Comment

    4. iPhone 7 Display Assembly Replacement: step 4, image 1 of 1
      Ask FixBot

      Add Comment

Conclusion

To reassemble your device, follow these instructions in reverse order.

Cancel: I did not complete this guide.

4 other people completed this guide.

Author

with

Evan Noronha

Member since: 02/05/15

230,327 Reputation

166 Guides authored

0 Guide Comments

Add Comment

View Statistics:

Past 24 Hours: 2

Past 7 Days: 7

Past 30 Days: 23

All Time: 3,235