Shop the Holiday Gift Guide
Free Shipping on Domestic Orders $75+

iPhone 5s Home Button Assembly Replacement

Views: 26K

View statistics:

Past 24 Hours:
0
Past 7 Days:
9
Past 30 Days:
44
All Time:
25,505
Comments: 68

62 comments on steps, 6 guide comments.

Go to guide comments
Completed: 35

35 people have marked this guide "completed." Will you be next?

Favorites: 34

34 people have favorited (and subscribed to) this guide. Will you be next?

Time Required: No estimate
Difficulty: Moderate
Prerequisite Only

This is a prerequisite-only guide! This guide is part of another procedure and isn’t meant to be used alone.

iPhone 5s Home Button Assembly Replacement

Introduction

Go to step 1 ↓

Prerequisite to replace the home button assembly in your iPhone 5s.

Please note that only the phone's original home button assembly will be capable of using the Touch ID functionality. Installing a new home button will only restore ordinary home button functions, not the Touch ID features.

What you need

Fix Kit

This kit contains all the parts and tools needed to complete this guide.

Parts

Tools

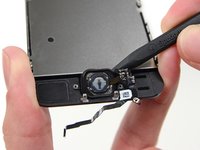
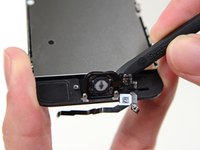
    1. iPhone 5s Home Button Assembly Replacement, Home Button Assembly: step 1, image 1 of 2 iPhone 5s Home Button Assembly Replacement, Home Button Assembly: step 1, image 2 of 2
      • Unscrew the single captive Phillips #000 screw securing the home button cable.

      • The captive screw is fastened to the home button cable by a spring contact backing. During reassembly, ensure the contact is in the correct orientation—on the side of the screw nearest the LCD.

      • If your replacement part does not have this captive screw and spring contact, you will need to transfer them to the new cable.

      Ask FixBot

      Add Comment

    2. iPhone 5s Home Button Assembly Replacement: step 2, image 1 of 2 iPhone 5s Home Button Assembly Replacement: step 2, image 2 of 2
      • Fold the home button cable down, out of the way of the home button bracket.

      Ask FixBot

      Add Comment

    3. iPhone 5s Home Button Assembly Replacement: step 3, image 1 of 1
      • Remove the two 1.4 mm Phillips #000 screws from the home button bracket.

      Ask FixBot

      Add Comment

    4. iPhone 5s Home Button Assembly Replacement: step 4, image 1 of 1
      • Remove the home button bracket from the display assembly.

      Ask FixBot

      Add Comment

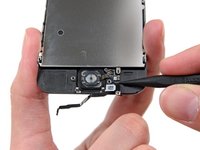
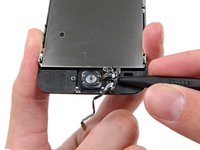
    5. iPhone 5s Home Button Assembly Replacement: step 5, image 1 of 2 iPhone 5s Home Button Assembly Replacement: step 5, image 2 of 2
      • Wedge the the tip of a spudger underneath the home button cable assembly.

      • The home button cable is affixed by mild adhesive.

      • Gently work the spudger underneath the cable to separate the home button cable from the front panel assembly.

      • Do not remove the home button yet, as it is still attached to the front panel assembly.

      Ask FixBot

      Add Comment

    6. iPhone 5s Home Button Assembly Replacement: step 6, image 1 of 2 iPhone 5s Home Button Assembly Replacement: step 6, image 2 of 2
      • If necessary, remove the tape over the home button on the front side of your cracked front panel assembly.

      • Gently push the top left corner of the home button up away from the front panel.

      • Do not push the home button all the way through—you only need to get a corner free, so that you can pry it free with a spudger.

      • This membrane is very thin. If you feel like you're going to tear the button, apply heat and try again.

      Ask FixBot

      Add Comment

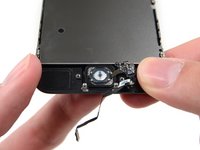
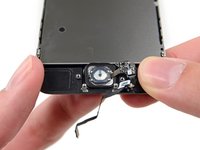
    7. iPhone 5s Home Button Assembly Replacement: step 7, image 1 of 2 iPhone 5s Home Button Assembly Replacement: step 7, image 2 of 2
      • Peel the home button the rest of the way off of the display by prying gently with a spudger.

      Ask FixBot

      Add Comment

    8. iPhone 5s Home Button Assembly Replacement: step 8, image 1 of 1
      • Remove the home button assembly from the front panel.

      Ask FixBot

      Add Comment

Conclusion

To reassemble your device, follow these instructions in reverse order.

Cancel: I did not complete this guide.

35 other people completed this guide.

Author

with

Sam Goldheart

Member since: 10/18/12

478,949 Reputation

538 Guides authored

Team

iFixit Member of iFixit

Staff

119 Members

72,954 Guides authored

6 Guide Comments

Unfortunately this will never work, the sensor is paired to the logic board. If you want to replace the defective tactile switch, remove all the plastic/rubber parts on the flex cable and resolder a new switch or disassemble the switch and clean/replace the metal dome switch. If you want to repair fingerprint function, just give up.

Tom Chai - Reply Share

I purchased a full iphone 5S home button replacement assembly (comes with the home button attached to the flex cable) And now the fingerprint function does not show up at all. Where it's supposed to show in settings as "Touch ID and Passcode" It only says passcode. Restored as new to 7.1, still doing the same thing.. Anybody have ideas?

Casey - Reply Share

Only the home button that came with the phone has Touch ID function. In order to replace it and still have Touch ID, you would need to get it replaced at an Apple Store.

p3rs0nn - Reply Share

I think you can easily break the Touch ID sensor

nguyenquanganh38 - Reply Share

Hey I changed my screen but now the home button doesnt work properly, it does work but it doesnt make the usual clicking sound and only works with a firm press, although the fingerprint does still work so not sure what the issue is.. any ideas?

Luke Earp - Reply Share

Add Comment

View Statistics:

Past 24 Hours: 0

Past 7 Days: 9

Past 30 Days: 44

All Time: 25,505