Free Shipping on Domestic Orders $75+

iPhone 5s Battery Replacement

Prerequisite Only
This is a prerequisite-only guide! This guide is part of another procedure and isn’t meant to be used alone.

What you need

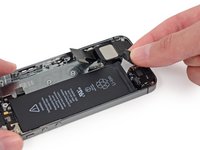
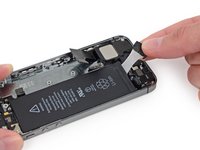
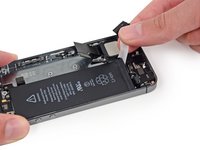
    1. iPhone 5s Battery Replacement, Battery: step 1, image 1 of 3 iPhone 5s Battery Replacement, Battery: step 1, image 2 of 3 iPhone 5s Battery Replacement, Battery: step 1, image 3 of 3
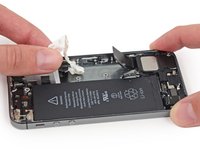
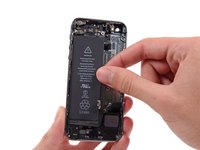
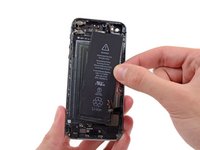
      • Insert the tip of a spudger into the hole in the battery adhesive tab near the headphone jack.

      • Lift the tab up slightly and use the spudger to unfold the tab from its recess.

      Ask FixBot

      Add Comment

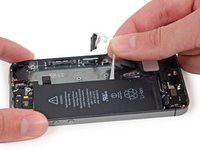
    2. iPhone 5s Battery Replacement: step 2, image 1 of 3 iPhone 5s Battery Replacement: step 2, image 2 of 3 iPhone 5s Battery Replacement: step 2, image 3 of 3
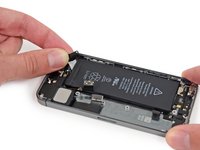
      • Pull the battery adhesive tab straight up from the phone.

      • Cut the black battery adhesive tab between the two white adhesive strips, separating them.

      Ask FixBot

      Add Comment

    3. iPhone 5s Battery Replacement: step 3, image 1 of 2 iPhone 5s Battery Replacement: step 3, image 2 of 2
      • Try to keep the strips flat and unwrinkled during this procedure; wrinkled strips will stick together and break instead of pulling out cleanly.

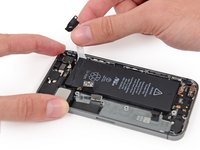
      • Slowly pull one of the battery adhesive strips away from the battery, toward the bottom of the iPhone.

      • Pull steadily, maintaining constant tension on the strip as it slips out from between the battery and the rear case. For best results, pull the strip at a 60º angle or less.

      Ask FixBot

      Add Comment

    4. iPhone 5s Battery Replacement: step 4, image 1 of 3 iPhone 5s Battery Replacement: step 4, image 2 of 3 iPhone 5s Battery Replacement: step 4, image 3 of 3
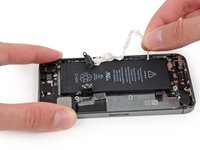
      • Guide the strip carefully around the corner and up the side of the battery.

      • Be careful not to snag it on the corner of the battery or on any of the other internal iPhone components.

      • The strip will stretch to many times its original length. Continue pulling, re-grabbing the strip near the battery if necessary, until the entire strip comes free.

      Ask FixBot

      Add Comment

    5. iPhone 5s Battery Replacement: step 5, image 1 of 3 iPhone 5s Battery Replacement: step 5, image 2 of 3 iPhone 5s Battery Replacement: step 5, image 3 of 3
      • Repeat to remove the second adhesive strip.

      • If you removed both strips successfully, skip the next two steps.

      • If either of the adhesive strips break underneath the battery and cannot be retrieved, try to remove the remaining strip, and then proceed to the next step.

      Ask FixBot

      Add Comment

    6. iPhone 5s Battery Replacement: step 6, image 1 of 1
      • If any of the adhesive strips broke off and the battery remains stuck to the rear case, prepare an iOpener or use a hair dryer to heat the rear case directly behind the battery.

      Ask FixBot

      Add Comment

    7. iPhone 5s Battery Replacement: step 7, image 1 of 1
      Tool used on this step:
      Plastic Cards
      $2.99
      Buy
      • Flip the iPhone back over and insert a plastic card between the case side of the battery and the rear case.

      • Be careful to keep the card as flat as possible to avoid bending the battery, which may damage it and cause it to release dangerous chemicals.

      • Press the card in farther to break up the adhesive behind the battery.

      Ask FixBot

      Add Comment

    8. iPhone 5s Battery Replacement: step 8, image 1 of 2 iPhone 5s Battery Replacement: step 8, image 2 of 2
      • Remove the battery from the rear case.

      • When installing the battery, refer to this guide to replace your battery's adhesive strips.

      Ask FixBot

      Add Comment

Conclusion

To reassemble your device, follow these instructions in reverse order.

Cancel: I did not complete this guide.

19 other people completed this guide.

Sam Goldheart

Member since: 10/18/12

478,415 Reputation

538 Guides authored

Team

iFixit Member of iFixit

Staff

122 Members

72,401 Guides authored

2 Guide Comments

I feel like this guide should at least start with a link to another guide on opening up your phone. It’s weird that it just jumps in assuming your phone has already been opened. From a UX perspective, I should have to hunt around for a preceding guide when the topic of this one shows up on the top of my search results and describes exactly what I want to do.

alex - Reply Share

Use this battery guide to replace your battery. This guide is a prerequisite to remove the battery in the course of another repair, and isn’t meant to be followed on its own.

Sam Goldheart - Reply Share

Add Comment

View Statistics:

Past 24 Hours: 0

Past 7 Days: 5

Past 30 Days: 25

All Time: 11,908