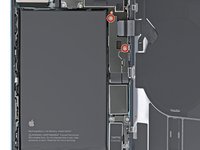
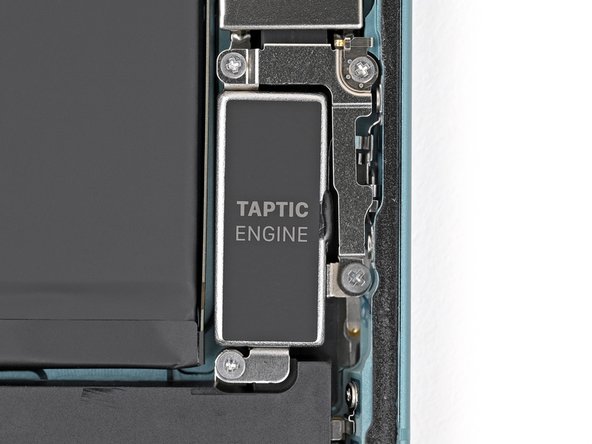
Free Shipping on Domestic Orders $75+

iPhone 16 Plus Taptic Engine Removal

Prerequisite Only
This is a prerequisite-only guide! This guide is part of another procedure and isn’t meant to be used alone.
  1. iPhone 16 Plus Taptic Engine Removal, Heat the bottom edge: step 1, image 1 of 2 iPhone 16 Plus Taptic Engine Removal, Heat the bottom edge: step 1, image 2 of 2
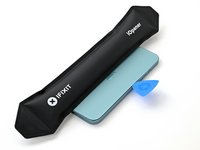
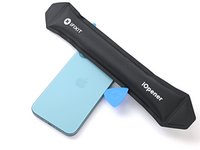
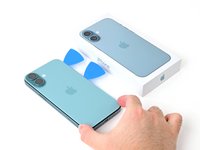
    • Apply a heated iOpener to the bottom edge of the back glass for two minutes.

    • Alternatively, you can use a hair dryer or heat gun to heat the bottom edge of the back glass until it's hot to the touch.

    • Be careful not to heat the phone hotter than this—the battery is susceptible to heat damage.

  2. iPhone 16 Plus Taptic Engine Removal, Insert an opening pick: step 2, image 1 of 3 iPhone 16 Plus Taptic Engine Removal, Insert an opening pick: step 2, image 2 of 3 iPhone 16 Plus Taptic Engine Removal, Insert an opening pick: step 2, image 3 of 3
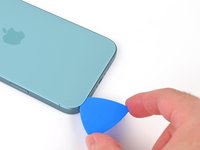
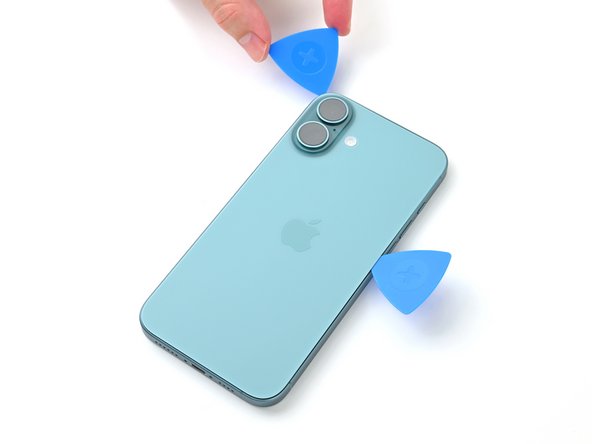
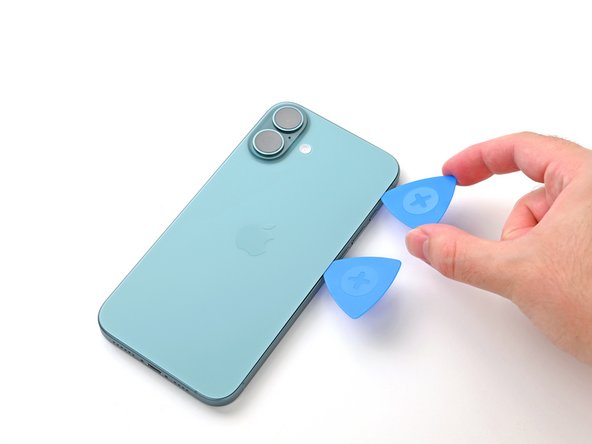
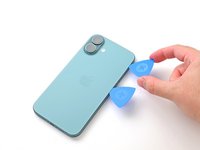
    • Apply a suction handle to the bottom edge of the back glass, above the USB-C port.

    • Pull up on the handle with a strong, steady force to create a gap between the back glass and the frame.

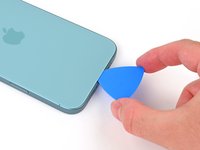
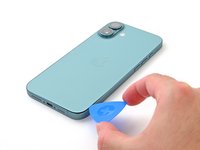
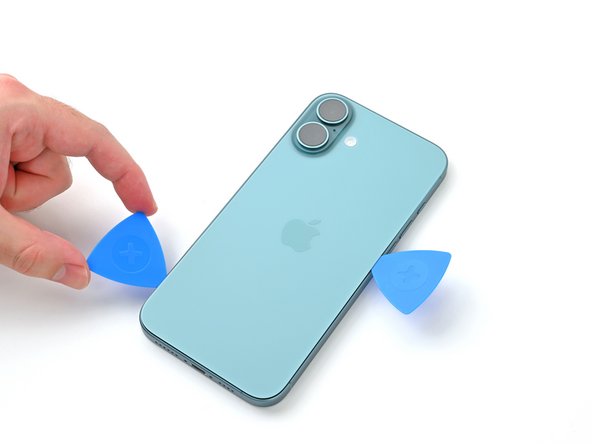
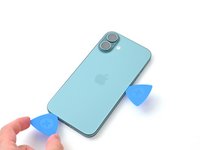
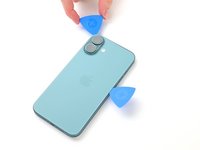
    • Insert the tip of an opening pick into the gap.

  3. iPhone 16 Plus Taptic Engine Removal, Back glass information: step 3, image 1 of 2 iPhone 16 Plus Taptic Engine Removal, Back glass information: step 3, image 2 of 2
    • As you slice the adhesive securing the back glass in the next steps, be careful of the following areas:

    • There's a delicate cable connecting the back glass to the phone, right next to the volume up button. Don't insert your pick here to avoid slicing the cable.

    • There are multiple spring contacts around the perimeter of the phone. Be extra careful not to insert your pick deeper than suggested in each step to avoid bending these contacts.

  4. iPhone 16 Plus Taptic Engine Removal, Separate the bottom edge adhesive: step 4, image 1 of 3 iPhone 16 Plus Taptic Engine Removal, Separate the bottom edge adhesive: step 4, image 2 of 3 iPhone 16 Plus Taptic Engine Removal, Separate the bottom edge adhesive: step 4, image 3 of 3
    • Don't insert your pick deeper than 5 mm on the bottom edge to avoid damaging the spring contacts.

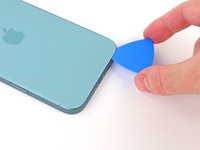
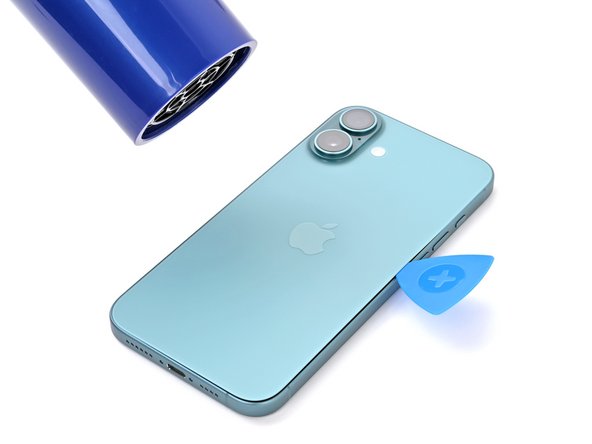
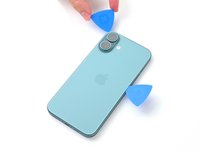
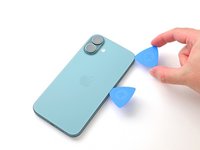
    • Slide your pick back and forth along the bottom edge to separate the adhesive.

    • Leave your pick inserted in the bottom right corner to prevent the adhesive from resealing.

  5. iPhone 16 Plus Taptic Engine Removal, Heat the right edge: step 5, image 1 of 2 iPhone 16 Plus Taptic Engine Removal, Heat the right edge: step 5, image 2 of 2
    • Apply a heated iOpener to the right edge of the back glass for two minutes.

    • When using a hair dryer or heat gun, heat the back glass until it's hot to the touch.

  6. iPhone 16 Plus Taptic Engine Removal, Separate the bottom right corner adhesive: step 6, image 1 of 3 iPhone 16 Plus Taptic Engine Removal, Separate the bottom right corner adhesive: step 6, image 2 of 3 iPhone 16 Plus Taptic Engine Removal, Separate the bottom right corner adhesive: step 6, image 3 of 3
    • Don't insert your pick deeper than 5 mm along the right edge to avoid damaging the spring contacts and ribbon cable.

    • Slide your pick around the bottom right corner and slide it halfway up the right edge, or until you feel a hard stop at a clip securing the back glass.

    • Don't slice near the volume buttons to avoid damaging the wireless charging/flash cable.

    • Leave this pick inserted to prevent the adhesive from resealing.

  7. iPhone 16 Plus Taptic Engine Removal, Heat the left edge: step 7, image 1 of 2 iPhone 16 Plus Taptic Engine Removal, Heat the left edge: step 7, image 2 of 2
  8. iPhone 16 Plus Taptic Engine Removal, Separate the left edge adhesive: step 8, image 1 of 3 iPhone 16 Plus Taptic Engine Removal, Separate the left edge adhesive: step 8, image 2 of 3 iPhone 16 Plus Taptic Engine Removal, Separate the left edge adhesive: step 8, image 3 of 3
    • Don't insert your pick deeper than 5 mm along the left edge to avoid damaging the spring contact.

    • Insert a second opening pick at the bottom edge.

    • Slide the second pick around the bottom left corner and along the left edge of the screen to separate the adhesive and release the metal clips.

    • You'll hear and feel the metal clips release as you pass them.

    • Leave this pick inserted at the top left corner to prevent the adhesive from resealing.

  9. iPhone 16 Plus Taptic Engine Removal, Heat the top edge: step 9, image 1 of 2 iPhone 16 Plus Taptic Engine Removal, Heat the top edge: step 9, image 2 of 2
    • Apply a heated iOpener to the top edge of the back glass, angled to include the volume buttons, for two minutes.

    • When using a hair dryer or heat gun, heat until it's hot to the touch.

  10. iPhone 16 Plus Taptic Engine Removal, Separate the top edge adhesive: step 10, image 1 of 3 iPhone 16 Plus Taptic Engine Removal, Separate the top edge adhesive: step 10, image 2 of 3 iPhone 16 Plus Taptic Engine Removal, Separate the top edge adhesive: step 10, image 3 of 3
    • Don't insert your pick deeper than 3 mm along the top edge to avoid damaging the spring contacts.

    • Slide your opening pick across the top edge and around the top right corner to the volume up button to separate the adhesive.

    • You should hear and feel clicks as the top two clips release.

  11. iPhone 16 Plus Taptic Engine Removal, Swing open the back glass: step 11, image 1 of 2 iPhone 16 Plus Taptic Engine Removal, Swing open the back glass: step 11, image 2 of 2
    • Don't try to fully remove the back glass just yet—it's still attached with a delicate ribbon cable. Follow the next few steps to remove it safely.

    • If the back glass doesn't swing open easily, don't force it—go back around the perimeter with your pick to check for missed sections of adhesive or stuck clips.

    • You may need to lift the back glass up slightly before swinging it open to fully disengage the clips.

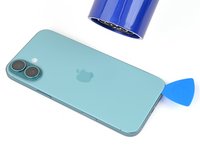
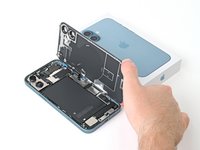
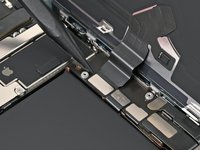
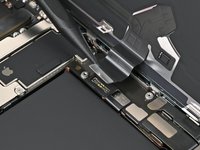
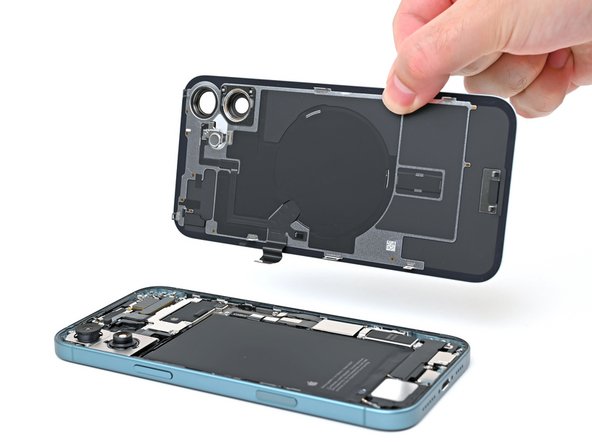
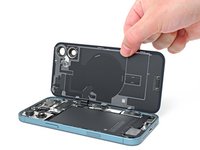
    • Gently swing open the back glass towards the volume buttons.

    • Support the back glass with a clean, sturdy object like a small box to avoid straining the cable.

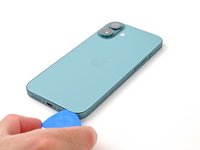
    • Remove the opening picks.

  12. iPhone 16 Plus Taptic Engine Removal, Unfasten the middle connector cover: step 12, image 1 of 2 iPhone 16 Plus Taptic Engine Removal, Unfasten the middle connector cover: step 12, image 2 of 2
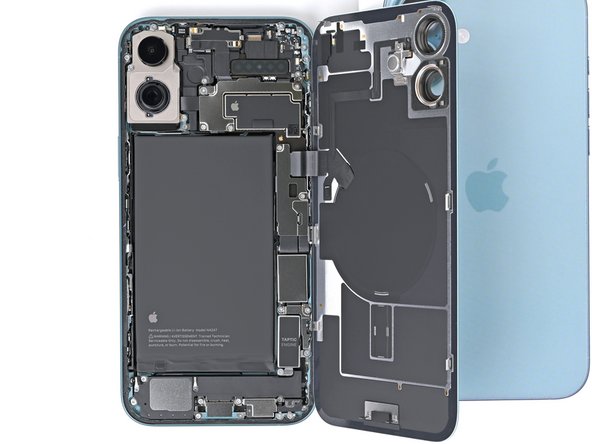
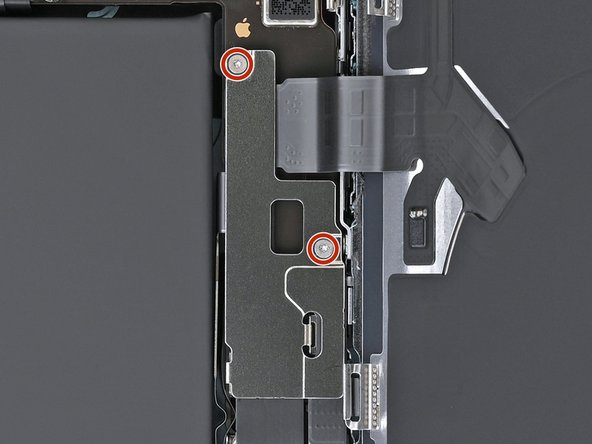
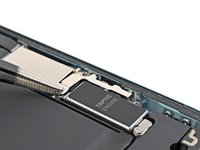
    • Use a tri-point Y000 driver to remove the two 1.3 mm-long screws securing the middle connector cover.

  13. iPhone 16 Plus Taptic Engine Removal, Remove the middle connector cover: step 13, image 1 of 2 iPhone 16 Plus Taptic Engine Removal, Remove the middle connector cover: step 13, image 2 of 2
    • Be careful not to dent or puncture the battery during this step.

    • Use blunt-nose tweezers or your fingers to slide the cover towards the left edge of the phone and release its hook from its slot on the logic board.

    • Remove the cover.

  14. iPhone 16 Plus Taptic Engine Removal, Disconnect the wireless charger: step 14, image 1 of 2 iPhone 16 Plus Taptic Engine Removal, Disconnect the wireless charger: step 14, image 2 of 2
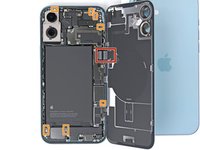
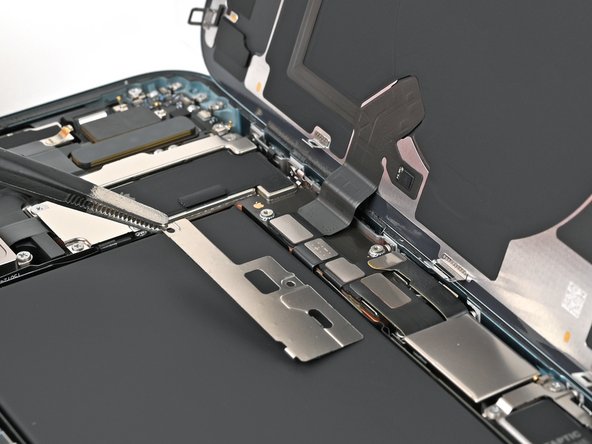
    • Use the point of a spudger to pry up and disconnect the wireless charging coil press connector.

  15. iPhone 16 Plus Taptic Engine Removal, Remove the back glass: step 15, image 1 of 2 iPhone 16 Plus Taptic Engine Removal, Remove the back glass: step 15, image 2 of 2
    • Lift the back glass off the frame and remove it.

  16. iPhone 16 Plus Taptic Engine Removal, Remove the Taptic Engine bracket screws: step 16, image 1 of 2 iPhone 16 Plus Taptic Engine Removal, Remove the Taptic Engine bracket screws: step 16, image 2 of 2
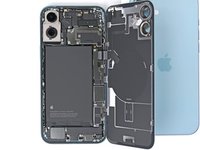
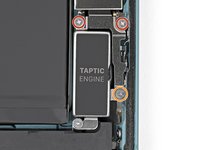
    • Use a Phillips screwdriver to remove the three screws securing the Taptic Engine bracket:

    • Two 1.9 mm‑long screws

    • One 2.1 mm‑long screw

  17. iPhone 16 Plus Taptic Engine Removal: step 17, image 1 of 2 iPhone 16 Plus Taptic Engine Removal: step 17, image 2 of 2
    • Use tweezers or your fingers to remove the Taptic Engine bracket.

  18. iPhone 16 Plus Taptic Engine Removal, Disconnect the Taptic Engine: step 18, image 1 of 2 iPhone 16 Plus Taptic Engine Removal, Disconnect the Taptic Engine: step 18, image 2 of 2
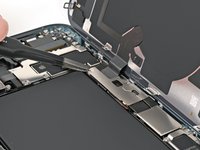
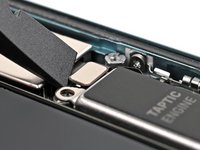
    • Use the flat end of a spudger to pry up and disconnect the Taptic Engine press connector.

  19. iPhone 16 Plus Taptic Engine Removal, Remove the Taptic Engine screw: step 19, image 1 of 2 iPhone 16 Plus Taptic Engine Removal, Remove the Taptic Engine screw: step 19, image 2 of 2
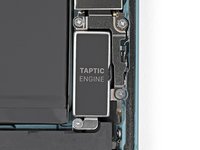
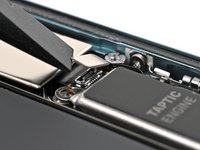
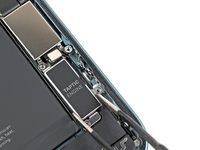
    • Use a Phillips screwdriver to remove the 1.8 mm screw securing the Taptic Engine.

  20. iPhone 16 Plus Taptic Engine Removal, Remove the Taptic Engine: step 20, image 1 of 2 iPhone 16 Plus Taptic Engine Removal, Remove the Taptic Engine: step 20, image 2 of 2
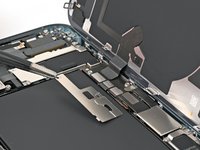
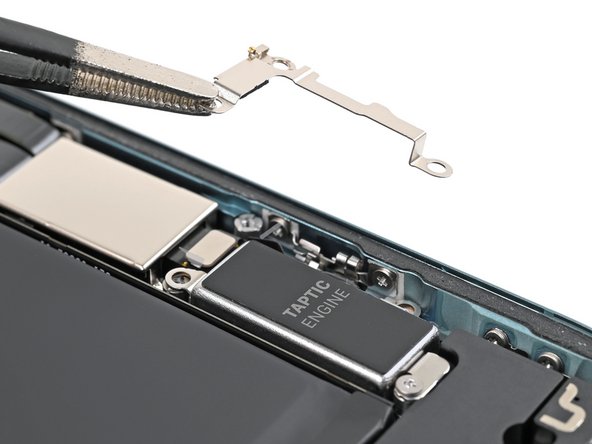
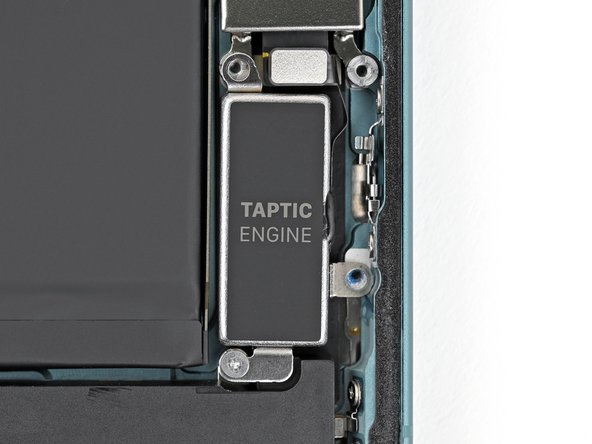
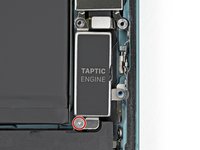
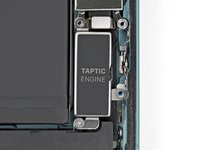
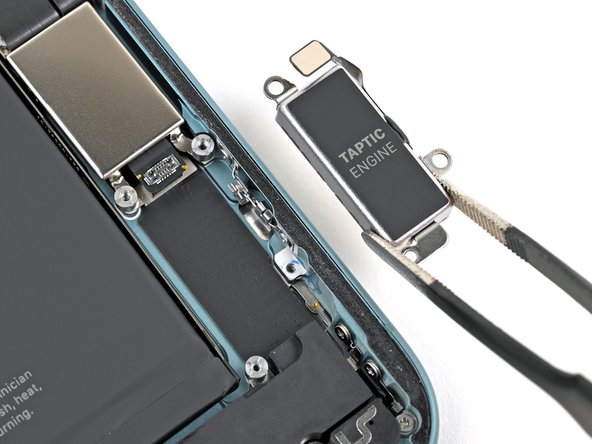
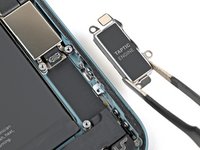
    • Use blunt-nose tweezers or your fingers to pick up and remove the Taptic Engine.

Conclusion

To reassemble your device, follow these instructions in reverse order.

Nick Schultz

Member since: 03/24/24

44,147 Reputation

254 Guides authored

Team

iFixit Member of iFixit

Staff

123 Members

24,061 Guides authored

0 Guide Comments

Add Comment

View Statistics:

Past 24 Hours: 0

Past 7 Days: 0

Past 30 Days: 17

All Time: 90