Free Shipping on Domestic Orders $75+

Lenovo Legion 5 17ACH6H Right SSD Replacement

Views: 17K

View statistics:

Past 24 Hours:
6
Past 7 Days:
33
Past 30 Days:
157
All Time:
16,693
Comments: 2

2 comments on steps.

Completed: 5

5 people have marked this guide "completed." Will you be next?

Favorites: 1

1 person has favorited (and subscribed to) this guide. Will you be next?

Time Required: 30 - 45 minutes
Difficulty: Moderate
Lenovo Legion 5 17ACH6H Right SSD Replacement

Introduction

Go to step 1 ↓

Use this guide to upgrade or replace the right side M.2 solid-state drive (SSD) in a Lenovo Legion 5 17ACH6H gaming laptop. This laptop is only compatible with NVME SSDs, and is therefore not compatible with SATA SSDs.

Before you perform this repair, back up your existing SSD if possible. If you are replacing the SSD where your operating system is installed, familiarize yourself with a disk cloning utility so you’ll be ready to migrate your data to the new SSD.

Finally, be sure to completely power off and unplug your laptop. Make sure the laptop is not in standby, sleep, or hibernation mode.

What you need

Fix Kit

This kit contains all the parts and tools needed to complete this guide.

Parts

Tools

    1. Lenovo Legion 5 17ACH6H Right SSD Replacement, Back cover removal: step 1, image 1 of 2 Lenovo Legion 5 17ACH6H Right SSD Replacement, Back cover removal: step 1, image 2 of 2
      • Use a Phillips #1 screwdriver to remove the following ten screws securing the back cover to the frame:

      • Six 12.8 mm PH1 screws

      • Four 4.6 mm PH1 screws

      Ask FixBot

      Add Comment

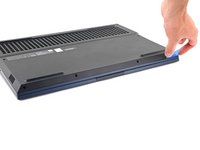
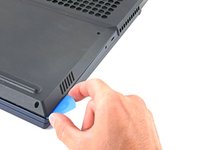
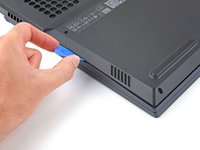
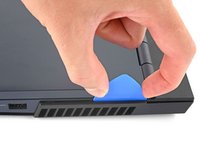
    2. Lenovo Legion 5 17ACH6H Right SSD Replacement, Release the front clips: step 2, image 1 of 3 Lenovo Legion 5 17ACH6H Right SSD Replacement, Release the front clips: step 2, image 2 of 3 Lenovo Legion 5 17ACH6H Right SSD Replacement, Release the front clips: step 2, image 3 of 3
      • Insert the rounded edge of an opening pick between the back cover and the frame in the lower right corner.

      • Angle the pick to about 45˚.

      Ask FixBot

      Add Comment

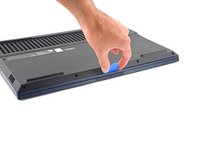
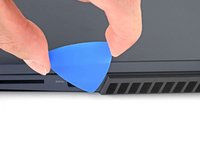
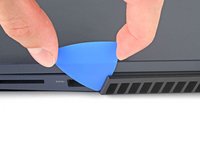
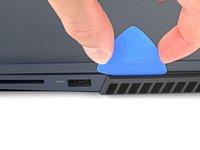
    3. Lenovo Legion 5 17ACH6H Right SSD Replacement: step 3, image 1 of 3 Lenovo Legion 5 17ACH6H Right SSD Replacement: step 3, image 2 of 3 Lenovo Legion 5 17ACH6H Right SSD Replacement: step 3, image 3 of 3
      • Slide the pick along the front edge to release the clips securing the back cover to the frame.

      Ask FixBot

      Add Comment

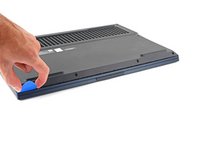
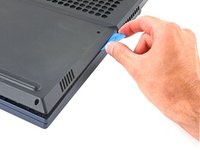
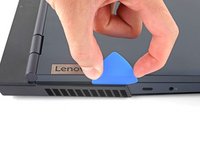
    4. Lenovo Legion 5 17ACH6H Right SSD Replacement, Release the right clips: step 4, image 1 of 3 Lenovo Legion 5 17ACH6H Right SSD Replacement, Release the right clips: step 4, image 2 of 3 Lenovo Legion 5 17ACH6H Right SSD Replacement, Release the right clips: step 4, image 3 of 3
      • Insert the edge of an opening pick between the back cover and the frame on the right edge.

      • Angle the pick to about 30˚ and slide down the left edge to release the clips.

      Ask FixBot

      Add Comment

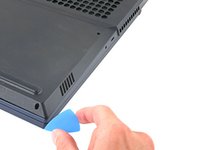
    5. Lenovo Legion 5 17ACH6H Right SSD Replacement, Release the left clips: step 5, image 1 of 3 Lenovo Legion 5 17ACH6H Right SSD Replacement, Release the left clips: step 5, image 2 of 3 Lenovo Legion 5 17ACH6H Right SSD Replacement, Release the left clips: step 5, image 3 of 3
      • Repeat the same procedure on the left edge to release the clips.

      Ask FixBot

      Add Comment

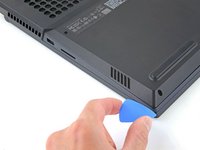
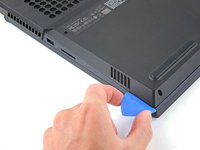
    6. Lenovo Legion 5 17ACH6H Right SSD Replacement, Release the right vent clips: step 6, image 1 of 3 Lenovo Legion 5 17ACH6H Right SSD Replacement, Release the right vent clips: step 6, image 2 of 3 Lenovo Legion 5 17ACH6H Right SSD Replacement, Release the right vent clips: step 6, image 3 of 3
      • Slide the opening pick between the frame and the plastic vents on the right side near the USB-A port.

      • Rotate the pick so that it is positioned on top of the plastic vents.

      • If the pick is difficult to insert, position the laptop vertically to reduce the weight on the back cover.

      Ask FixBot

      Add Comment

    7. Lenovo Legion 5 17ACH6H Right SSD Replacement: step 7, image 1 of 2 Lenovo Legion 5 17ACH6H Right SSD Replacement: step 7, image 2 of 2
      • Push the pick between the frame and plastic vents.

      • Slide the pick along the top edge of the plastic vents to release the clips.

      Ask FixBot

      Add Comment

    8. Lenovo Legion 5 17ACH6H Right SSD Replacement, Release the left vent clips: step 8, image 1 of 3 Lenovo Legion 5 17ACH6H Right SSD Replacement, Release the left vent clips: step 8, image 2 of 3 Lenovo Legion 5 17ACH6H Right SSD Replacement, Release the left vent clips: step 8, image 3 of 3
      • Slide the opening pick between the frame and the plastic vents on the left side near the USB-C port.

      • Rotate the pick so that it is positioned on top of the plastic vents.

      • Push the pick between the frame and plastic vents.

      • Slide the pick along the top edge of the plastic vents to release the clips.

      Ask FixBot

      Add Comment

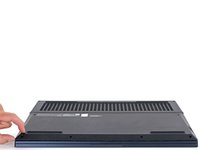
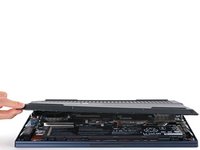
    9. Lenovo Legion 5 17ACH6H Right SSD Replacement, Remove the back cover: step 9, image 1 of 3 Lenovo Legion 5 17ACH6H Right SSD Replacement, Remove the back cover: step 9, image 2 of 3 Lenovo Legion 5 17ACH6H Right SSD Replacement, Remove the back cover: step 9, image 3 of 3
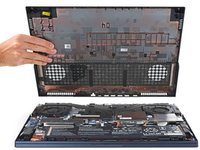
      • Lift the back cover up and remove it from the chassis.

      • During reassembly, this is a good point to power on your laptop and test all functions before sealing it up. Be sure to power your laptop back down before you continue working.

      Ask FixBot

      Add Comment

    1. Lenovo Legion 5 17ACH6H Right SSD Replacement, Disconnect the battery: step 10, image 1 of 3 Lenovo Legion 5 17ACH6H Right SSD Replacement, Disconnect the battery: step 10, image 2 of 3 Lenovo Legion 5 17ACH6H Right SSD Replacement, Disconnect the battery: step 10, image 3 of 3
      • Use the pointed end of a spudger to push each side of the battery connector to loosen it.

      Ask FixBot

      Add Comment

    2. Lenovo Legion 5 17ACH6H Right SSD Replacement: step 11, image 1 of 2 Lenovo Legion 5 17ACH6H Right SSD Replacement: step 11, image 2 of 2
      • Use the flat end of a spudger to push out and disconnect battery cable.

      Ask FixBot

      Add Comment

    1. Lenovo Legion 5 17ACH6H Right SSD Replacement, Right SSD removal: step 12, image 1 of 2 Lenovo Legion 5 17ACH6H Right SSD Replacement, Right SSD removal: step 12, image 2 of 2
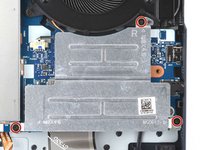
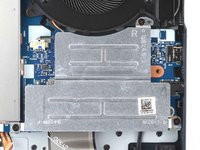
      • Use a Phillips screwdriver to remove the three 5 mm PH00 screws securing the right SSD shield to the motherboard.

      • During reassembly, make sure the hole on the top of the shield aligns with the post on the chassis.

      Ask FixBot

      Add Comment

    2. Lenovo Legion 5 17ACH6H Right SSD Replacement, Remove the SSD shield: step 13, image 1 of 3 Lenovo Legion 5 17ACH6H Right SSD Replacement, Remove the SSD shield: step 13, image 2 of 3 Lenovo Legion 5 17ACH6H Right SSD Replacement, Remove the SSD shield: step 13, image 3 of 3
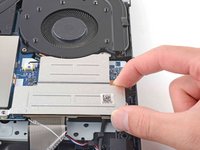
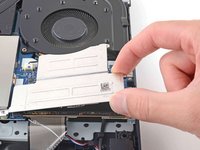
      • Grab the SSD shield and lift up to remove it.

      Ask FixBot

      Add Comment

    3. Lenovo Legion 5 17ACH6H Right SSD Replacement: step 14, image 1 of 2 Lenovo Legion 5 17ACH6H Right SSD Replacement: step 14, image 2 of 2
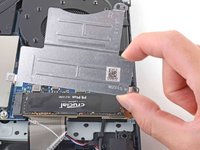
      • Use a Phillips screwdriver to remove the 2.8 mm PH1 screw securing the SSD to the motherboard.

      • The SSD will spring up to about 30˚ when the screw is removed.

      Ask FixBot

      Add Comment

    4. Lenovo Legion 5 17ACH6H Right SSD Replacement, Remove the right SSD: step 15, image 1 of 3 Lenovo Legion 5 17ACH6H Right SSD Replacement, Remove the right SSD: step 15, image 2 of 3 Lenovo Legion 5 17ACH6H Right SSD Replacement, Remove the right SSD: step 15, image 3 of 3
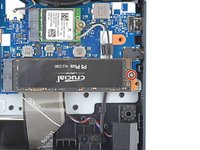
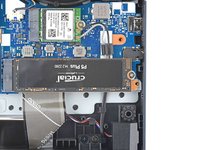
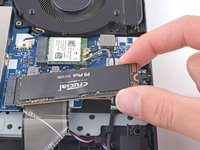
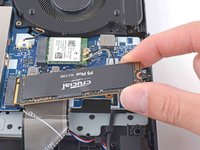
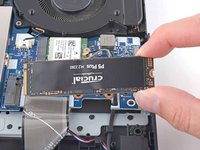
      • Grip the edges of the SSD near the screw indent.

      • Gently pull to remove the SSD.

      Ask FixBot

      Add Comment

Conclusion

To reassemble your device, follow these instructions in reverse order.

Take your e-waste to an R2 or e-Stewards certified recycler.

Repair didn’t go as planned? Try some basic troubleshooting, or ask our Lenovo Legion Answers community for help.

Cancel: I did not complete this guide.

5 other people completed this guide.

Chayton Ritter

Member since: 08/21/20

27,833 Reputation

105 Guides authored

0 Guide Comments

Add Comment

View Statistics:

Past 24 Hours: 6

Past 7 Days: 33

Past 30 Days: 157

All Time: 16,693