Free Shipping on Domestic Orders $75+

iPad Pro 13" Front Camera Removal

Prerequisite Only
This is a prerequisite-only guide! This guide is part of another procedure and isn’t meant to be used alone.

What you need

    1. iPad Pro 13" Front Camera Removal, Remove the front camera bracket cover: step 1, image 1 of 3 iPad Pro 13" Front Camera Removal, Remove the front camera bracket cover: step 1, image 2 of 3 iPad Pro 13" Front Camera Removal, Remove the front camera bracket cover: step 1, image 3 of 3
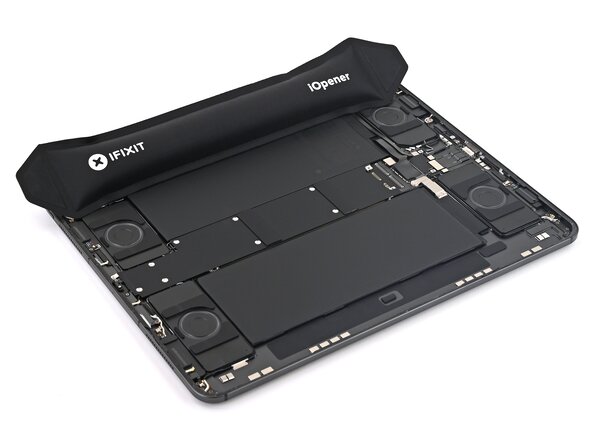
      • Use a heated iOpener, hair dryer, or heat gun to soften the adhesive securing the long, black rubber cover below the front camera assembly.

      • Use tweezers or your fingers to pry up and remove the cover from the right side. Work slowly to avoid tearing it—it'll be reused later.

      • Leave the smaller rubber cover to the left of the front camera assembly in place.

      Ask FixBot

      Add Comment

    2. iPad Pro 13" Front Camera Removal, Remove the front camera bracket: step 2, image 1 of 1
      • Use a JCIS or JIS 00 screwdriver to remove the four screws securing the front camera bracket:

      • Two 2.0 mm‑long screws on either edge.

      • The left edge screw is hidden by the smaller black rubber cover. Peel up only the loose portion on its left edge to access the screw.

      • Two 1.3 mm‑long screws in the center of the bracket.

      Ask FixBot

      Add Comment

    3. iPad Pro 13" Front Camera Removal: step 3, image 1 of 2 iPad Pro 13" Front Camera Removal: step 3, image 2 of 2
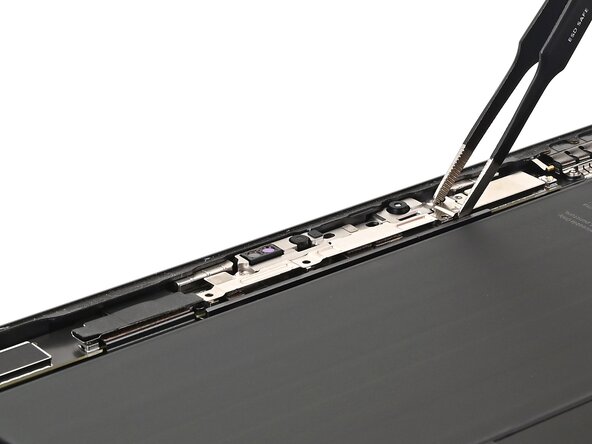
      • Use tweezers or your fingers to lift and remove the front camera bracket.

      Ask FixBot

      Add Comment

    4. iPad Pro 13" Front Camera Removal, Disconnect the front camera module: step 4, image 1 of 2 iPad Pro 13" Front Camera Removal, Disconnect the front camera module: step 4, image 2 of 2
      • Use the point of a spudger to pry up and disconnect the front camera module's leftmost press connector.

      Ask FixBot

      Add Comment

    5. iPad Pro 13" Front Camera Removal: step 5, image 1 of 2 iPad Pro 13" Front Camera Removal: step 5, image 2 of 2
      • Be careful not to damage the sockets on the board in this step. The connectors are glued together and more difficult to disconnect.

      • Use the flat end of a spudger to pry up and disconnect the front camera module's two central press connectors. Insert the spudger underneath the top edge of each connector.

      Ask FixBot

      Add Comment

    6. iPad Pro 13" Front Camera Removal, Remove the front camera screws: step 6, image 1 of 1
      • Use a Torx Plus 3IP screwdriver to remove the two 2.0 mm‑long screws securing the front camera assembly.

      • Standard Torx also works. Use T3 or T4 and apply constant, downward force to prevent stripping.

      Ask FixBot

      Add Comment

    7. iPad Pro 13" Front Camera Removal, Remove the front camera: step 7, image 1 of 3 iPad Pro 13" Front Camera Removal, Remove the front camera: step 7, image 2 of 3 iPad Pro 13" Front Camera Removal, Remove the front camera: step 7, image 3 of 3
      • The front camera module has thermal compound underneath its left side. Leave it in place for reassembly.

      • Use your fingers or a spudger to pry up and remove the front camera assembly from its right edge.

      Ask FixBot

      Add Comment

Finish Line

Cancel: I did not complete this guide.

Nick Schultz

Member since: 03/24/24

65,240 Reputation

343 Guides authored

0 Guide Comments

Add Comment

View Statistics:

Past 24 Hours: 1

Past 7 Days: 4

Past 30 Days: 16

All Time: 111