Introduction
Diese Anleitung zeigt dir, wie du das RAM am 21,5" Intel iMac EMC 3068 austauschen kannst.
Einige Bilder zeigen einen 2015er iMac, der sich in kaum sichtbaren Details unterscheidet. Diese Unterschiede beeinflussen den Reparaturverlauf nicht.
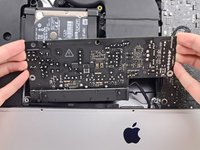
Diese Anleitung ist mit "potenziell gefährlich" markiert, da es notwendig ist, an einem Netzteil mit großen Kondensatoren zu hantieren. Ziehe den Stecker aus der Steckdose und halte die Einschalttaste mindestens 10 Sekunden lang gedrückt, um so die Kondensatoren zu entladen. Fasse die Platine nur an den Kanten an und berühre keine Bauteile.
What you need
-
Tool used on this step:iMac Intel 21.5" Cardboard Service Wedge$4.99
-
Wenn du die iFixit-Reparaturhilfe aus Karton verwendest, dann baue sie zuerst mit Hilfe dieser Anleitung zusammen.
-
Bevor du beginnst an deinem iMac zu arbeiten: Ziehe den Netzstecker, drücke und halte den Ausschaltknopf für mindestens zehn Sekunden. Dadurch werden die Kondensatoren im Netzteil entladen.
-
-
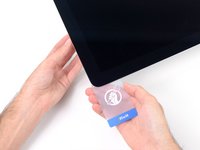
Tool used on this step:Plastic Cards$2.99
-
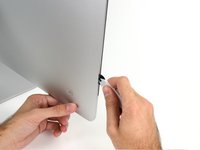
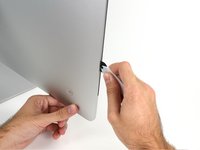
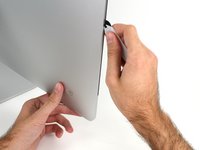
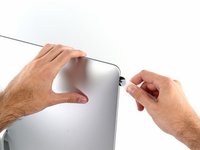
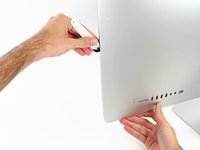
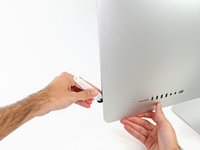
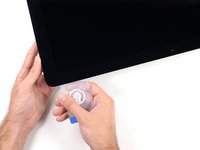
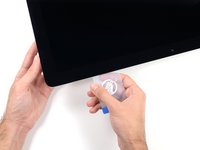
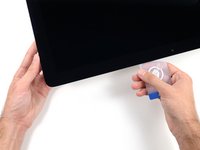
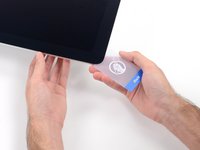
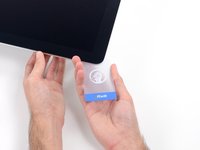
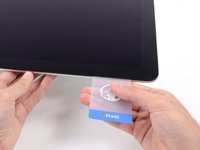
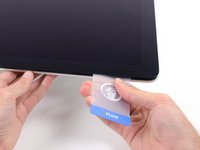
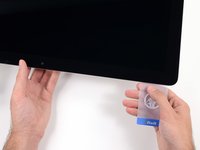
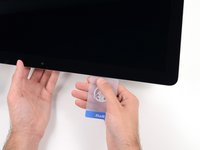
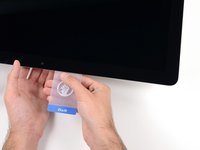
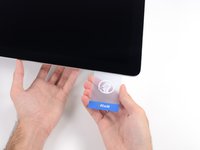
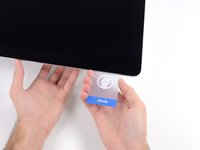
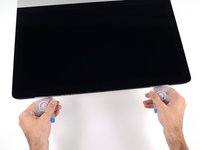
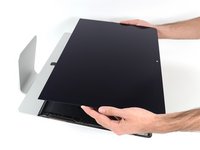
Beginne in der oberen rechten Ecke und zwänge eine Kunststoffkarte zwischen Display und Rahmen.
-
-
-
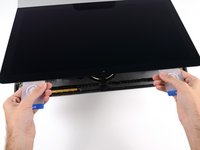
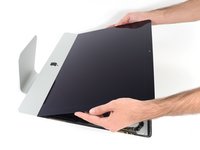
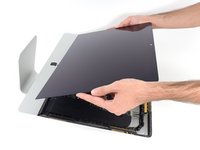
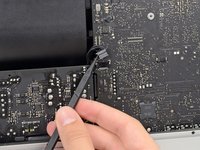
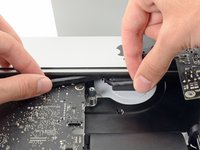
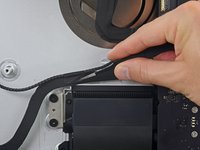
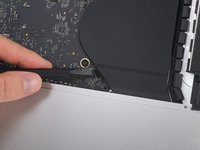
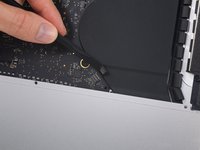
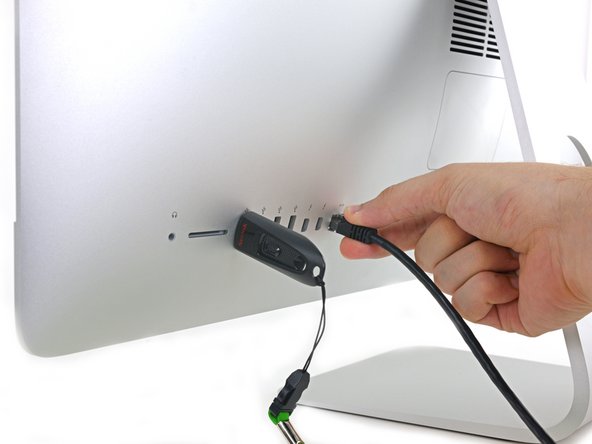
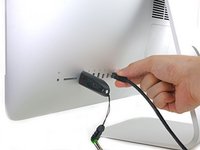
Halte das Display mit einer Hand fest und löse mit der anderen Hand das Kabel der Stromversorgung des Displays.
-
-
-
-
Entferne folgende fünf Kreuzschlitzschrauben, welche die untere Auflagestütze befestigen:
-
Vier 3,2 mm Schrauben
-
Eine 1,7 mm Schraube
-
-
-
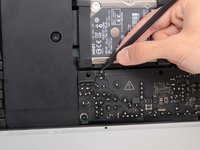
Entferne folgende Torx T10 Schrauben welche die Festplattenhalterungen am iMac befestigen:
-
Zwei 21 mm Schrauben
-
Eine 9 mm Schraube
-
Eine 27 mm Schraube
-
-
-
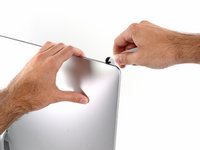
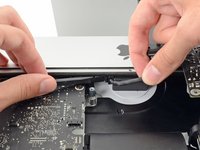
Drücke abwechselnd mit der Spudgerspitze an jeder Seite des Kabelsteckers der Einschalttaste und lasse ihn so allmählich aus seinem Anschluss herauswandern.
-
-
-
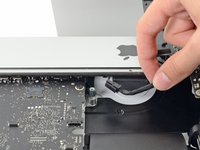
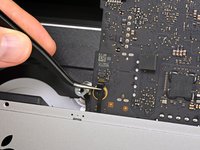
Um das Kabel abzutrennen, musst du die Verriegelung auf der Rückseite des Steckers, hinter dem Logic Board, drücken, dann kannst du den Stecker gerade herausziehen.
-
-
-
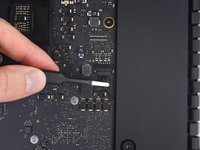
Drücke die Raste an der Seite des Netzkabelsteckers mit dem flachen Ende des Spudgers nach innen.
-
Während du die Raste mit dem Spudger gedrückt hältst, kannst du das Netzkabel fassen und den Stecker gerade aus seinem Anschluss herausziehen.
-
-
-
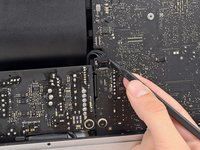
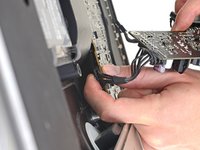
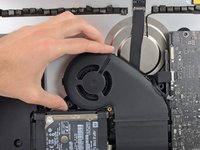
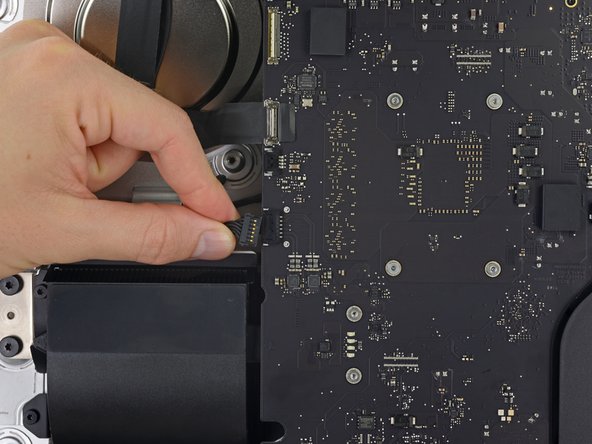
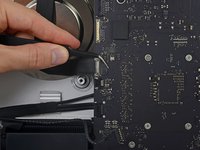
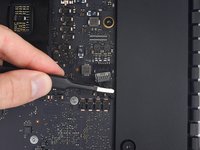
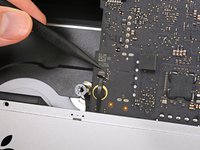
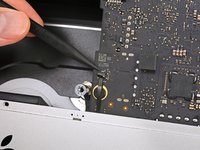
Ziehe den Stecker am Lüfterkabel gerade aus seinem Anschluss auf dem Logic Board.
-
-
-
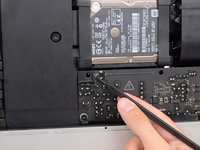
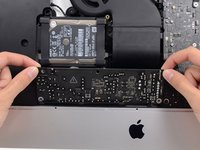
Hebe die Festplatte am Rand in der Nähe des Logic Board an und ziehe sie etwas aus ihrem Sitz.
-
-
-
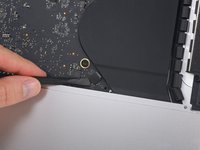
Entferne die 7,3 mm Torx T8 Schraube, welche den Festplatteneinschub am Rückgehäuse befestigt.
-
-
-
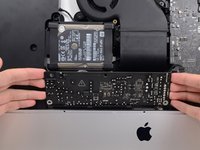
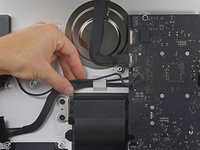
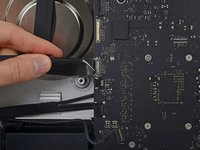
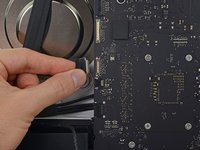
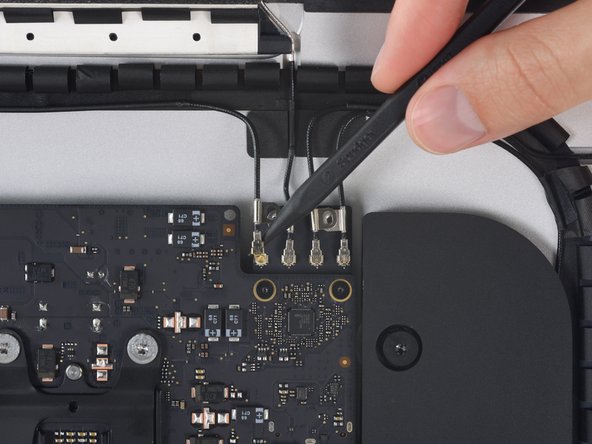
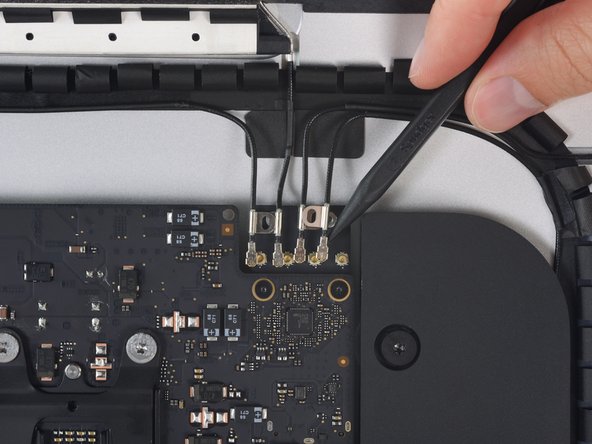
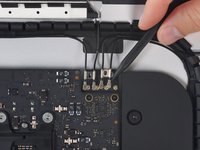
Ziehe das Kabel des linken Lautsprechers vorsichtig aus dem Abschluss auf dem Logic Board heraus.
-
-
-
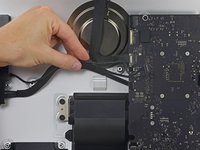
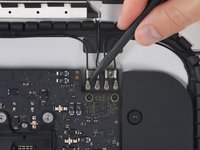
Klappe den Sicherungsbügel am ZIF Anschluss des Mikrofonflachbandkabels mit dem flachen Ende des Spudgers hoch.
-
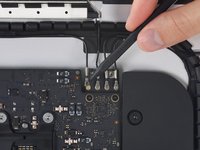
Ziehe vorsichtig das Mikrofonkabel gerade aus dem Anschluss heraus.
-
-
-
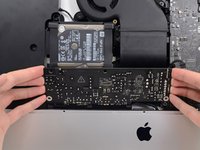
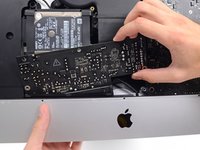
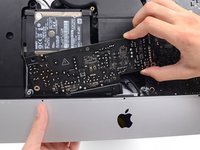
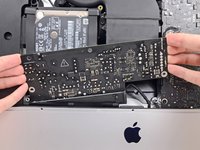
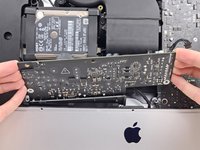
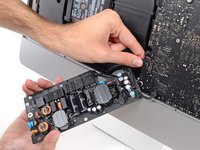
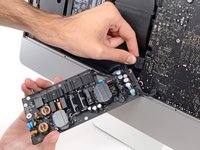
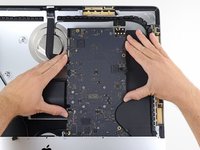
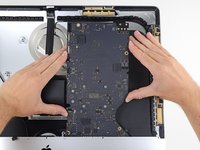
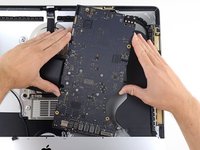
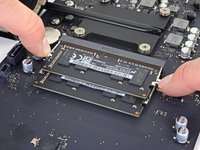
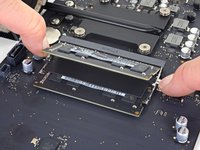
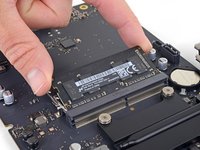
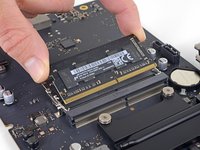
Fasse das Logic Board nur an den Kanten an und drehe es herum, so dass du an die beiden RAM Module herankommst.
-
Zwei Klammern halten das RAM Modul fest , eine auf jeder Seite. Drücke mit den Fingern die beiden Klammern weg vom RAM Modul.
-


Um dein Gerät wieder zusammenzusetzen, folge den Schritten in umgekehrter Reihenfolge.
Cancel: I did not complete this guide.
31 other people completed this guide.
Special thanks to these translators:
100%

These translators are helping us fix the world! Want to contribute?
Start translating ›

11 Guide Comments
Thought this was going to be extremely difficult but once I started with these instructions it actually wasn’t that bad, though it took me a slow and careful 3.5 hours. Was quite nervous handling that power supply though!
Excellent guide! It took me about 1.5 hours to complete the entire RAM+SSD installation. The iMac has massively improved and feels like a new computer: way way faster than before, with a 1TB Samsung SSD, 32GB of RAM and a brand new installation of macOS Catalina. Be very careful with the I/O ports, especially with the USB-C/Thunderbolt ones: the alignment is critical, as well as the correct position of the logic board in relation to the case. Even a slight misalignment can impede the USB-C plug from fully entering the port, making it hard or impossible to establish a connection.
Great guide… took a mediocre “unupgradable” iMac to 32 GB ram and new SSD HD (the other guide… but crosses with this). Excellent guidance. If you have to fix or upgrade anything else while changing out the RAM, this is the time and performed steps to do it with. Read the others to see the variations you need to do (like steps to clone the HD before changing, etc.) but as deep as you get into this machine, it exposes pretty much everything. Again, great work!
Wonderful guide! I was afraid that I am not going to make it since I don’t have a lot of experience in such things but following the steps carefully, paying attention to every detail, has led me to successfully upgrade my iMac 3086 with 1TB SSD and 32GB RAM. I was really afraid that this RAM upgrade probably won’t work because it’s been said on everymac.com that the maximum is 16GB and I’ve read somewhere about a person whose iMac didn’t even start after such intervention. I decided to purchase Crucial 2x16GB at 2400MHz, despite that the iMac has 2133Mhz bus. I trust this brand and I’ve already upgraded my MacBook Pro 15” mid-2012 with the same brand, again pushing the RAM beyond the official limits and it still works great. The SSD I put here is also from Crucial and I just turned on the iMac and it runs like never before! The whole procedure took me a bit over 2 hours. Thanks for the great work with this guide!!!
Hey Alex, I’m also worried about the compatibility of the Crucial RAM, so could you tell me which especific model did you use, please?