
Xbox Series S Power Supply Replacement

What you need

  1. Xbox Series S Power Supply Replacement, Peel off the sticker coverings: step 1, image 1 of 3 Xbox Series S Power Supply Replacement, Peel off the sticker coverings: step 1, image 2 of 3 Xbox Series S Power Supply Replacement, Peel off the sticker coverings: step 1, image 3 of 3
    • Before you start this guide, turn off the Xbox and unplug any cables from it.

    • Use tweezers to peel off the two white screw covers located on the bottom corners of the back panel.

  2. Xbox Series S Power Supply Replacement, Remove the back panel screws: step 2, image 1 of 1
    Tool used on this step:
    Magnetic Project Mat
    $19.95
    Buy
    • Use a T8 Torx driver to remove the two 10 mm-long screws securing the back panel to the bottom panel.

    • Throughout this repair, keep track of each screw and make sure it goes back exactly where it came from.

  3. Xbox Series S Power Supply Replacement, Remove the bottom panel: step 3, image 1 of 3 Xbox Series S Power Supply Replacement, Remove the bottom panel: step 3, image 2 of 3 Xbox Series S Power Supply Replacement, Remove the bottom panel: step 3, image 3 of 3
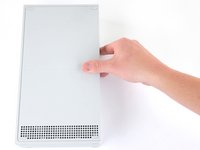
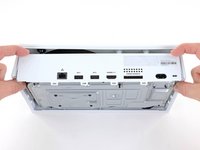
    • Slide the bottom panel horizontally toward the back of the console until it comes to a stop.

    • This slides the clips out of the slots on the plastic case.

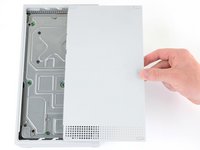
    • Lift straight up and remove the bottom panel from the plastic case.

  4. Xbox Series S Power Supply Replacement, Remove the plastic case screws: step 4, image 1 of 1
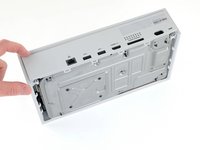
    • Use a T10 Torx driver to remove the seven 51 mm-long screws securing the chassis to the plastic case.

  5. Xbox Series S Power Supply Replacement, Remove the plastic case: step 5, image 1 of 3 Xbox Series S Power Supply Replacement, Remove the plastic case: step 5, image 2 of 3 Xbox Series S Power Supply Replacement, Remove the plastic case: step 5, image 3 of 3
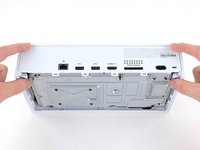
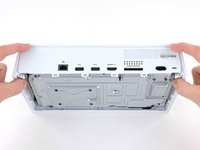
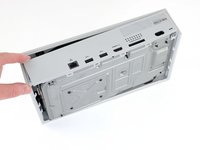
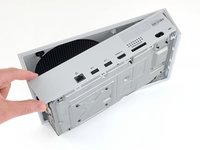
    • With the bottom of the Xbox facing you, pull the two bottom-rear corners of the plastic case away from each other.

    • As you pull the corners apart, slide the back panel towards the bottom of the device. This releases the back panel from the plastic case.

    • The back panel should now settle on top of the clips on the back of the plastic case.

    • The back panel is permanently attached to the aluminum chassis.

    • Do not attempt to fully remove the chassis from the plastic case with this technique. You may risk breaking your case.

  6. Xbox Series S Power Supply Replacement: step 6, image 1 of 3 Xbox Series S Power Supply Replacement: step 6, image 2 of 3 Xbox Series S Power Supply Replacement: step 6, image 3 of 3
    • Pull the bottom-left corner away from the chassis while swinging the chassis away from the plastic case.

    • You may need to lift the chassis to free it from the clips on the bottom-front of the plastic case during this process.

    • Remove the plastic case from the chassis.

  7. Xbox Series S Power Supply Replacement, Remove the power supply screws: step 7, image 1 of 1
    • Use a T10 Torx driver to remove the seven 11.3 mm-long screws securing the power supply to the chassis.

  8. Xbox Series S Power Supply Replacement, Remove the upper chassis: step 8, image 1 of 2 Xbox Series S Power Supply Replacement, Remove the upper chassis: step 8, image 2 of 2
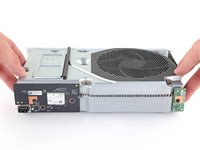
    • Flip the device over.

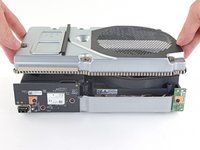
    • Lift the upper chassis straight up to remove it.

  9. Xbox Series S Power Supply Replacement, Remove the power supply: step 9, image 1 of 3 Xbox Series S Power Supply Replacement, Remove the power supply: step 9, image 2 of 3 Xbox Series S Power Supply Replacement, Remove the power supply: step 9, image 3 of 3
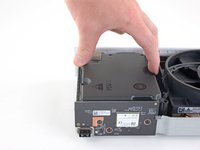
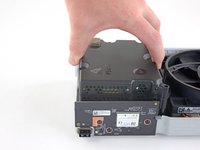
    • Lift the power supply straight up to disconnect it from the motherboard.

    • Remove the power supply.

Conclusion

To reassemble your device, follow these instructions in reverse order.

Take your e-waste to an R2 or e-Stewards certified recycler.

Repair didn’t go as planned? Try some basic troubleshooting, or ask our Answers community for help.

8 other people completed this guide.

Robert Boyd

Member since: 02/01/21

26,500 Reputation

94 Guides authored

6 Comments

What is the name of the blue paste on the power supply, and does it need to be replaced?

Luna - Reply

I'd assume this is thermal putty used in lieu of thermal pads. Similar to thermal pads, there is usually no need to replace or reapply them unless their position doesn't line up with the components that need heat conduction—in this case the storage expansion module. Hope this helps!

Manuel Haeussermann -

I’m still getting the same results as soon as I load into a game the xbox turns off.

Leo Hernandez - Reply

Looks like we both wasted 75 dollars on a Microsoft money laundering scheme designed to breakdown and not be capable of repair.

midickcrosoft -

Worked like a charm

Mikeymadrigal3 - Reply

Add Comment

View Statistics:

Past 24 Hours: 16

Past 7 Days: 111

Past 30 Days: 519

All Time: 15,917