Introduction
Follow this guide to remove and replace the fan on a Xbox Series S.
What you need
-
Tool used on this step:Tweezers$4.99
-
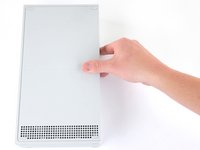
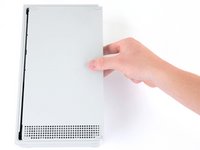
Use tweezers to peel off the two white screw covers located on the bottom corners of the back panel.
 Ask FixBot
-
-
Tool used on this step:Magnetic Project Mat$19.95
-
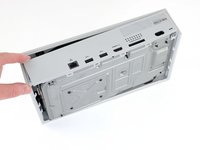
Use a T8 Torx driver to remove the two 10 mm-long screws securing the back panel to the bottom panel.
-
-
-
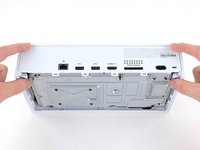
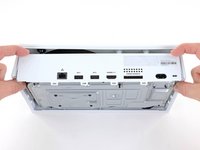
Slide the bottom panel horizontally toward the back of the console until it comes to a stop.
-
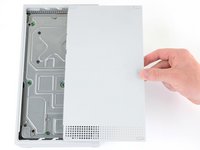
Lift straight up and remove the bottom panel from the plastic case.
-
-
-
Use a T10 Torx driver to remove the seven 51 mm-long screws securing the chassis to the plastic case.
-
-
-
-
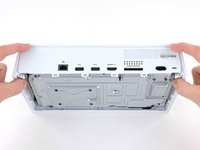
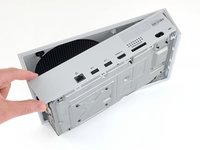
With the bottom of the Xbox facing you, pull the two bottom-rear corners of the plastic case away from each other.
-
As you pull the corners apart, slide the back panel towards the bottom of the device. This releases the back panel from the plastic case.
-
-
-
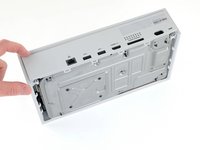
Pull the bottom-left corner away from the chassis while swinging the chassis away from the plastic case.
-
Remove the plastic case from the chassis.
-
-
-
Use a T10 Torx driver to remove the seven 11.3 mm-long screws securing the power supply to the chassis.
-
-
-
Flip the device over.
-
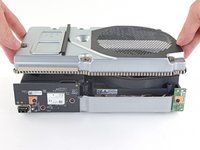
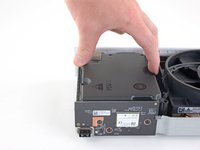
Lift the upper chassis straight up to remove it.
-
-
-
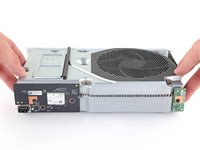
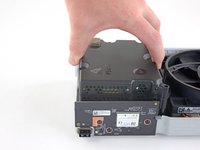
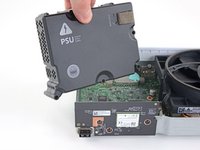
Lift the power supply straight up to disconnect it from the motherboard.
-
Remove the power supply.
-
-
-
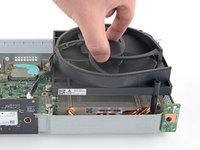
Use a T10 Torx driver to remove the two 11.3 mm-long screws securing the fan to the chassis.
-
-
-
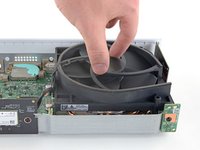
Flip the device over.
-
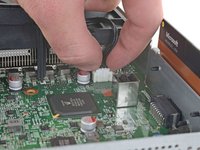
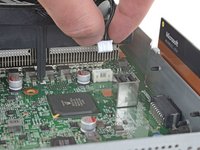
Use your fingers to pull and disconnect the fan connector from its motherboard socket.
-


To reassemble your device, follow these instructions in reverse order.
Take your e-waste to an R2 or e-Stewards certified recycler.
Repair didn’t go as planned? Try some basic troubleshooting, or ask our Answers community for help.
Cancel: I did not complete this guide.
37 other people completed this guide.
