
Xbox One Elite Controller (Model 1698) Joystick Potentiometer Replacement

What you need

  1. Xbox One Elite Controller (Model 1698) Joystick Potentiometer Replacement, Show me the Screws!: step 1, image 1 of 2 Xbox One Elite Controller (Model 1698) Joystick Potentiometer Replacement, Show me the Screws!: step 1, image 2 of 2
    • You can remove the side panels with a pry tool.

    • You don't need to remove the rubber. The rubber on this controller was already bad

  2. Xbox One Elite Controller (Model 1698) Joystick Potentiometer Replacement, Removing the back panel screws: step 2, image 1 of 1
    • Remove the 5 Torx Security Bit (TR9) screws

  3. Xbox One Elite Controller (Model 1698) Joystick Potentiometer Replacement, Popping that back panel off: step 3, image 1 of 3 Xbox One Elite Controller (Model 1698) Joystick Potentiometer Replacement, Popping that back panel off: step 3, image 2 of 3 Xbox One Elite Controller (Model 1698) Joystick Potentiometer Replacement, Popping that back panel off: step 3, image 3 of 3
    • Pry the panel next to the 3.5mm port

    • Be careful to not rip the ribbon shown in the next step

  4. Xbox One Elite Controller (Model 1698) Joystick Potentiometer Replacement, Warning Carefully remove the ribbon: step 4, image 1 of 2 Xbox One Elite Controller (Model 1698) Joystick Potentiometer Replacement, Warning Carefully remove the ribbon: step 4, image 2 of 2
    • Be careful to not rip the ribbon cable

    • You can pop the connector up to remove the ribbon easily

    • Ribbon Cable

  5. Xbox One Elite Controller (Model 1698) Joystick Potentiometer Replacement, Screws on controller motherboard: step 5, image 1 of 1
    • Remove the 2 Torx (T6) screws

  6. Xbox One Elite Controller (Model 1698) Joystick Potentiometer Replacement, Desolder wires from motherboard: step 6, image 1 of 2 Xbox One Elite Controller (Model 1698) Joystick Potentiometer Replacement, Desolder wires from motherboard: step 6, image 2 of 2
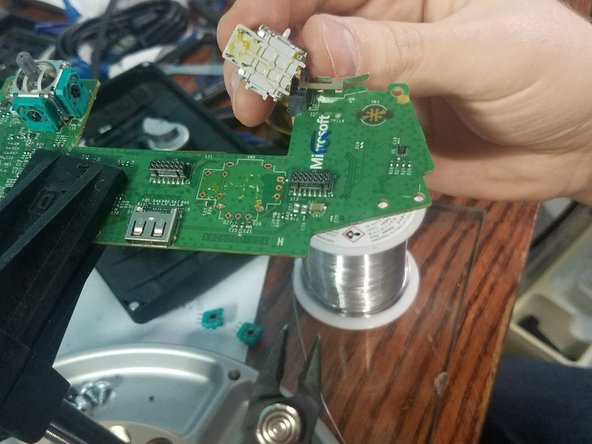
    • Desolder the 4 wires on each side, these control the vibrations and the RT LT

  7. Xbox One Elite Controller (Model 1698) Joystick Potentiometer Replacement, Remove the motherboard: step 7, image 1 of 2 Xbox One Elite Controller (Model 1698) Joystick Potentiometer Replacement, Remove the motherboard: step 7, image 2 of 2
    • Pull up from the "top" side of the controller on the sister board.

  8. Xbox One Elite Controller (Model 1698) Joystick Potentiometer Replacement, Desolder Button Pins: step 8, image 1 of 1
    • These can be difficult to desolder. It is best to use a 650F degree soldering iron, if you have this available. If you are having trouble desoldering it with the old solder, adding fresh solder makes removal of the old solder easier.

    • Desolder the 4 pins holding the pins in on the left analog stick.

    • Desolder the 4 pins holding the button in on the right analog stick.

  9. Xbox One Elite Controller (Model 1698) Joystick Potentiometer Replacement, Desolder potentiometers: step 9, image 1 of 1
    • A 650F degree soldering iron is required. If you are having trouble desoldering these components, add new solder to make removal easier.

    • First, desolder the left analog stick.

    • Next, desolder the 6 pins for the right analog stick.

  10. Xbox One Elite Controller (Model 1698) Joystick Potentiometer Replacement, Desolder Ground Pins: step 10, image 1 of 1
    • A 650 watt soldering iron is required. If you are having trouble desoldering the old analog sticks, add fresh solder to make removal of the old analog sticks easier.

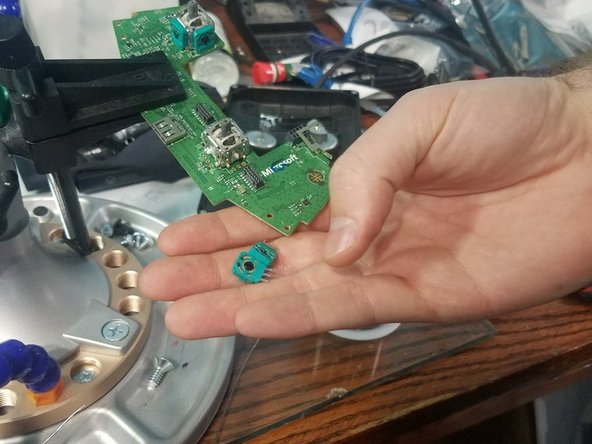
    • Desolder the left analog stick from the controller.

    • Desolder the right analog stick from the controller.

  11. Xbox One Elite Controller (Model 1698) Joystick Potentiometer Replacement, Troubleshooting: step 11, image 1 of 3 Xbox One Elite Controller (Model 1698) Joystick Potentiometer Replacement, Troubleshooting: step 11, image 2 of 3 Xbox One Elite Controller (Model 1698) Joystick Potentiometer Replacement, Troubleshooting: step 11, image 3 of 3
    • If you are having trouble desoldering here are the two things you can do to solve.

    • You can use a screw driver to open the resistors and then remove them from the board allowing access to the ground pins

    • Now using snips you can cut the pins and then use a soldering iron to both sides and remove the cut pin gently with pliers

EasyAsABC123

Member since: 01/22/10

2,407 Reputation

5 Guides authored

View Statistics:

Past 24 Hours: 23

Past 7 Days: 90

Past 30 Days: 403

All Time: 48,945