
TI-84 Plus CE Recovery Techniques.

What you need

Video Overview

  1. TI-84 Plus CE Recovery Techniques., Did you try turning it off and on again?: step 1, image 1 of 3 TI-84 Plus CE Recovery Techniques., Did you try turning it off and on again?: step 1, image 2 of 3 TI-84 Plus CE Recovery Techniques., Did you try turning it off and on again?: step 1, image 3 of 3
    • Some problems can be fixed simply by powercycling.

    • Press [2nd]

    • Press [on]

    • The calculator should now be turned off.

    • Press [on] to turn it back on.

  2. TI-84 Plus CE Recovery Techniques., Perform a RAM reset with the reset button.: step 2, image 1 of 3 TI-84 Plus CE Recovery Techniques., Perform a RAM reset with the reset button.: step 2, image 2 of 3 TI-84 Plus CE Recovery Techniques., Perform a RAM reset with the reset button.: step 2, image 3 of 3
    • This will clear all information stored in the RAM!

    • Information stored in the Archive will be safe.

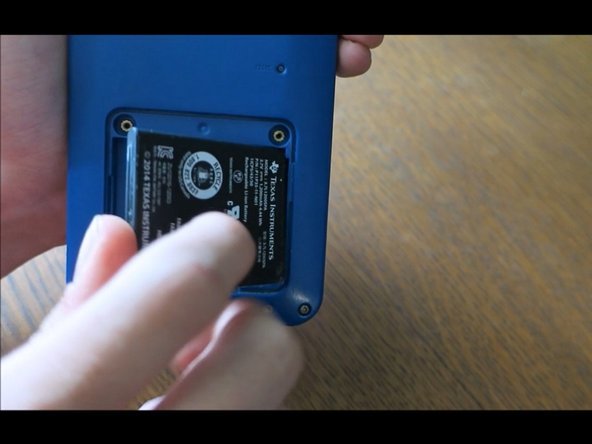
    • Remove the slide case and turn your calculator on its back.

    • Take a pencil or thin object and press and hold the 'reset' button on the back of the calculator for at least 2 seconds, then release.

    • After a second or two, your calculator should say "RAM Cleared".

  3. TI-84 Plus CE Recovery Techniques., Perform a RAM reset by removing the battery.: step 3, image 1 of 3 TI-84 Plus CE Recovery Techniques., Perform a RAM reset by removing the battery.: step 3, image 2 of 3 TI-84 Plus CE Recovery Techniques., Perform a RAM reset by removing the battery.: step 3, image 3 of 3
    • This will clear all information in the RAM!

    • Information stored in the Archive will be safe.

    • Refer to this guide for instructions on how to remove the battery.

    • Reinsert the battery after a few seconds.

    • Your calculator should automatically turn on and display a "RAM Cleared" screen.

  4. TI-84 Plus CE Recovery Techniques., Re-install the OS (Part 1:  TI Connect CE): step 4, image 1 of 3 TI-84 Plus CE Recovery Techniques., Re-install the OS (Part 1:  TI Connect CE): step 4, image 2 of 3 TI-84 Plus CE Recovery Techniques., Re-install the OS (Part 1:  TI Connect CE): step 4, image 3 of 3
    • This will clear all information stored in the RAM!

    • This could erase information stored in the Archive!

    • Backup your information to your computer or another calculator if you want to save information.

    • Install TI Connect CE. (If you already have it installed, you can skip this step)

    • If you are running either MacOS or Windows, go to TI's website and download TI Connect CE.

    • If you are running Linux, install TiLP.

    • Open TI Connect CE.

    • Connect your calculator to your computer via a USB to mini USB adapter.

  5. TI-84 Plus CE Recovery Techniques., Re-install the OS (Part 2: Initializing the calculator): step 5, image 1 of 3 TI-84 Plus CE Recovery Techniques., Re-install the OS (Part 2: Initializing the calculator): step 5, image 2 of 3 TI-84 Plus CE Recovery Techniques., Re-install the OS (Part 2: Initializing the calculator): step 5, image 3 of 3
    • All warnings from Part 1 still apply.

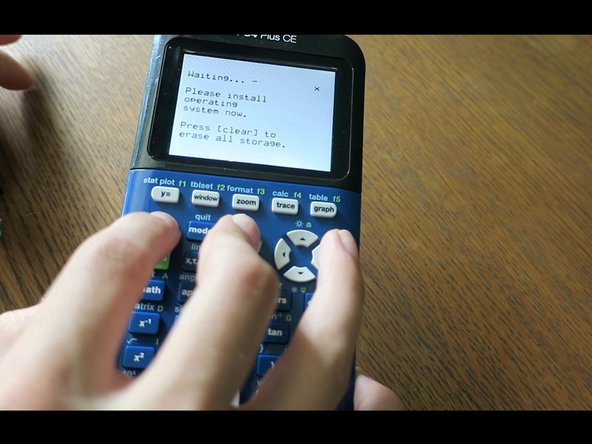
    • Press and hold [2nd] and [del].

    • Turn the calculator over; press and release the 'reset' button.

    • Keep holding down [2nd] and [del]!

    • If you did it correctly, you will see a 'Install OS now' screen. If you do not see this screen, try again.

    • Once you see this screen, you can release [2nd] and [del].

  6. TI-84 Plus CE Recovery Techniques., Re-install the OS (Part 3: Sending the OS): step 6, image 1 of 3 TI-84 Plus CE Recovery Techniques., Re-install the OS (Part 3: Sending the OS): step 6, image 2 of 3 TI-84 Plus CE Recovery Techniques., Re-install the OS (Part 3: Sending the OS): step 6, image 3 of 3
    • All warnings from Part 1 still apply.

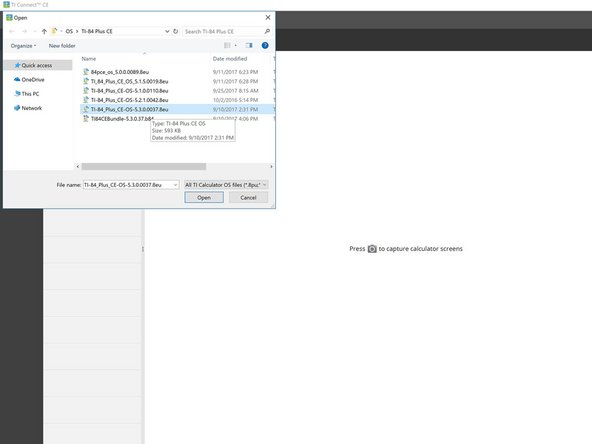
    • Download the most recent OS from TI's website.

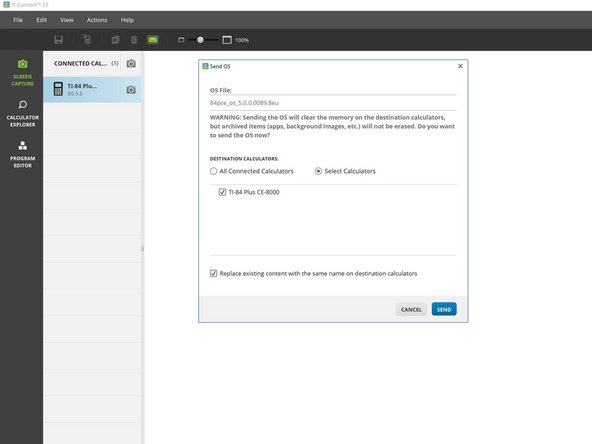
    • In TI Connect CE, click on 'Actions', then 'send OS/Bundle to calculators...'

    • Navigate to where you saved the OS and select it.

    • Wait for it to load, then click 'send'.

    • This will take a few minutes.

  7. TI-84 Plus CE Recovery Techniques., Re-install the OS (Part 4: Recieving the OS): step 7, image 1 of 3 TI-84 Plus CE Recovery Techniques., Re-install the OS (Part 4: Recieving the OS): step 7, image 2 of 3 TI-84 Plus CE Recovery Techniques., Re-install the OS (Part 4: Recieving the OS): step 7, image 3 of 3
    • DO NOT UNPLUG THE CABLE DURING TRANSFER! You risk damaging your calculator!

    • All warnings from Part 1 still apply.

    • Wait for the OS to send and verify.

    • Once finished, you should see a 'RAM cleared' screen. Your calculator is now finished installing the OS.

TheLastMillennial

Member since: 07/18/18

3,205 Reputation

2 Guides authored

View Statistics:

Past 24 Hours: 63

Past 7 Days: 400

Past 30 Days: 1,575

All Time: 53,313