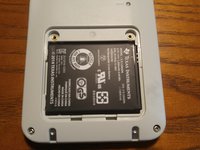
Texas Instruments TI-84 Plus CE Battery Replacement

What you need

  1. Texas Instruments TI-84 Plus CE Battery Replacement, TI-84 Plus CE Battery Repair: step 1, image 1 of 1
    • Make sure your TI-84 Plus CE is off before starting the repair.

    • Any objects in your RAM will be removed if the battery is taken out. To ensure your objects are safe, archive them or back them up to a computer.

  2. Texas Instruments TI-84 Plus CE Battery Replacement, Battery door: step 2, image 1 of 3 Texas Instruments TI-84 Plus CE Battery Replacement, Battery door: step 2, image 2 of 3 Texas Instruments TI-84 Plus CE Battery Replacement, Battery door: step 2, image 3 of 3
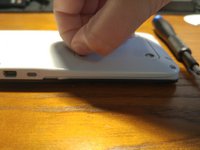
    • Locate the 2 Philips screws on the back of your calculator, as outlined.

    • These screws are not to be confused with the 6 Torx T6 scews surrounding the calculator.

    • With a Philips 0 or 00 screwdriver, unscrew the two screws.

    • The two Philips screws will not come out of the battery door, and will stay attached. Do not attempt to remove them completely.

  3. Texas Instruments TI-84 Plus CE Battery Replacement, Battery door lift: step 3, image 1 of 3 Texas Instruments TI-84 Plus CE Battery Replacement, Battery door lift: step 3, image 2 of 3 Texas Instruments TI-84 Plus CE Battery Replacement, Battery door lift: step 3, image 3 of 3
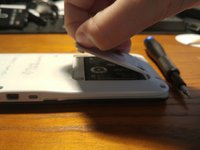
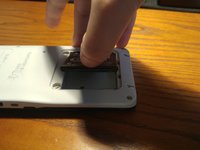
    • Lift the battery door by grasping one of the two screws that are unscrewed, and pulling upwards.

    • Be sure to lift gently, as little force is needed to get the battery door removed.

  4. Texas Instruments TI-84 Plus CE Battery Replacement, Battery removal using your nails: step 4, image 1 of 3 Texas Instruments TI-84 Plus CE Battery Replacement, Battery removal using your nails: step 4, image 2 of 3 Texas Instruments TI-84 Plus CE Battery Replacement, Battery removal using your nails: step 4, image 3 of 3
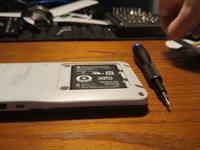
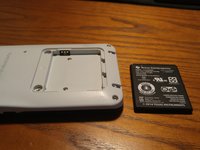
    • Pull out the battery using your nails, by inserting your nail into the small cut out, and lifting up on the battery.

    • As an alternative, you can use an opening tool. Go to Step 5 to see the procedure.

  5. Texas Instruments TI-84 Plus CE Battery Replacement, Battery removal using an opening tool: step 5, image 1 of 3 Texas Instruments TI-84 Plus CE Battery Replacement, Battery removal using an opening tool: step 5, image 2 of 3 Texas Instruments TI-84 Plus CE Battery Replacement, Battery removal using an opening tool: step 5, image 3 of 3
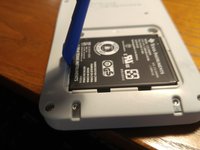
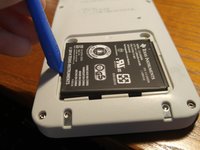
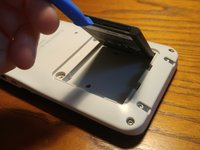
    • Put your opening tool in the small opening as described in the photos.

    • Gently pull out the battery. You may need to hold your calculator to prevent your calculator from sliding around your working surface.

Conclusion

To reassemble your device, follow these instructions in reverse order.

12 other people completed this guide.

o355

Member since: 03/26/16

489 Reputation

1 Guide authored

8 Comments

Where can I buy the replacement batteries?

louis liu - Reply

Hey louis liu, I updated this guide with a link on where to buy the battery. It cost about $12 USD on Amazon: http://a.co/d/iTK2V0v

TheLastMillennial - Reply

I replaced the battery and it worked for 1 week, the battery icon was on the screen which didn’t seem to get charged in full. After a week, the calc didn’t work anymore.

Lesly Simon - Reply

So you're saying when you try charge the calculator it doesn't charge the battery at all? Does the LED next to the charging port turn solid orange when you plug it in? Have you tried a different power source (i.e. your computer or a wall block) or a different cable?

TheLastMillennial -

Add Comment

View Statistics:

Past 24 Hours: 9

Past 7 Days: 151

Past 30 Days: 733

All Time: 45,372