
Sony ULT WEAR Touch Sensor Replacement

Michelle Pride and 3 other contributors
Last updated on Jun 13, 2025
Views: 787
View statistics:
- Past 24 Hours:
- 3
- Past 7 Days:
- 22
- Past 30 Days:
- 97
- All Time:
- 787
Comments: 0
No one has left comments on this guide. Will you be first?
Go to guide commentsCompleted: 0 1
No one has marked this guide "completed." Will you be the first?
1 person has marked this guide "completed." It's you — great job!
Favorites: 0 1
No one has favorited (and subscribed to) this guide. Will you be the first?
1 person has favorited (and subscribed to) this guide — and that's you!
Introduction
Go to step 1 ↓Having trouble operating the touch controls such as volume, playback, or calls? The sensor might be failing and may need to be replaced. Follow this simple guide to replace the touch sensor connected to the mainboard via a ribbon cable in your Sony ULT Wear.
Before replacing the sensor, make sure the surface of it is clean. Oil, dirt, or residue can interfere with conductivity if overlooked and create false unresponsiveness. Also, make sure the problem is not a loose connection by applying light pressure to the housing. Before you begin, power device off to protect yourself and circuit components.
What you need
Tools
-
Spudger4.9


-
-
-
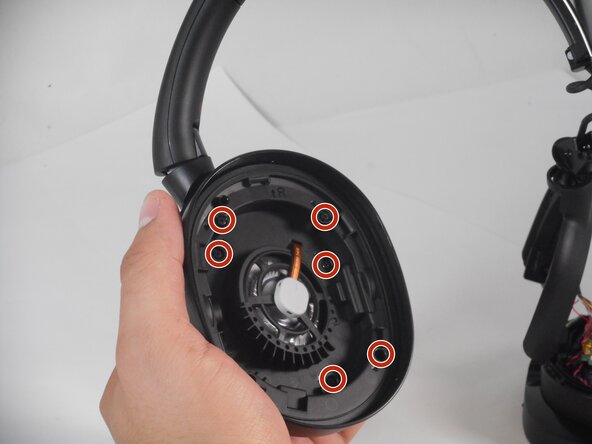
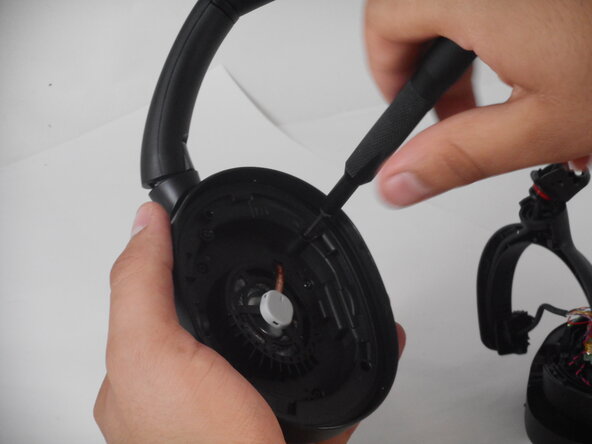
Remove the right ear pad by gently prying it open with the spudger.
-
Remove the eight 4.3 mm screws on the driver.
 Ask FixBot
-
-
-
-
Flip over the right ear pad to expose the outer shell.
-
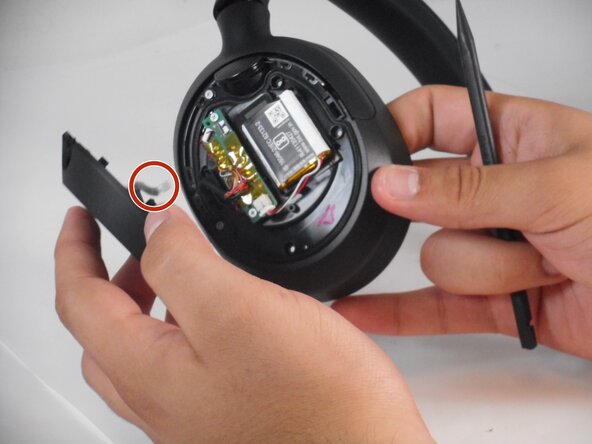
Carefully pry the outer shell with the plastic spudger, making sure to keep the ribbon cable intact.
-
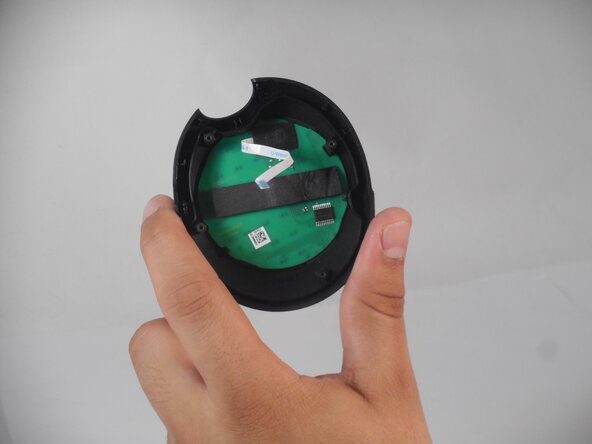
Disconnect the ribbon cable from the board.
-
The sensor is attached to the outer shell, from here the sensor can be replaced.
-
-





To reassemble your device, follow the above steps in reverse order.
Take your e-waste to an R2 or e-Stewards certified recycler.
Repair didn’t go as planned? Try some basic troubleshooting or ask our Answers community for help.

Team

University of Memphis, Team 2-3, Sneed Spring 2025 Member of University of Memphis, Team 2-3, Sneed Spring 2025
UM-SNEED-S25S2G3
3 Members
72 Guides authored
