Installing Sony Handycam DCR-DVD103 LCD Screen

What you need

  1. Installing Sony Handycam DCR-DVD103 LCD Screen, Battery: step 1, image 1 of 1
    • Images do not show the camera's battery.

    • On the back of the camera beneath the viewfinder, locate the battery pack.

    • Press the small button.

    • Slide the switch forward.

  2. Installing Sony Handycam DCR-DVD103 LCD Screen: step 2, image 1 of 1
    • Remove the battery from the camera.

    • To reinsert the battery, slide the battery into the camera.

  3. Installing Sony Handycam DCR-DVD103 LCD Screen, Outer Cover: step 3, image 1 of 1
    • Using a #00 Phillips screwdriver, remove the six 4.5 mm screws from the camera's bottom.

  4. Installing Sony Handycam DCR-DVD103 LCD Screen: step 4, image 1 of 2 Installing Sony Handycam DCR-DVD103 LCD Screen: step 4, image 2 of 2
    • Remove the three 4.5 mm screws beneath the battery.

    • Remove the 2.9 mm screw from the right corner.

    • Remove the two 4.5 mm screws from the battery's right wall.

    • Images do not show the battery.

  5. Installing Sony Handycam DCR-DVD103 LCD Screen: step 5, image 1 of 1
    • Remove the 4.5 mm screw under the output flap on the front of the camera below the lens.

  6. Installing Sony Handycam DCR-DVD103 LCD Screen: step 6, image 1 of 2 Installing Sony Handycam DCR-DVD103 LCD Screen: step 6, image 2 of 2
    • Remove the two 4.5 mm screws at the top of the camera.

    • Remove the 4.5 mm screw from the disk side of the camera (next to the lens).

  7. Installing Sony Handycam DCR-DVD103 LCD Screen: step 7, image 1 of 2 Installing Sony Handycam DCR-DVD103 LCD Screen: step 7, image 2 of 2
    • Extend the gray viewfinder, then gently remove the black plastic casing.

    • Caution: Plastic pieces are fragile.

  8. Installing Sony Handycam DCR-DVD103 LCD Screen: step 8, image 1 of 1
    • Remove the two 2.9 mm screws under the black plastic casing.

  9. Installing Sony Handycam DCR-DVD103 LCD Screen: step 9, image 1 of 1
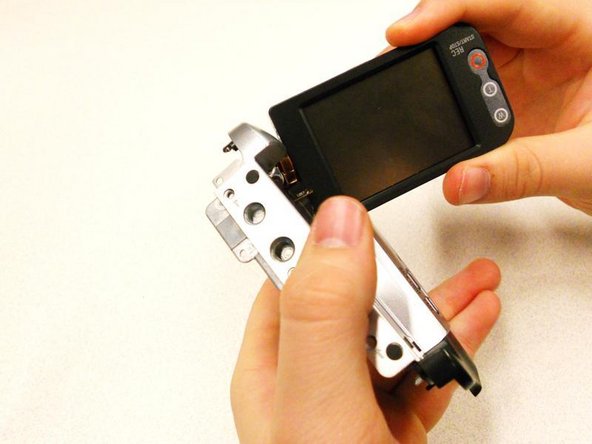
    • Gently pull apart the outer silver case and screen.

    • Remove the copper wire strip to detach the case from the camera.

  10. Installing Sony Handycam DCR-DVD103 LCD Screen, LCD Screen: step 10, image 1 of 1
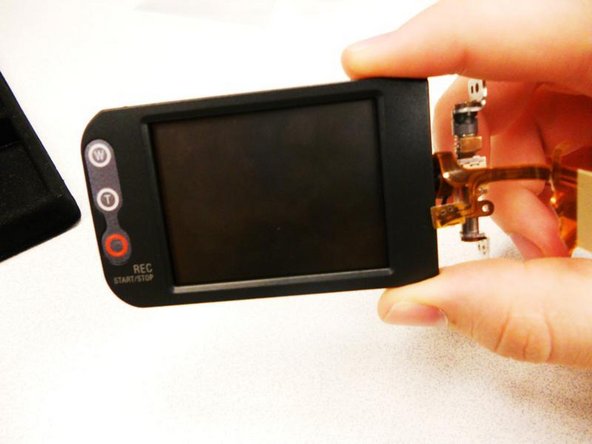
    • First remove the copper strip holding that connects the outer casing to the entire of the camera. Use caution when removing the wire because if to much force is used it may tear.

  11. Installing Sony Handycam DCR-DVD103 LCD Screen: step 11, image 1 of 3 Installing Sony Handycam DCR-DVD103 LCD Screen: step 11, image 2 of 3 Installing Sony Handycam DCR-DVD103 LCD Screen: step 11, image 3 of 3
    • Now remove four 2.9mm screws from the L-shaped circuit board. They are marked with red circles in the slide.

    • Then remove the three wire strips connected to the camera so you can pull off the L-shaped circuit board. They are marked with yellow boxes in the slide.

    • Next remove the one wire strip that is connected to the bottom of the circuit board.

  12. Installing Sony Handycam DCR-DVD103 LCD Screen: step 12, image 1 of 1
    • The next step is to remove the two 4.5mm screws that are marked with red circles in the slide.

    • Then remove the small black holder from above the base of the LCD screen.

  13. Installing Sony Handycam DCR-DVD103 LCD Screen: step 13, image 1 of 1
    • Now you must remove one 2.9mm screw from the base of the LCD screen.

  14. Installing Sony Handycam DCR-DVD103 LCD Screen: step 14, image 1 of 1
    • Next remove the silver and black, front and back casings from the base of the screen. They are pointed out with red boxes in the slide.

    • Then remove one copper strip from the inside of the bottom case. The strip is marked with a yellow box.

  15. Installing Sony Handycam DCR-DVD103 LCD Screen: step 15, image 1 of 1
    • Now remove two 5.4mm screws, that are holding the screen to the cover, from the base of the LCD.

  16. Installing Sony Handycam DCR-DVD103 LCD Screen: step 16, image 1 of 3 Installing Sony Handycam DCR-DVD103 LCD Screen: step 16, image 2 of 3 Installing Sony Handycam DCR-DVD103 LCD Screen: step 16, image 3 of 3
    • Next twist out the screen from the cover.

    • Be careful not to break the casing when trying to get the screen out as it does require some maneuvering.

  17. Installing Sony Handycam DCR-DVD103 LCD Screen: step 17, image 1 of 1
    • Now you must remove two 3.8mm screws from the end of the LCD.

  18. Installing Sony Handycam DCR-DVD103 LCD Screen: step 18, image 1 of 1
    • Next you must remove two 3.8mm screws from the bottom of the LCD.

  19. Installing Sony Handycam DCR-DVD103 LCD Screen: step 19, image 1 of 2 Installing Sony Handycam DCR-DVD103 LCD Screen: step 19, image 2 of 2
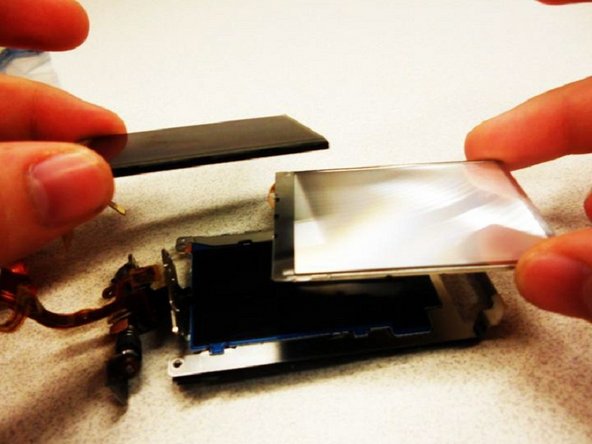
    • Now you can pull off the silver cover on the screen which will reveal the circut board from behind the screen itself.

    • Also, pull off the black tape stuck to both sides of the circuit board.

  20. Installing Sony Handycam DCR-DVD103 LCD Screen: step 20, image 1 of 1
    • Next remove three 4.5mm screws from back-side of the LCD.

  21. Installing Sony Handycam DCR-DVD103 LCD Screen: step 21, image 1 of 3 Installing Sony Handycam DCR-DVD103 LCD Screen: step 21, image 2 of 3 Installing Sony Handycam DCR-DVD103 LCD Screen: step 21, image 3 of 3
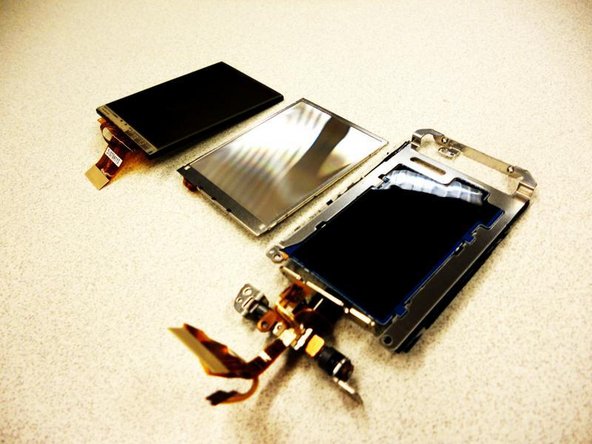
    • Finally, take out the three copper strips to remove both the screen and the back light.

    • Now you can replace what is broken.

kaitlin

Member since: 01/11/11

342 Reputation

3 Guides authored

Team

Cal Poly, Team 7-44, Regan Winter 2011 Member of Cal Poly, Team 7-44, Regan Winter 2011

CPSU-REGAN-W11S7G44

5 Members

10 Guides authored

View Statistics:

Past 24 Hours: 1

Past 7 Days: 1

Past 30 Days: 18

All Time: 8,073