Introduction
The battery of almost all electronic devices wears out over time. My Sena 30K is now 4 years old and has about 400 charging cycles behind it. Meanwhile, the battery only lasts 2 hours when I have my phone plugged in to listen to music and my mesh intercom activated at the same time. With this guide, you can replace your battery and restore your Sena's full performance.
If your battery is swollen, take appropriate precautions.
This guide describes how to open your Sena and remove most of the device to access the battery.
For optimal performance, you should calibrate your battery after completing these instructions: Charge it to 100% and let it charge for at least two more hours. Then use your Sena until it turns off due to a low battery condition. Then charge it to 100% without interruption.
What you need
-
-
Switch your Sena off and remove all connections (helmet mount / charging cable).
-
-
-
Use a Phillips screwdriver to remove the seven screws which secure the front cover:
-
Two 1.7 mm screws
-
Five 1.9 mm screws
-
-
-
-
Remove the bottom connector which connects the Sena to the helmet mount.
-
-
-
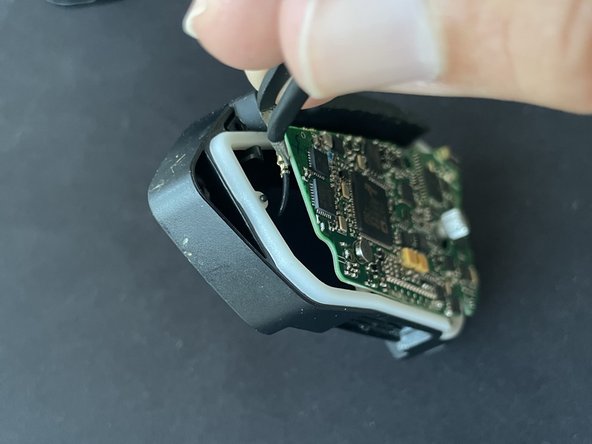
Use tweezers to remove the mesh antenna cable from the motherboard.
-
-
-
Carefully pull the motherboard off the battery board underneath.
-
-
-
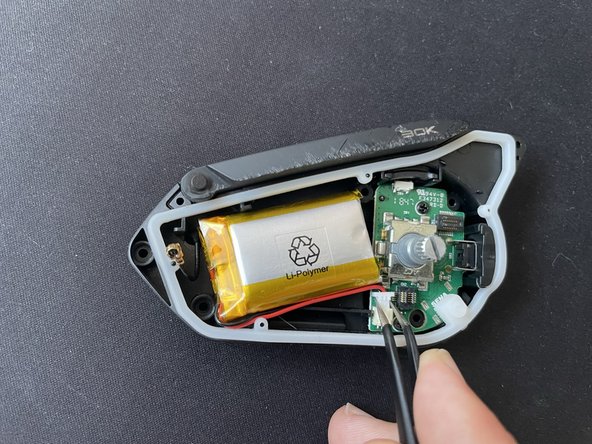
Grab the battery connector with tweezers and pull it off the battery board.
-
-
-
Separate the battery from the back cover with an opening pick.
-


To reassemble your device, follow these instructions in reverse order.
Take your e-waste to an R2 or e-Stewards certified recycler.
To reassemble your device, follow these instructions in reverse order.
Take your e-waste to an R2 or e-Stewards certified recycler.
Cancel: I did not complete this guide.
6 other people completed this guide.
Special thanks to these translators:
100%


These translators are helping us fix the world! Want to contribute?
Start translating ›
3 Comments
Klasse Anleitung!
Sehr gute Anleitung.
Damit konnte ich den Akku aus meinem Sena unfallfrei ausbauen.