Introduction
I repaired a couple of screen replacements for the Samsung Note 20
I did one that needed a back glass and one that did not.
Created a custom back glass to troll my older brother for not having a case on a brand new phone. The replacement screens had not even been created yet until now we waited for 3 weeks!
What you need
Video Overview
-
-
On this Note 20 the OLED is clearly broken and has a crack on the side.
-
The back has no damage to it so apply heat.
-
-
-
Start from the buttom straight up and down push tool in until you hit the frame you while hear a sound
-
Slide tool at angle stop at the curve
-
-
-
After loosening the buttom pull tool out.
-
Now pry with your fingers and pull up with suction cup.
-
While sticking splicer on curved edge side slowly working wiggling down the curve edge
-
Lift and wiggle the back glass off
-
-
-
Remove 6 PH000 Screws from the wireless charging pad covering the battery connection.
-
Disconnect wireless coil from connections with plastic spudger
-
Use spudger at top on the metal squeezing it under the top of the wireless charging pad bracket.
-
Lift and wiggle slowly the charging pad off while locating the battery connection
-
Battery Connection!!
-
-
-
Remove 4 PH000 Screws to the ear speaker bracket.
-
Also disconnect this connection!
-
-
-
-
Make sure its disconnected
-
Disconnect all yellow boxed connections!
-
Remove the 2 PH000 Screws holding the camera
-
Lift mainboard with spudger from ear speaker goin down using the frame as a leveler
-
-
-
Front Camera Location
-
Use straight edge blade at bottom of camera to break it loose. You can actually pull the glue/adhesive out it will come out in one chunk.
-
Lift camera out slowly
-
-
-
Remove 5 PH000 Screws for the Loudspeaker bracket
-
Use spudger to lift out bracket
-
Disconnect flex cables
-
Remove 3 Black PH000 Screws to microphoned board and charger port
-
-
-
Lift out Microphone board 1st
-
Then lift out charge port wiggling it loose
-
Good lift spot with point end of spudger at arrow location
-
Loosen Adhesive
-
-
-
Remove 2 black PH000 Screws on top right lifting flex out.
-
Remove 2 PH000 Screws on Bottom right lift flex out.
-
-
-
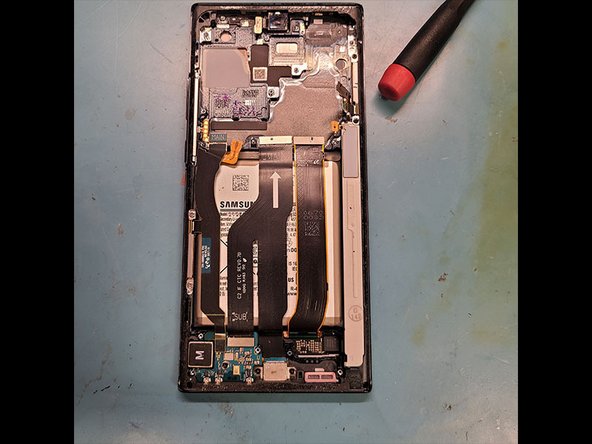
Spray with alcohol start a little pry to get alcohol under battery
-
Lift with suction cup on battery
-
Bam its out not damaged
-
-
-
Vibator
-
Frame Flex Cables
-
Charge Port goes in 1st
-
Then microphone board goes on top of charge port. Connect the flex cables
-
3 Black PH000 Screws
-
-
-
Lay out adhesive for under the battery
-
Disconnect battery
-
Connect al loose flex cables to there connections
-
-
-
Apply adhesive to back of phone lay back glass back down
-
If you have to replace back glass you have to move microphone from old back glass rear camera lens to the new back glass.
-