Free Shipping on Domestic Orders $75+

Screen Components Removal

Prerequisite Only
This is a prerequisite-only guide! This guide is part of another procedure and isn’t meant to be used alone.

What you need

    1. Screen Components Removal, Transfer screen parts: step 1, image 1 of 3 Screen Components Removal, Transfer screen parts: step 1, image 2 of 3 Screen Components Removal, Transfer screen parts: step 1, image 3 of 3
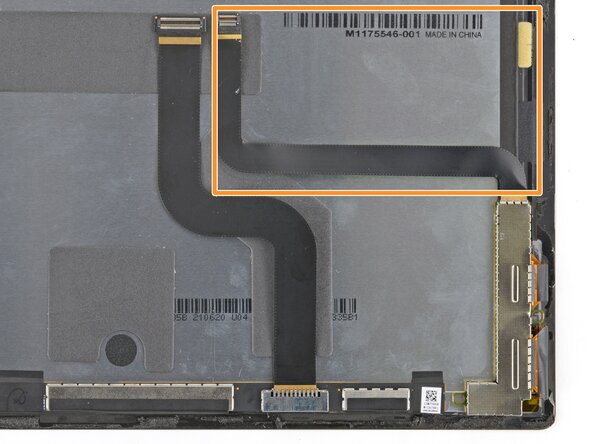
      • Compare your replacement screen to the original. You may need to transfer the following parts:

      • The skinny board located near the bottom right of the screen.

      • Two S shaped screen cables attached to the original screen.

      • If your replacement screen comes with these parts installed, you can skip down to the adhesive removal step.

      Ask FixBot

      Add Comment

    2. Screen Components Removal, Remove the screen cable cover: step 2, image 1 of 3 Screen Components Removal, Remove the screen cable cover: step 2, image 2 of 3 Screen Components Removal, Remove the screen cable cover: step 2, image 3 of 3
      • Use the point of a spudger to pry up and unclip the screen cable's metal cover.

      • Be careful not to deform the cover too much, as you'll need to reinstall it during reassembly.

      • Remove the cover.

      Ask FixBot

      Add Comment

    3. Screen Components Removal, Disconnect the screen cable: step 3, image 1 of 3 Screen Components Removal, Disconnect the screen cable: step 3, image 2 of 3 Screen Components Removal, Disconnect the screen cable: step 3, image 3 of 3
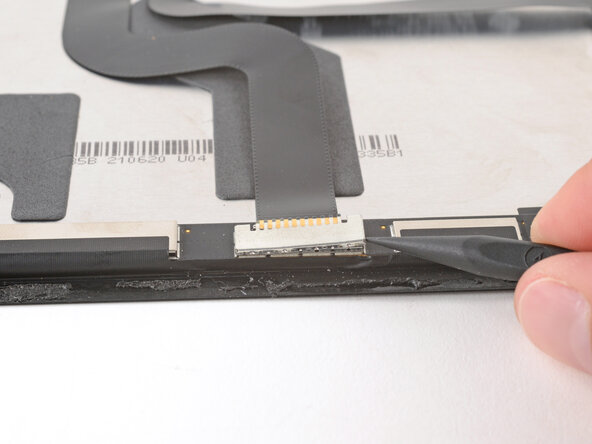
      • Use a spudger to pry up and disconnect the screen cable press connector, starting on one of the short sides and moving to the other.

      Ask FixBot

      Add Comment

    4. Screen Components Removal: step 4, image 1 of 1
      • Remove the cable and set it aside—you'll install it on your new screen later.

      Ask FixBot

      Add Comment

    5. Screen Components Removal, Remove the board cover: step 5, image 1 of 3 Screen Components Removal, Remove the board cover: step 5, image 2 of 3 Screen Components Removal, Remove the board cover: step 5, image 3 of 3
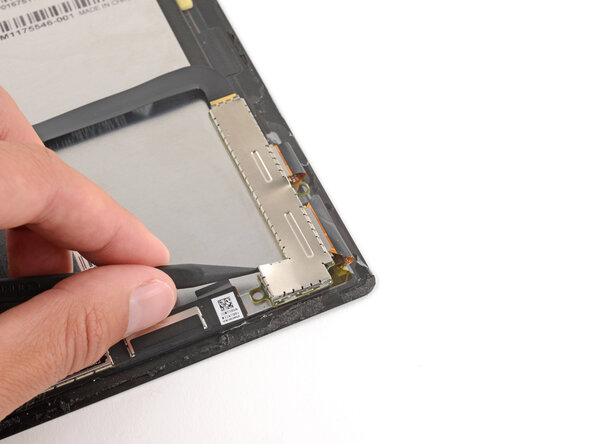
      • Use the point of a spudger to pry up and unclip the edges of the metal cover on the board (near the bottom right of the screen).

      • Be careful not to deform the cover too much, as you'll need to reinstall it during reassembly.

      • Remove the cover.

      Ask FixBot

      Add Comment

    6. Screen Components Removal, Disconnect the board: step 6, image 1 of 3 Screen Components Removal, Disconnect the board: step 6, image 2 of 3 Screen Components Removal, Disconnect the board: step 6, image 3 of 3
      • Use the flat end of a spudger to lift the hinged, locking flaps on the board's two ZIF connectors.

      Ask FixBot

      Add Comment

    7. Screen Components Removal: step 7, image 1 of 3 Screen Components Removal: step 7, image 2 of 3 Screen Components Removal: step 7, image 3 of 3
      • Use the point of a spudger to slide both cables completely out of their sockets.

      • You can leave the ribbon cable connected to the top edge of the board, since you're going to be transferring it.

      Ask FixBot

      Add Comment

    8. Screen Components Removal, Remove the board: step 8, image 1 of 3 Screen Components Removal, Remove the board: step 8, image 2 of 3 Screen Components Removal, Remove the board: step 8, image 3 of 3
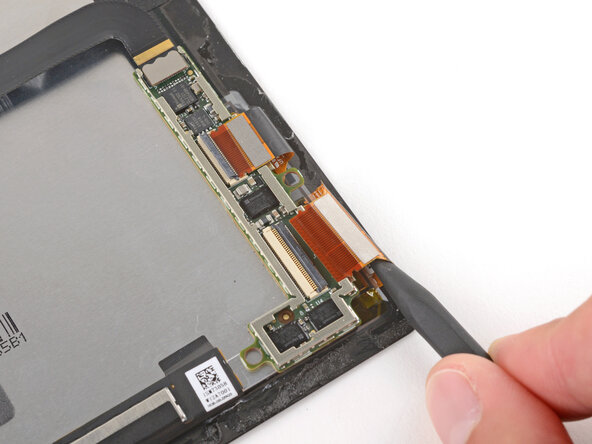
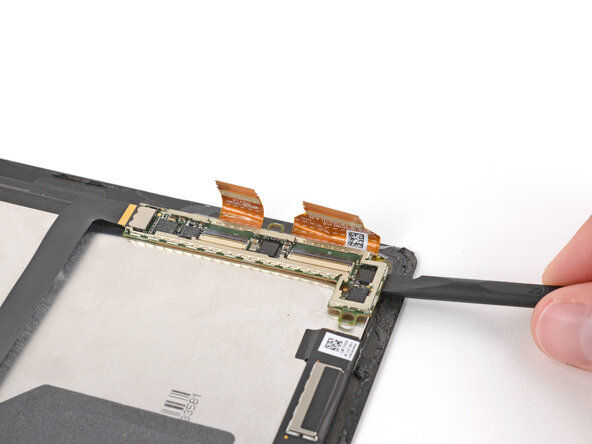
      • Mild adhesive secures the board to the screen.

      • Slide the flat end of a spudger under the board and lift to remove it.

      Ask FixBot

      Add Comment

Finish Line

Cancel: I did not complete this guide.

Spencer Day

Member since: 09/14/22

205,788 Reputation

1,267 Guides authored

0 Guide Comments

Add Comment

View Statistics:

Past 24 Hours: 0

Past 7 Days: 1

Past 30 Days: 3

All Time: 35