Introduction
In this guide, we will open up the back case of the laptop and replace the hard drive. Replacing the hard drive is a quick way to solve any issues resulting from common hard drive issues including; a slow startup, random crashes, corrupted files, and problems with opening files and media. A faulty drive can result from many things, including running at total or near-full capacity.
If the original hard drive has been tested to be causing issues, it's a good idea to replace it and possibly upgrade storage capacity.
Note: Before replacing a hard drive, it is a good idea to have a backup of files stored on it, if files are needed to be recovered afterward.
What you need
-
-
Start off by powering down your laptop, equipping your anti-static wrist strap, and positioning your laptop upside-down.
-
-
-
Now it's time to break out your blue opening tool! Pry off the bottom cover, which is now attached only by plastic clasps.
-
-
-
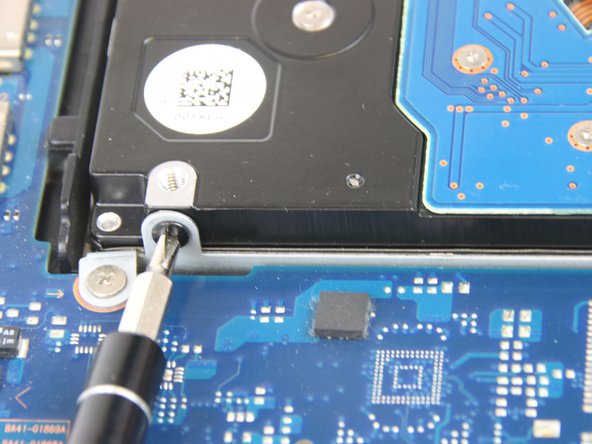
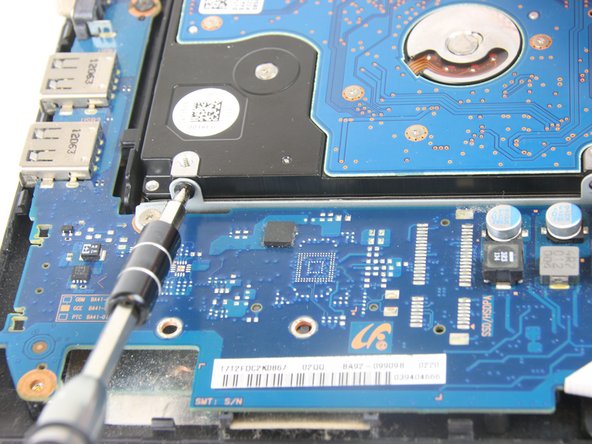
Use a Phillips #0 screwdriver to remove the four 4.5mm bracket screws holding the hard drive onto the motherboard.
-
Take care not to remove the screws holding the bracket to the motherboard, as you will need that bracket to attach the next hard drive.
-
-
-
Last, lift up the hard drive and gently pull off the SATA cable that is currently connected to the board. The hard drive is now fully removed from the laptop.
-


Team

USF Tampa, Team 2-4, Nance Fall 2016 Member of USF Tampa, Team 2-4, Nance Fall 2016
USFT-NANCE-F16S2G4
4 Members
5 Guides authored