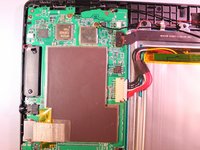
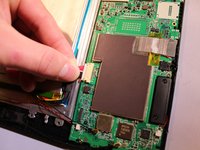
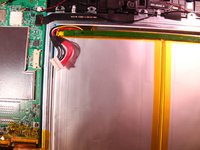
Power Removal

What you need

  1. Power Removal, Power Removal: step 1, image 1 of 3 Power Removal, Power Removal: step 1, image 2 of 3 Power Removal, Power Removal: step 1, image 3 of 3
    • Before working on the device, make sure the device is off and not plugged into any power source for safety reasons. Failure to comply could result in injury.

    • Place the device on a firm surface with the device screen facing down.

  2. Power Removal: step 2, image 1 of 2 Power Removal: step 2, image 2 of 2
    • Remove 2, 6.1 mm Phillips J000 screws from the back of the device.

    • If any screws are stripped, refer to the ifixit guide for how to remove a stripped screw. How to Remove a Stripped Screw

  3. Power Removal: step 3, image 1 of 3 Power Removal: step 3, image 2 of 3 Power Removal: step 3, image 3 of 3
    Tool used on this step:
    Plastic Cards
    $2.99
    Buy
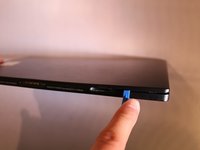
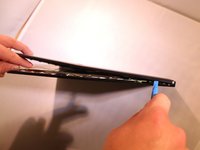
    • Using a plastic tool and the plastic card, gently pry off the back cover.

  4. Power Removal: step 4, image 1 of 3 Power Removal: step 4, image 2 of 3 Power Removal: step 4, image 3 of 3
    • Using tweezers, remove the electrical connector that connects to the battery to remove the power to the battery.

Conclusion

To reassemble your device, follow these instructions in reverse order.

One other person completed this guide.

One Comment

Thank you. It got me along to open my Venturer. Wish I could send a picture of the failure.

Tl Sn - Reply

Add Comment

View Statistics:

Past 24 Hours: 0

Past 7 Days: 1

Past 30 Days: 7

All Time: 669