PlayStation Move Battery Replacement

What you need

  1. PlayStation Move  Battery Replacement, Battery: step 1, image 1 of 1
    • Using a Phillips #0 screwdriver, remove the four 10mm screws from the corners of the trigger button.

  2. PlayStation Move  Battery Replacement: step 2, image 1 of 3 PlayStation Move  Battery Replacement: step 2, image 2 of 3 PlayStation Move  Battery Replacement: step 2, image 3 of 3
    • Using a Phillips #0 screwdriver, remove the four 10mm screws located at the back of the device.

  3. PlayStation Move  Battery Replacement: step 3, image 1 of 2 PlayStation Move  Battery Replacement: step 3, image 2 of 2
    • Insert the plastic opening tool at the indent along the front and back surfaces of the controller.

    • Gently use a forward and backward motion to safely pop open the cover.

    • Use your hands to further pull it apart and pop it open.

  4. PlayStation Move  Battery Replacement: step 4, image 1 of 2 PlayStation Move  Battery Replacement: step 4, image 2 of 2
    • Once the device is opened, lift the battery out of the black plastic holder.

    • Carefully pull the battery out and ensure that it's wires are still connected to the inside.

  5. PlayStation Move  Battery Replacement: step 5, image 1 of 3 PlayStation Move  Battery Replacement: step 5, image 2 of 3 PlayStation Move  Battery Replacement: step 5, image 3 of 3
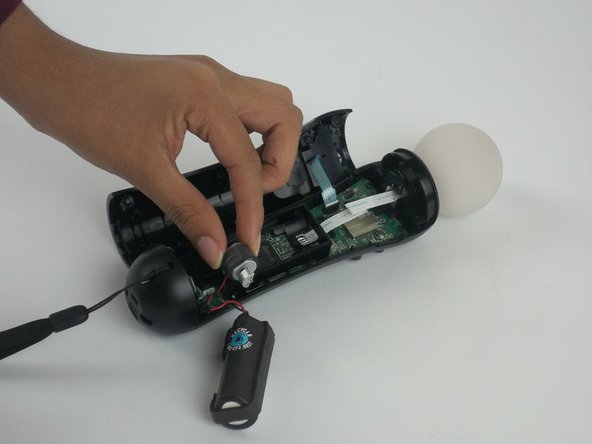
    • Using a Phillips head screwdriver, remove the 9mm screw located to the right of the battery, which is connected to the inner plastic frame.

    • Use the plastic opening tool to carefully take out the grey cylindrical piece (vibrator) that is also attached to a wire.

  6. PlayStation Move  Battery Replacement: step 6, image 1 of 2 PlayStation Move  Battery Replacement: step 6, image 2 of 2
    • Gently pull out the small cylindrical grey piece (vibrator).

    • Removing this piece makes it easier to access the wire connection of the battery and remove it.

  7. PlayStation Move  Battery Replacement: step 7, image 1 of 2 PlayStation Move  Battery Replacement: step 7, image 2 of 2
    • Use tweezers to remove the small piece with a cylindrical top that is located to the left of the inner plastic frame.

  8. PlayStation Move  Battery Replacement: step 8, image 1 of 3 PlayStation Move  Battery Replacement: step 8, image 2 of 3 PlayStation Move  Battery Replacement: step 8, image 3 of 3
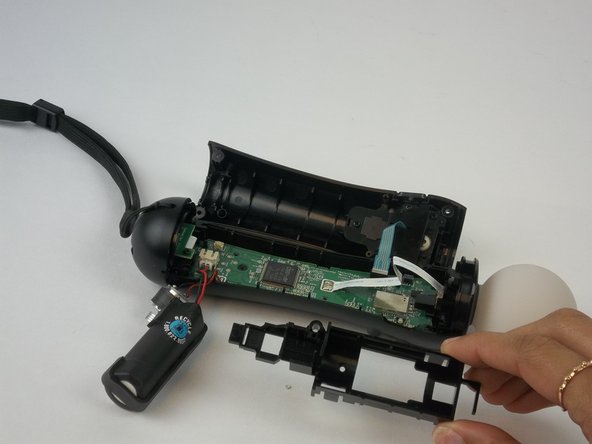
    • Use one hand to hold the bottom of the device, and the other hand to squeeze the inner plastic frame.

    • While squeezing the inner plastic frame, pull it up and then pull it towards you to detach it.

    • While removing the frame, be extremely careful because it could damage the frame or the motherboard.

  9. PlayStation Move  Battery Replacement: step 9, image 1 of 2 PlayStation Move  Battery Replacement: step 9, image 2 of 2
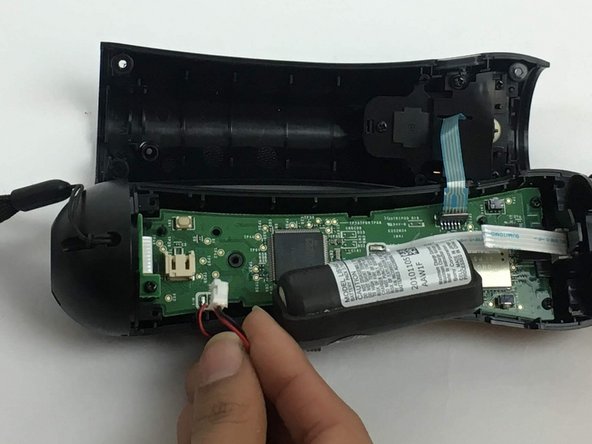
    • Gently pull on the end of the red and black wires which is closest to the connector to disconnect the battery.

Jenelle Mohammed

Member since: 09/28/16

217 Reputation

1 Guide authored

Team

USF Tampa, Team 3-3, Passmore Fall 2016 Member of USF Tampa, Team 3-3, Passmore Fall 2016

USFT-PASSMORE-F16S3G3

4 Members

8 Guides authored

View Statistics:

Past 24 Hours: 2

Past 7 Days: 13

Past 30 Days: 73

All Time: 14,280