Introduction
Follow this guide to replace a broken or faulty disc drive in your PlayStation 5 Slim. You can also use this guide to install a disc drive if your PlayStation doesn't have one.
If you're having issues playing disc-based games, Blu-rays, or DVDs, you may need to replace your disc drive.
An internet connection is required to set up and pair your new disc drive.
-
-
Shut down your console.
-
Unplug all cables and accessories.
-
Remove any stands supporting your device.
-
-
-
Firmly pull up the front edge of the disc drive cover to release the clips.
-
Remove the cover.
-
-
-
-
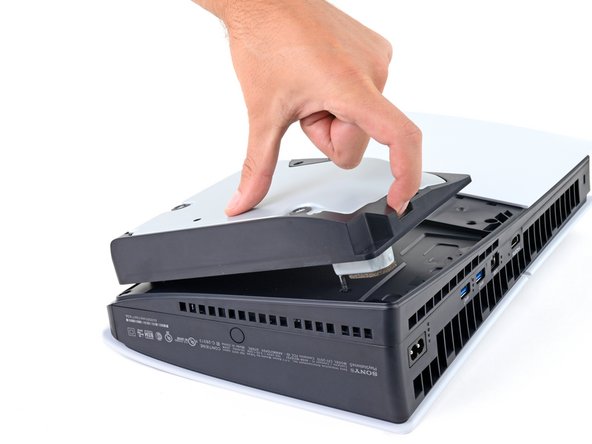
Use the cutout on the bottom right corner of the disc drive to lift its right edge and disconnect it.
-
Remove the disc drive.
-
-
-
Place the hooks on the drive's left edge into their cutouts on the frame and lay the drive onto your PlayStation.
-
Firmly press the right edge into place so the disc drive connector slides into its socket on the bottom right corner.
-


To reassemble your device, follow these instructions in reverse order.
Take your e-waste to an R2 or e-Stewards certified recycler.
Repair didn’t go as planned? Try some basic troubleshooting, or ask our Answers community for help.
To reassemble your device, follow these instructions in reverse order.
Take your e-waste to an R2 or e-Stewards certified recycler.
Repair didn’t go as planned? Try some basic troubleshooting, or ask our Answers community for help.
Cancel: I did not complete this guide.
One other person completed this guide.

