PlayStation 3 Super Slim Power Supply Unit Replacement

What you need

  1. PlayStation 3 Super Slim Power Supply Unit Replacement, Power Supply Unit: step 1, image 1 of 2 PlayStation 3 Super Slim Power Supply Unit Replacement, Power Supply Unit: step 1, image 2 of 2
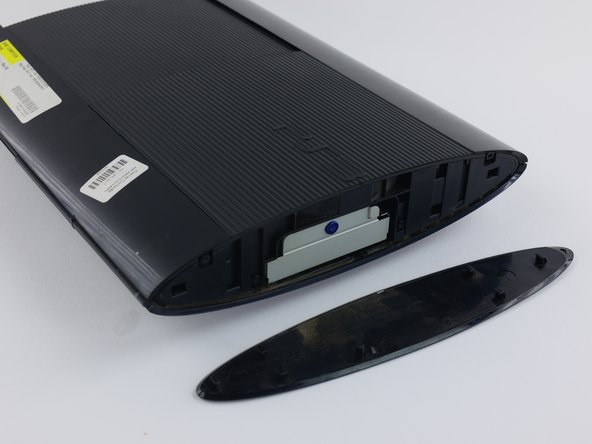
    • Remove the side HDD bay cover by sliding the panel towards the back of the device.

    • The bay cover is found on the right side of the device.

  2. PlayStation 3 Super Slim Power Supply Unit Replacement: step 2, image 1 of 2 PlayStation 3 Super Slim Power Supply Unit Replacement: step 2, image 2 of 2
    • Remove all three black 9.8mm long screws with a T-8 security screwdriver.

    • Remove the blue 7.9mm long screw with a Phillips #1 screwdriver.

  3. PlayStation 3 Super Slim Power Supply Unit Replacement: step 3, image 1 of 2 PlayStation 3 Super Slim Power Supply Unit Replacement: step 3, image 2 of 2
    • Pull on the tab to remove the HDD.

    • The HDD should be removed and stored carefully to prevent damage to data.

  4. PlayStation 3 Super Slim Power Supply Unit Replacement: step 4, image 1 of 2 PlayStation 3 Super Slim Power Supply Unit Replacement: step 4, image 2 of 2
    • On the bottom of the device, pry out the three rubber feet covers with the metal spudger.

    • Remove the four black 36.3mm long screws underneath with a Phillips #1 screwdriver.

    • One screw is located underneath the warranty sticker. This sticker can either be peeled off or punctured through with a screwdriver.

  5. PlayStation 3 Super Slim Power Supply Unit Replacement: step 5, image 1 of 2 PlayStation 3 Super Slim Power Supply Unit Replacement: step 5, image 2 of 2
    • On the top of the device, unlatch the hook on the furthest right beneath the front panel, lift the panel slightly and apply pressure.

    • Unlatch the second right-side hook by sliding a plastic opening tool in the marked area.

    • Slide the panel to the left to unlatch the rest of the hooks.

    • This is probably the most difficult part of the procedure. If you cannot unlatch the hook on the front panel, you can attempt to pry all the hooks off. However, do this at your own risk, as these hooks break easily.

  6. PlayStation 3 Super Slim Power Supply Unit Replacement: step 6, image 1 of 1
    • Remove the back panel by pressing down the tab on the right side of the device, and sliding the panel to the left.

  7. PlayStation 3 Super Slim Power Supply Unit Replacement: step 7, image 1 of 3 PlayStation 3 Super Slim Power Supply Unit Replacement: step 7, image 2 of 3 PlayStation 3 Super Slim Power Supply Unit Replacement: step 7, image 3 of 3
    • Remove the five silver 20.8mm long screws with a Phillips #1 screwdriver.

    • Remove the two black 9.9mm long screws in the disc reader with a T-8 security screwdriver.

    • Remove the top black plastic shell.

  8. PlayStation 3 Super Slim Power Supply Unit Replacement: step 8, image 1 of 3 PlayStation 3 Super Slim Power Supply Unit Replacement: step 8, image 2 of 3 PlayStation 3 Super Slim Power Supply Unit Replacement: step 8, image 3 of 3
    • Move the optical drive to the side to reveal one of the silver 8.8mm long screws.

    • Remove the two silver 8.8mm long screws on either side with a Phillips #1 screwdriver.

  9. PlayStation 3 Super Slim Power Supply Unit Replacement: step 9, image 1 of 3 PlayStation 3 Super Slim Power Supply Unit Replacement: step 9, image 2 of 3 PlayStation 3 Super Slim Power Supply Unit Replacement: step 9, image 3 of 3
    • Remove the cable from the plug and remove the wires from the two plastic hooks.

    • When removing the cable from the plug, pull on the plastic male connecter, not on the wires.

    • Remove the power supply unit.

Joseph O'Connor

Member since: 04/14/16

2,383 Reputation

5 Guides authored

Team

Cal Poly, Team 34-13, Maness Spring 2016 Member of Cal Poly, Team 34-13, Maness Spring 2016

CPSU-MANESS-S16S34G13

4 Members

21 Guides authored

View Statistics:

Past 24 Hours: 12

Past 7 Days: 89

Past 30 Days: 334

All Time: 28,934