Introduction
This guide will teach you how to disassemble the Panasonic SA-PM31 to remove the CD player. You'll be taking apart most of the device to get to it, but with your Phillips #2 screwdriver in hand, it'll be as easy as following the steps below.
What you need
-
-
Remove the five 9 mm #2 Phillips screws from the side panel nearest the power button.
-
Repeat the process for the opposite panel.
-
Remove the two 15 mm #2 Phillips screws from the back of the top panel.
-
Remove the middle 10mm #2 Phillips screw from the back of the top panel.
-
-
-
Swing the back half of the panel slightly away from the unit. Then, starting at the top back corner, slide plastic opening tool through the created gap from back to front. The panel should pop off. Repeat the process on the opposite panel.
-
-
-
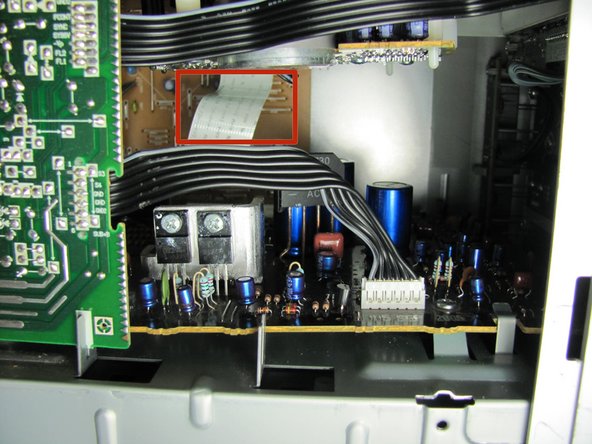
Looking in through the side nearest the power button, use your fingers to pull the white ribbon connection toward you, away from the rear circuit board.
-
-
-
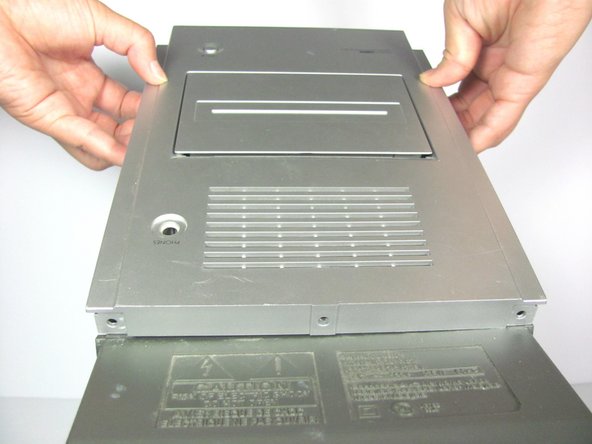
Remove the top panel. You will need to slightly bend the plastic tab outwards, to undo the clasp that is attached to the top.
-
-
-
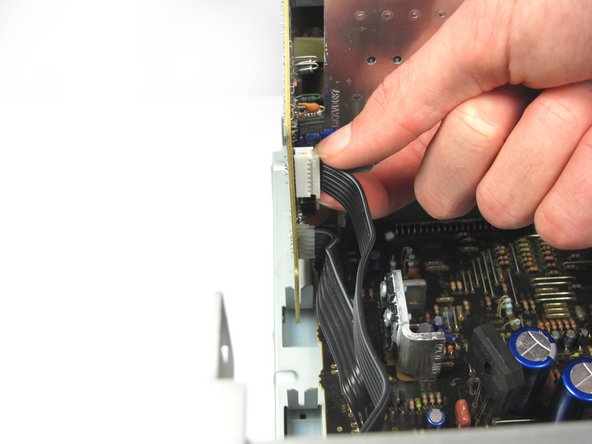
Locate the white connector where the top black ribbon wire attaches to the green and black circuit board.
-
Pinch the tabs on the white connector and pull it partially out.
-
Hold the black ribbon wire directly and pull it the rest of the way out.
-
-
-
-
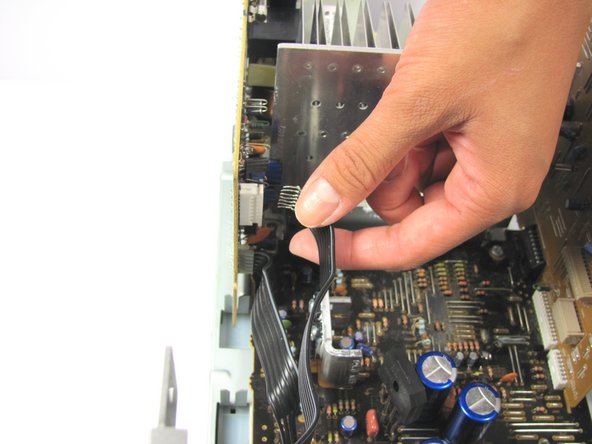
Pull the white ribbon cable from its base on the tan circuit board-located on the side of the system opposite the power button.
-
-
-
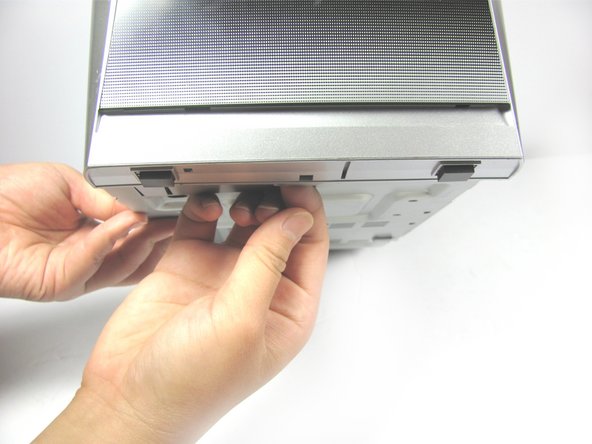
On the bottom sides of the front panel, pull the tabs outward to unclip the clasps.
-
Tilt the whole system up and unlock the bottom clasp of the front panel by pulling it toward you.
-
After placing the system back down, pull the front panel toward you to remove it.
-
-
-
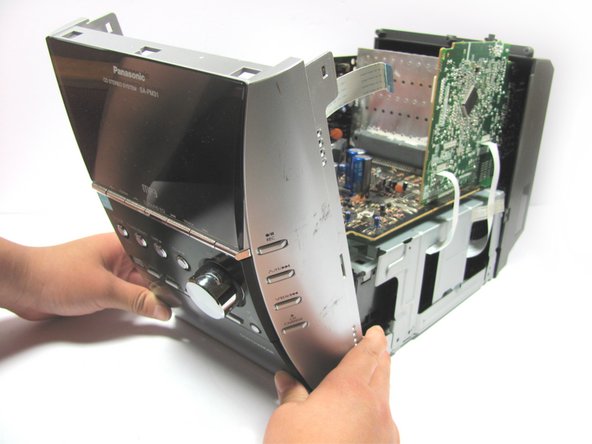
Remove the eight 9.5 mm #2 Phillips screws attaching the back to the device.
-
-
-
With a gentle tug, unplug the red and black cable from the tan circuit board.
-
Using both hands, unlock the plastic back panel from the metal clasps (located on the sides of the unit) by pulling the plastic away from the metal. Focus on undoing first one clasp, then the other.
-
Slide the back panel toward you and off of the unit.
-
-
-
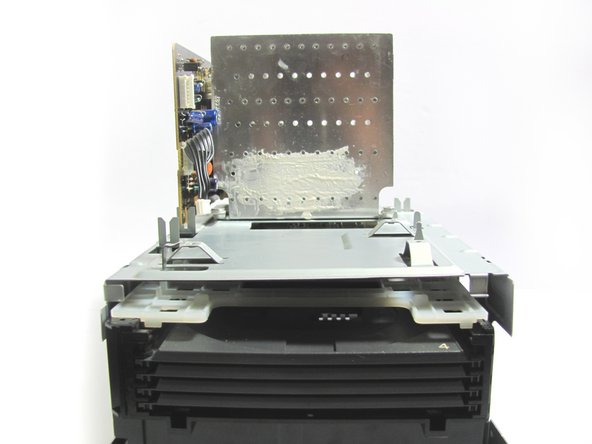
Rotate the device so that the front is facing towards you.
-
Remove the four 5.5mm #2 Phillips screws securing the mainboard (the black flat circuit board).
-
Remove the cable connector from the mainboard by pulling the connector up.
-
Detach the two side ribbon wires on the green side of the tan and green circuit board by pulling them out of the bottom.
-
-
-
Slide the mainboard away from the black and green circuit board and then up.
-
-
-
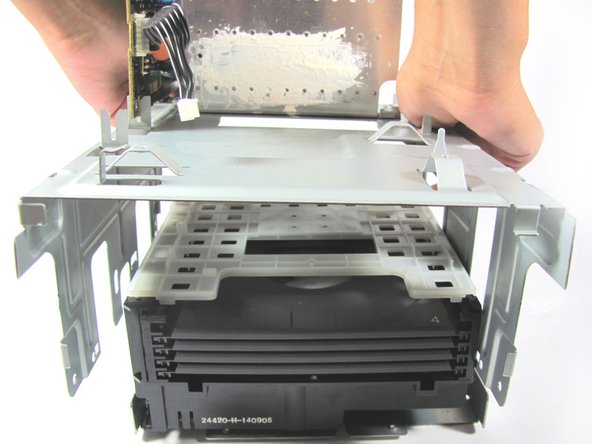
Rotate the device so that the side with the circuit board is facing towards you.
-
Pull the sides of the metal CD assembly case out slightly to disengage the clasps holding the encasing down.
-
Repeat the previous step on the other side.
-
Rotate the device so that the front is facing towards you.
-
Lift the metal CD assembly case up and away from the device.
-
-
-
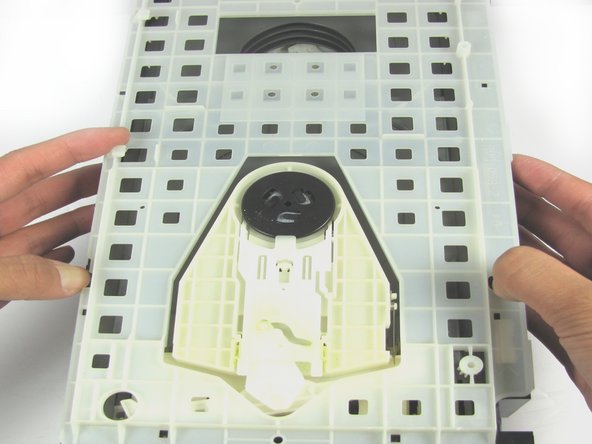
Push down on the two black clasps and pull the plastic grid towards you.
-
Lift the plastic grid off of the CD assembly.
-
-
-
Rotate the device so that the front is facing towards you
-
Lift the CD assembly away from the bottom panel.
-


Team

Cal Poly, Team 13-7, Forte Fall 2014 Member of Cal Poly, Team 13-7, Forte Fall 2014
CPSU-FORTE-F14S13G7
5 Members
7 Guides authored