
OLPC XO-1.5 Screen Portion Replacement

What you need

  1. OLPC XO-1.5 Screen Portion Replacement, Battery: step 1, image 1 of 1
    • Place the laptop upside down with the handle away from you.

  2. OLPC XO-1.5 Screen Portion Replacement: step 2, image 1 of 1
    • Slide the tabs out, towards the green edges, to show the open lock symbol.

    • The right tab will stay in place, but the left tab must be held in position while you remove the battery.

  3. OLPC XO-1.5 Screen Portion Replacement: step 3, image 1 of 3 OLPC XO-1.5 Screen Portion Replacement: step 3, image 2 of 3 OLPC XO-1.5 Screen Portion Replacement: step 3, image 3 of 3
    • Lift the middle of the battery to remove it.

  4. OLPC XO-1.5 Screen Portion Replacement, Screen Portion: step 4, image 1 of 1
    • Using the Phillips screwdriver, unscrew the 5 size M2 x .4 x 4mm screws underneath the battery.

  5. OLPC XO-1.5 Screen Portion Replacement: step 5, image 1 of 1
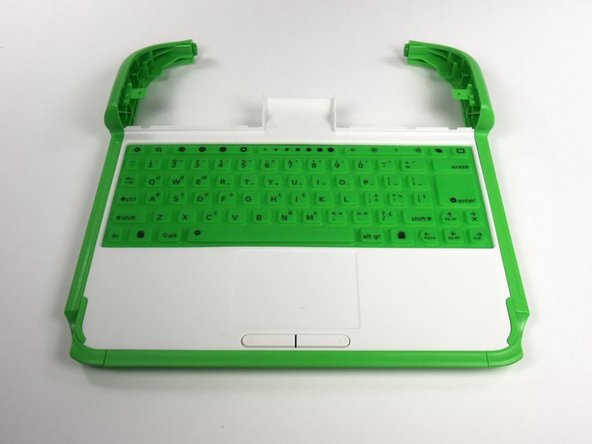
    • Turn the laptop so that the red XO symbol is right side up.

    • Pull off the white plastic panel with your fingers. There will be 4 tabs that hold the white panel in place. It will require moderate force to remove.

    • If you are having difficulty pulling off the white plastic panel, use a spudger.

  6. OLPC XO-1.5 Screen Portion Replacement: step 6, image 1 of 1
    • Unscrew the 4 size M2 x .4 x 4mm screws that are connected to the green plastic.

  7. OLPC XO-1.5 Screen Portion Replacement: step 7, image 1 of 1
    • Unplug the white connector with black cables on each end on the left of the hinge.

  8. OLPC XO-1.5 Screen Portion Replacement: step 8, image 1 of 1
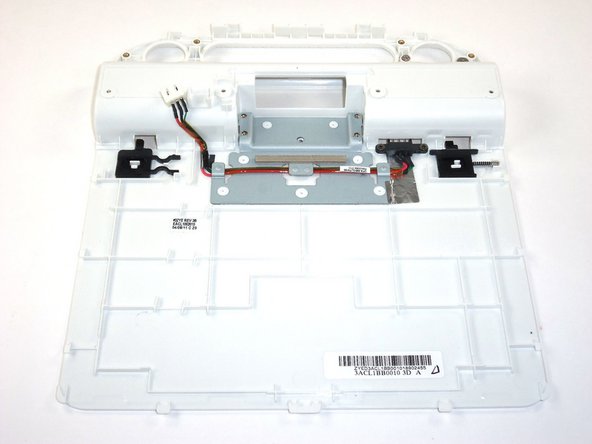
    • Using the Phillips screwdriver, unscrew the 4 size M3 x .5 x 5mm screws holding the metal to the rest of the laptop.

  9. OLPC XO-1.5 Screen Portion Replacement: step 9, image 1 of 1
    • Carefully lift the top half that has the screen away from the bottom half.

    • There is still one black cable connecting the two halves. Be sure not to break it.

  10. OLPC XO-1.5 Screen Portion Replacement: step 10, image 1 of 2 OLPC XO-1.5 Screen Portion Replacement: step 10, image 2 of 2
    • Rotate the laptop 180 degrees so that the XO logo is now upside down.

    • Push the white plastic back cover down away from the keyboard and top half. This should separate easily from the rest of the device.

  11. OLPC XO-1.5 Screen Portion Replacement: step 11, image 1 of 1
    • Turn the laptop upside down, exposing the bottom inside of the keyboard.

    • This is similar to how the laptop was positioned when removing the battery, except now the white panel is gone.

  12. OLPC XO-1.5 Screen Portion Replacement: step 12, image 1 of 1
    • Slide the black cable (the one that holds the two halves together) out of its connector.

  13. OLPC XO-1.5 Screen Portion Replacement: step 13, image 1 of 2 OLPC XO-1.5 Screen Portion Replacement: step 13, image 2 of 2
    • Separate the screen portion from the rest of the laptop.

Sam Clark

Member since: 10/05/12

61 Reputation

1 Guide authored

Team

Cal Poly, Team 3-19, Amido Fall 2012 Member of Cal Poly, Team 3-19, Amido Fall 2012

CPSU-AMIDO-F12S3G19

6 Members

10 Guides authored

View Statistics:

Past 24 Hours: 0

Past 7 Days: 9

Past 30 Days: 14

All Time: 1,061