Free Shipping on Domestic Orders $75+

OLED Screen Removal

Prerequisite Only
This is a prerequisite-only guide! This guide is part of another procedure and isn’t meant to be used alone.

What you need

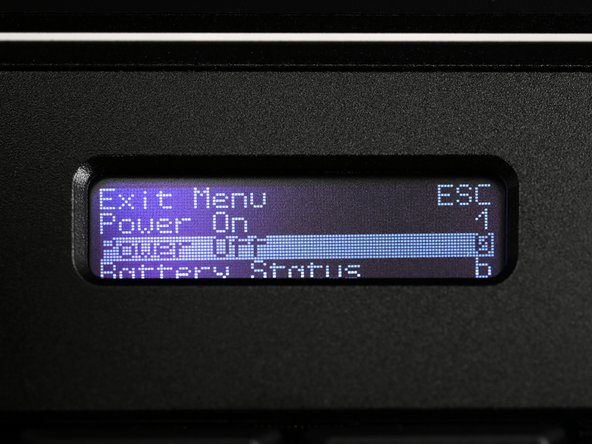
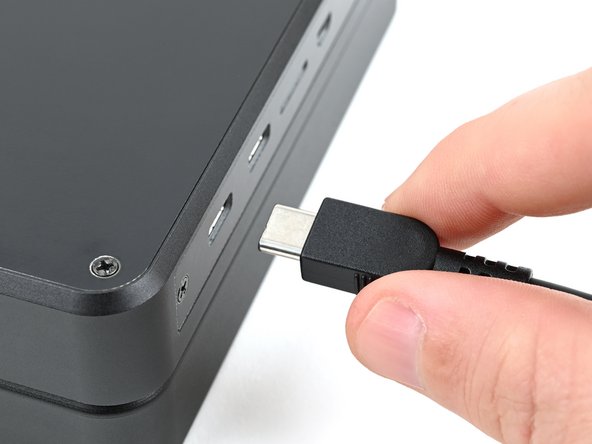
    1. OLED Screen Removal, Shut down the laptop: step 1, image 1 of 3 OLED Screen Removal, Shut down the laptop: step 1, image 2 of 3 OLED Screen Removal, Shut down the laptop: step 1, image 3 of 3
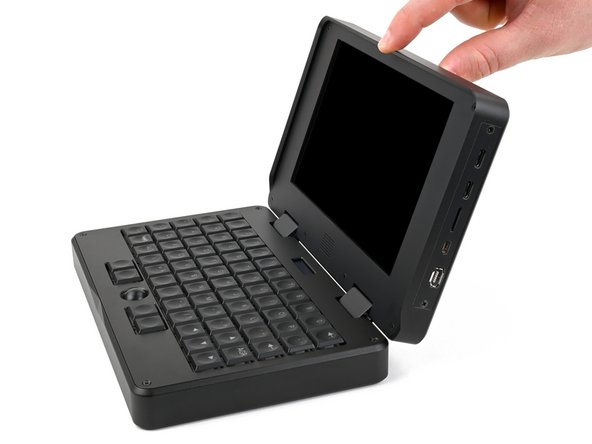
      • If you've installed an operating system, follow the appropriate steps to safely shut down the laptop.

      • If you've not yet installed an operating system, or the laptop is not responsive, you can shut it down with these steps:

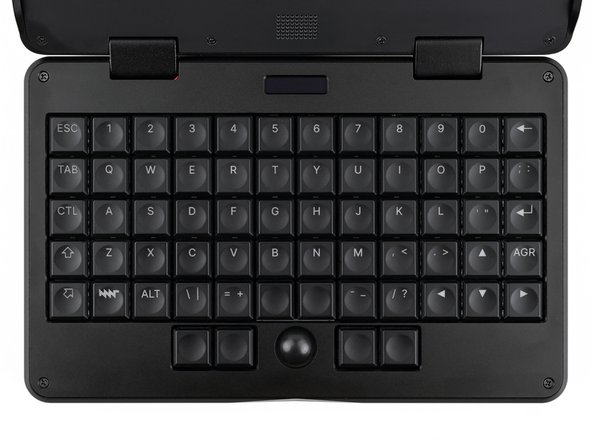
      • Turn on the OLED screen by pressing the Hyper key (diagonal arrow) and Enter at the same time.

      • Use the arrow keys to select Power Off on the OLED screen.

      • Press Enter to shut down the laptop.

      • Disconnect all cables from the laptop.

      Ask FixBot

      Add Comment

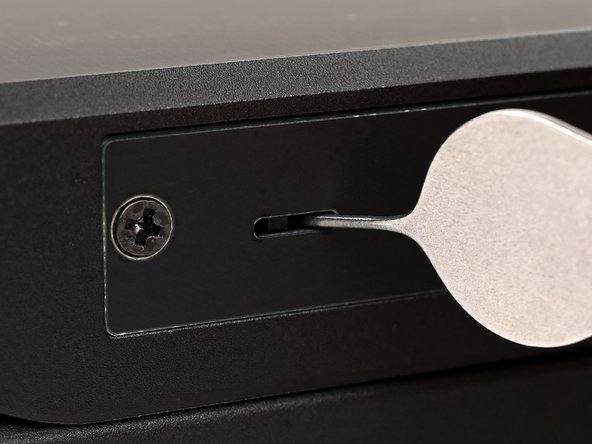
    2. OLED Screen Removal, Turn off the standby power: step 2, image 1 of 2 OLED Screen Removal, Turn off the standby power: step 2, image 2 of 2
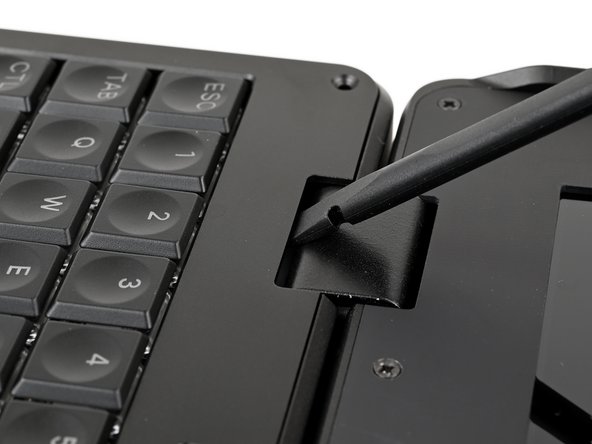
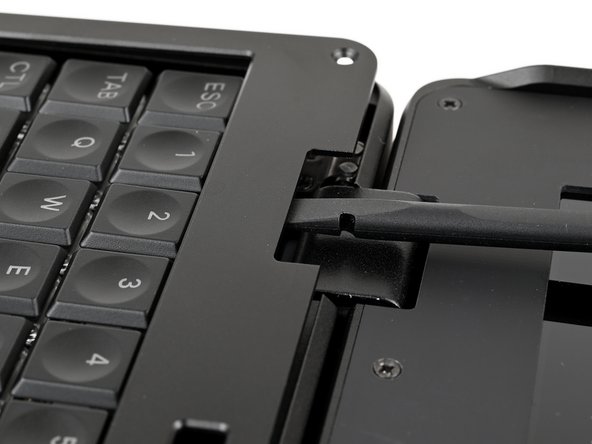
      • Use a small tool, like a SIM eject tool or a bent paperclip, to turn off the standby power switch by sliding the switch away from the headset jack.

      • The standby power switch is located in a small recess on the same side as the headset jack.

      Ask FixBot

      Add Comment

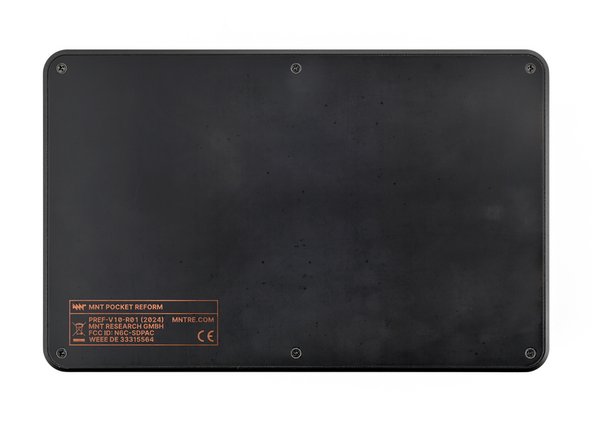
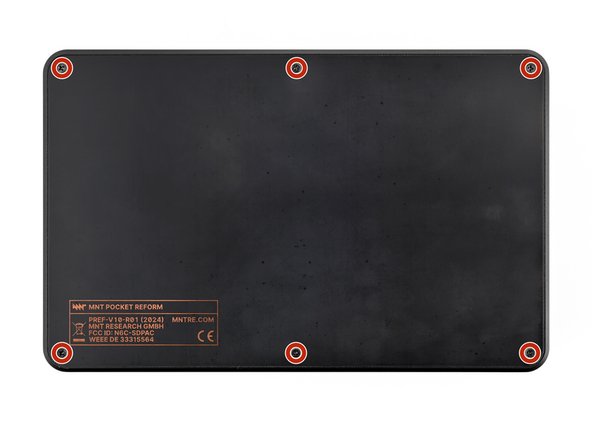
    1. OLED Screen Removal, Remove the bottom cover screws: step 3, image 1 of 2 OLED Screen Removal, Remove the bottom cover screws: step 3, image 2 of 2
      • Place the laptop on your work surface so the bottom cover, with the regulatory info box, is facing up.

      • Use a Phillips screwdriver to remove the six 4.8 mm‑long screws securing the bottom cover.

      Ask FixBot

      Add Comment

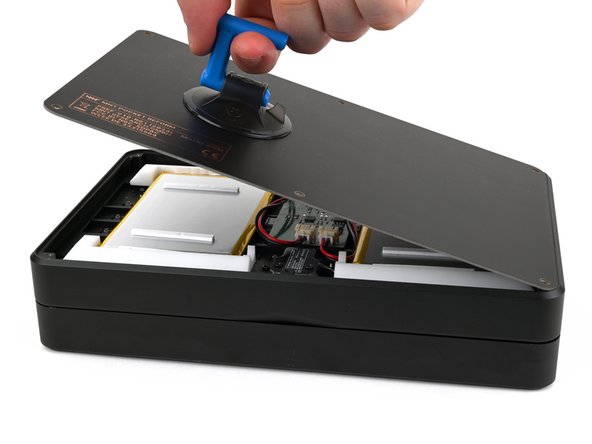
    2. OLED Screen Removal, Remove the bottom cover: step 4, image 1 of 3 OLED Screen Removal, Remove the bottom cover: step 4, image 2 of 3 OLED Screen Removal, Remove the bottom cover: step 4, image 3 of 3
      • The bottom cover is made of printed circuit board (PCB) material. Press gently but firmly near an edge when applying the suction handle to avoid breaking the cover.

      • Apply a suction handle to the bottom cover.

      • Use the suction handle to lift the bottom cover off of the laptop.

      • Alternatively, you can use a thin prying tool to lift the cover, or tilt the laptop until the cover falls out.

      • During reassembly, place the bottom cover on the laptop so the info box is opposite the hinges.

      Ask FixBot

      Add Comment

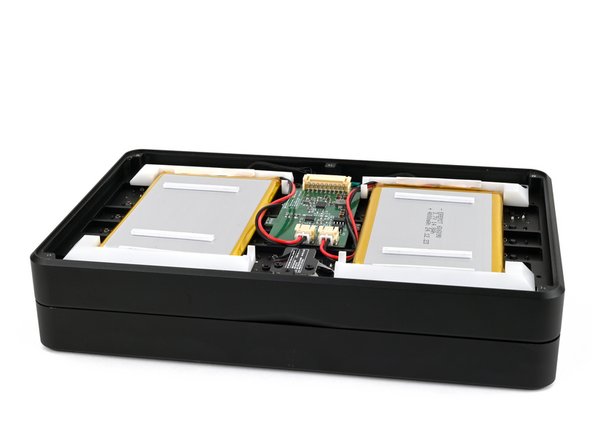
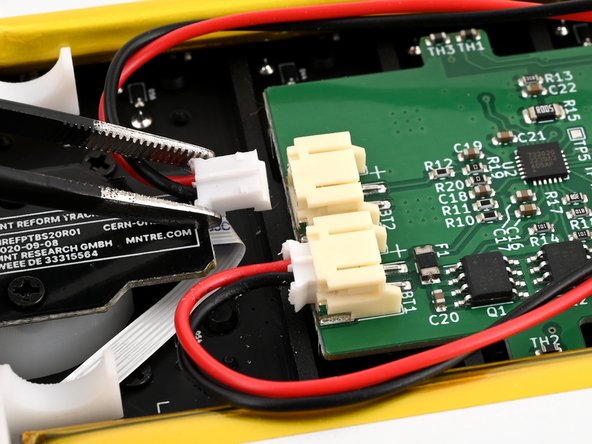
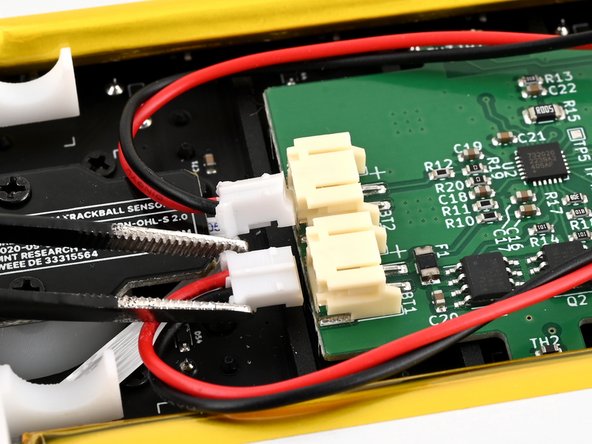
    1. OLED Screen Removal, Disconnect the batteries: step 5, image 1 of 3 OLED Screen Removal, Disconnect the batteries: step 5, image 2 of 3 OLED Screen Removal, Disconnect the batteries: step 5, image 3 of 3
      • Be careful not to damage the lithium-polymer batteries when working around them with metal tools. If the batteries are damaged or deformed in any way, take appropriate precautions.

      • Use a pair of tweezers or your fingers to disconnect the batteries' sliding connectors from the charger board.

      Ask FixBot

      Add Comment

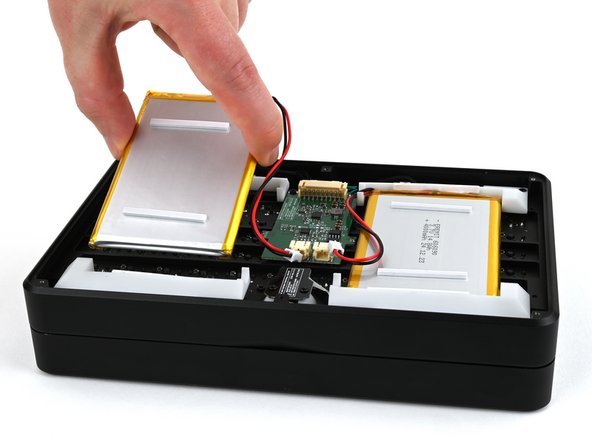
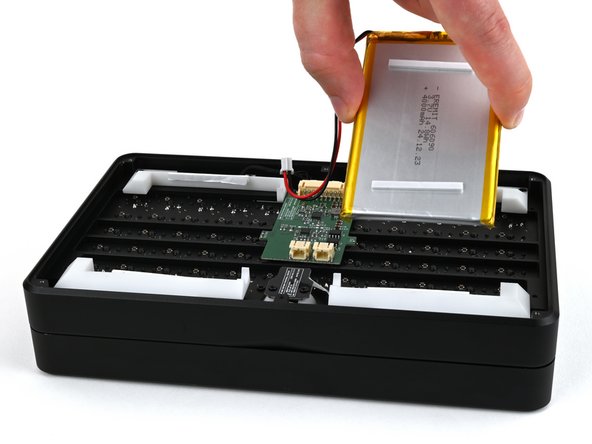
    2. OLED Screen Removal, Remove the batteries: step 6, image 1 of 3 OLED Screen Removal, Remove the batteries: step 6, image 2 of 3 OLED Screen Removal, Remove the batteries: step 6, image 3 of 3
      • Lift the batteries out of the frame.

      • During reassembly, install the batteries so the foam stickers face up, the sides of the batteries with wires are towards the hinges, and the wires run towards the middle of the laptop.

      Ask FixBot

      Add Comment

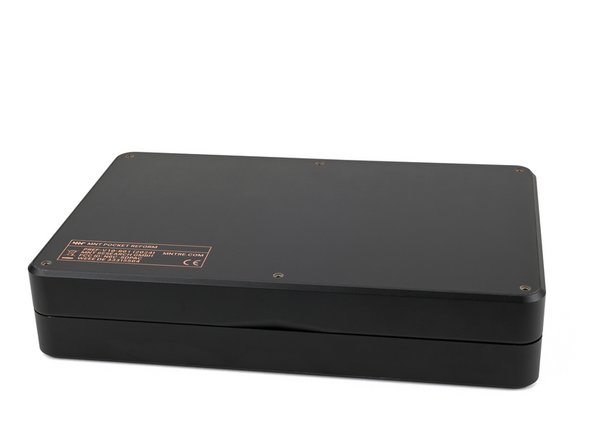
    1. OLED Screen Removal, Secure the bottom cover: step 7, image 1 of 3 OLED Screen Removal, Secure the bottom cover: step 7, image 2 of 3 OLED Screen Removal, Secure the bottom cover: step 7, image 3 of 3
      • Place the bottom cover on the laptop.

      • Use a Phillips screwdriver to secure the bottom cover with the six 4.8 mm‑long screws.

      Ask FixBot

      Add Comment

    1. OLED Screen Removal, Open the laptop: step 8, image 1 of 2 OLED Screen Removal, Open the laptop: step 8, image 2 of 2
      • Flip the laptop so the top cover with the MNT logo is facing up.

      • Open the laptop so the screws securing the keyboard bezel are easily accessible.

      Ask FixBot

      Add Comment

    2. OLED Screen Removal, Remove the keyboard bezel screws: step 9, image 1 of 2 OLED Screen Removal, Remove the keyboard bezel screws: step 9, image 2 of 2
      • Use a Phillips screwdriver to remove the four 4.8 mm‑long screws securing the keyboard bezel.

      Ask FixBot

      Add Comment

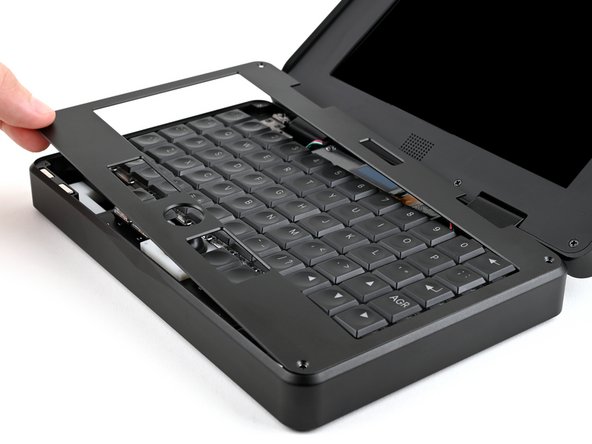
    3. OLED Screen Removal, Remove the keyboard bezel: step 10, image 1 of 3 OLED Screen Removal, Remove the keyboard bezel: step 10, image 2 of 3 OLED Screen Removal, Remove the keyboard bezel: step 10, image 3 of 3
      • Insert a spudger or your finger into the gap between a hinge and the display bezel.

      • Pry up the display bezel until you can grab it with your fingers.

      Ask FixBot

      Add Comment

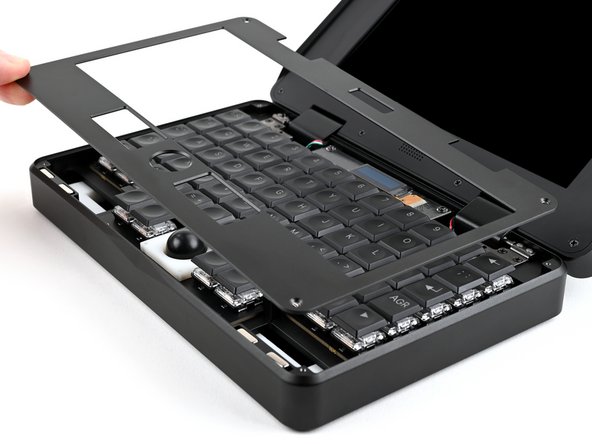
    4. OLED Screen Removal: step 11, image 1 of 3 OLED Screen Removal: step 11, image 2 of 3 OLED Screen Removal: step 11, image 3 of 3
      • There are four strong magnets under the keyboard bezel at the bottom of the frame. These can stay in place during the repair, but you can remove them to avoid losing them.

      • Lift and remove the keyboard bezel.

      • During reassembly:

      • If you removed the magnets, make sure they are installed so they attract the magnets under the display bezel.

      • Make sure the side of the keyboard bezel with countersunk (conically shaped) screw wells is facing up.

      Ask FixBot

      Add Comment

    5. OLED Screen Removal, Remove the trackball: step 12, image 1 of 2 OLED Screen Removal, Remove the trackball: step 12, image 2 of 2
      • Remove the trackball from its housing and place it somewhere where it won't roll away.

      Ask FixBot

      Add Comment

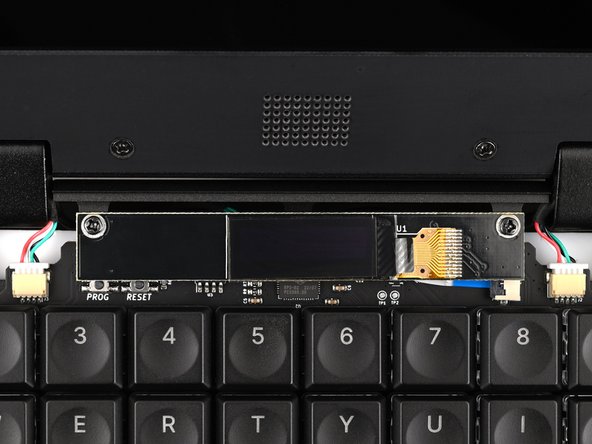
    6. OLED Screen Removal, Remove the OLED screen screws: step 13, image 1 of 2 OLED Screen Removal, Remove the OLED screen screws: step 13, image 2 of 2
      • Use a Phillips screwdriver to remove the two 5.0 mm‑long screws securing the OLED screen.

      • Note that these are round-top "cheesehead" screws instead of the flat-topped countersunk screws used everywhere else. Make sure to use the correct screws during reassembly.

      Ask FixBot

      Add Comment

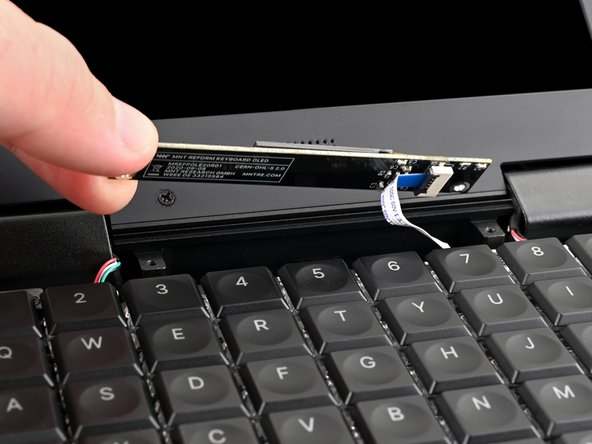
    7. OLED Screen Removal, Lift the OLED screen: step 14, image 1 of 2 OLED Screen Removal, Lift the OLED screen: step 14, image 2 of 2
      • There is still a ribbon cable under the OLED screen. Do not attempt to completely remove the screen yet.

      • Lift the OLED screen and rotate it so you can access the ribbon cable underneath it.

      Ask FixBot

      Add Comment

Conclusion

To reassemble your device, follow these instructions in reverse order.

Cancel: I did not complete this guide.

Spencer Pennington

Member since: 09/09/23

27,536 Reputation

125 Guides authored

Team

Guide Team Member of Guide Team

Staff

10 Members

61,630 Guides authored

0 Guide Comments

Add Comment

View Statistics:

Past 24 Hours: 0

Past 7 Days: 3

Past 30 Days: 11

All Time: 173