Free Shipping on Domestic Orders $75+

Nintendo Switch Lite Battery Disconnection

Prerequisite Only
This is a prerequisite-only guide! This guide is part of another procedure and isn’t meant to be used alone.

What you need

    1. Nintendo Switch Lite Battery Disconnection, Remove the back panel screws: step 1, image 1 of 1
      Tool used on this step:
      Magnetic Project Mat
      $19.95
      Buy
      • Before beginning this repair, make sure that the device is completely turned off.

      • Use a Y00 screwdriver to remove the four 6.3 mm-long screws securing the back panel.

      • Throughout this repair, keep track of each screw and make sure it goes back exactly where it came from.

      Ask FixBot

      Add Comment

    2. Nintendo Switch Lite Battery Disconnection, Remove the top and bottom back panel screws: step 2, image 1 of 2 Nintendo Switch Lite Battery Disconnection, Remove the top and bottom back panel screws: step 2, image 2 of 2
      • Use a JIS 00 driver or an iFixit Phillips driver to remove the following screws securing the back panel:

      • Two 3.6 mm-long screws on the top of the device

      • Two 3.6 mm-long screws on the bottom of the device

      • To prevent these tight screws from stripping, apply firm downward force, work slowly and try a different screwdriver if the screws won't come out.

      Ask FixBot

      Add Comment

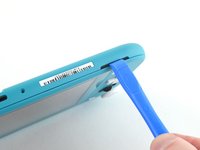
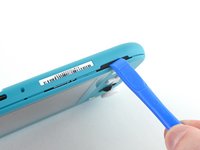
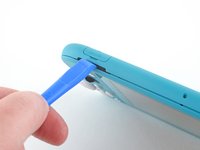
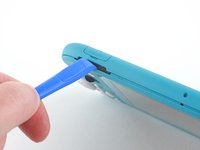
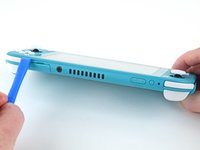
    3. Nintendo Switch Lite Battery Disconnection, Release the clips securing the back panel: step 3, image 1 of 2 Nintendo Switch Lite Battery Disconnection, Release the clips securing the back panel: step 3, image 2 of 2
      • Insert an opening tool into the left speaker grille on the bottom of the device.

      • Twist the opening tool to release the clips securing the back panel.

      • Avoid inserting the opening tool further than required to prevent damage to the speaker module.

      Ask FixBot

      Add Comment

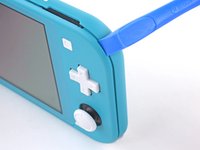
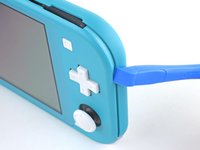
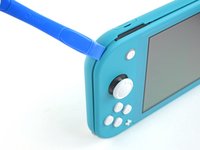
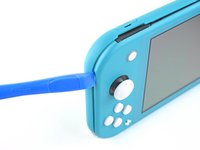
    4. Nintendo Switch Lite Battery Disconnection, Continue releasing the clips around the device: step 4, image 1 of 2 Nintendo Switch Lite Battery Disconnection, Continue releasing the clips around the device: step 4, image 2 of 2
      • Slide the opening tool around the bottom-left corner to release the clips on the left side of the device.

      Ask FixBot

      Add Comment

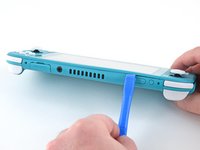
    5. Nintendo Switch Lite Battery Disconnection, Twist to release the clips: step 5, image 1 of 2 Nintendo Switch Lite Battery Disconnection, Twist to release the clips: step 5, image 2 of 2
      • Insert an opening tool into the right speaker grille on the bottom of the device.

      • Twist the opening tool to release the clips.

      • Avoid inserting the opening tool further than required to prevent damage to the speaker module.

      Ask FixBot

      Add Comment

    6. Nintendo Switch Lite Battery Disconnection, Slide and pry around the corners: step 6, image 1 of 2 Nintendo Switch Lite Battery Disconnection, Slide and pry around the corners: step 6, image 2 of 2
      • Slide and pry the opening tool around the bottom-right corner to release the clips on the right side of the device.

      Ask FixBot

      Add Comment

    7. Nintendo Switch Lite Battery Disconnection: step 7, image 1 of 2 Nintendo Switch Lite Battery Disconnection: step 7, image 2 of 2
      • Continue sliding and prying the opening tool along the gap on the top of the device to release the clips.

      Ask FixBot

      Add Comment

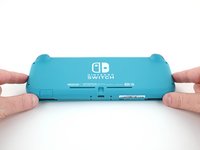
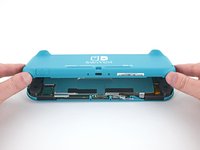
    8. Nintendo Switch Lite Battery Disconnection, Remove the back panel: step 8, image 1 of 3 Nintendo Switch Lite Battery Disconnection, Remove the back panel: step 8, image 2 of 3 Nintendo Switch Lite Battery Disconnection, Remove the back panel: step 8, image 3 of 3
      • Lift the bottom edge of the back panel, opening it like a book.

      • Remove the back panel.

      Ask FixBot

      Add Comment

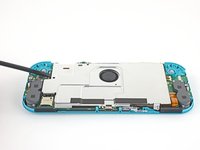
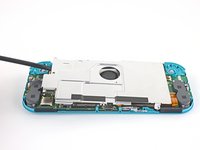
    1. Nintendo Switch Lite Battery Disconnection, Remove the shield plate: step 9, image 1 of 1
      • Use a JIS 00 driver or an iFixit Phillips driver to remove the four screws securing the shield plate:

      • Three 3.1 mm screws

      • One 4.5 mm screw

      Ask FixBot

      Add Comment

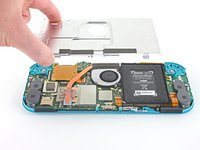
    2. Nintendo Switch Lite Battery Disconnection: step 10, image 1 of 3 Nintendo Switch Lite Battery Disconnection: step 10, image 2 of 3 Nintendo Switch Lite Battery Disconnection: step 10, image 3 of 3
      Tool used on this step:
      iFixit Thermal Putty
      $9.95
      Buy
      • Use a spudger or your fingers to lift the shield plate up and out of the device.

      • You may feel a bit of resistance. This is normal, since the shield plate is slightly bonded to the heat sink with thermal putty.

      • Remove the shield plate.

      • Clean off the old thermal putty from the shield plate and heat sink using isopropyl alcohol and a microfiber cloth. Apply new thermal putty to the heat sink before reassembly.

      Ask FixBot

      Add Comment

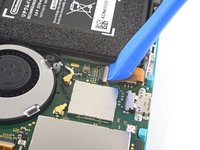
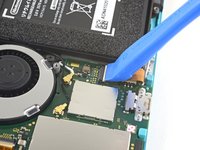
    1. Nintendo Switch Lite Battery Disconnection, Disconnect the interconnect cable: step 11, image 1 of 2 Nintendo Switch Lite Battery Disconnection, Disconnect the interconnect cable: step 11, image 2 of 2
      • Be gentle when lifting this flap—it's easy to accidentally break off.

      • Use your fingernail or an opening tool to flip up the small, hinged locking flap on the motherboard interconnect cable's ZIF connector.

      Ask FixBot

      Add Comment

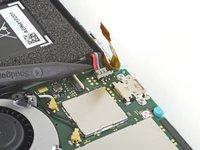
    2. Nintendo Switch Lite Battery Disconnection: step 12, image 1 of 2 Nintendo Switch Lite Battery Disconnection: step 12, image 2 of 2
      • Don't use metal tweezers! They can short-circuit the ribbon cable/connector and damage your device.

      • Use a spudger or a pair of non-conductive (nylon or ceramic) tweezers to slide the interconnect cable out of its connector on the motherboard.

      Ask FixBot

      Add Comment

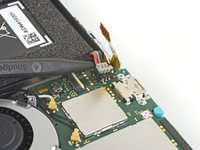
    3. Nintendo Switch Lite Battery Disconnection, Disconnect the battery: step 13, image 1 of 2 Nintendo Switch Lite Battery Disconnection, Disconnect the battery: step 13, image 2 of 2
      • Use the point of a spudger to pry the battery connector straight up and out of its socket on the motherboard.

      • During reassembly, wait until after you connect the interconnect cable (above) before connecting the battery.

      Ask FixBot

      Add Comment

Conclusion

To reassemble your device, follow these instructions in reverse order.

Cancel: I did not complete this guide.

One other person completed this guide.

Craig Lloyd

Member since: 02/10/16

43,545 Reputation

82 Guides authored

0 Guide Comments

Add Comment

View Statistics:

Past 24 Hours: 0

Past 7 Days: 5

Past 30 Days: 29

All Time: 611