This translation may not reflect the most recent updates from the source guide. Help update the translation or view the source guide.

Nexus 5X 电池替换

What you need

  1. Nexus 5X 电池替换, 背板: step 1, image 1 of 2 Nexus 5X 电池替换, 背板: step 1, image 2 of 2
    • 将取卡针插入到左侧SIM卡槽处。

    • 用点力将卡托弹出手机。

    • 移除卡托,将其放到合适的位置。

  2. Nexus 5X 电池替换: step 2, image 1 of 2 Nexus 5X 电池替换: step 2, image 2 of 2
    • 从SIM卡插槽开始,将塑料打开工具放在后面板和手机之间。

    • 将开启器工具轻轻地滑动到手机周围,直到听到咔嗒声,并且明显地看到与手机主体与背板分开。

    • 在手机的每个边缘继续进行此过程,直到指纹识别处。

  3. Nexus 5X 电池替换: step 3, image 1 of 1
    • 从手机背面的指纹识别处上轻轻取下后背板。

  4. Nexus 5X 电池替换, 中框架: step 4, image 1 of 2 Nexus 5X 电池替换, 中框架: step 4, image 2 of 2
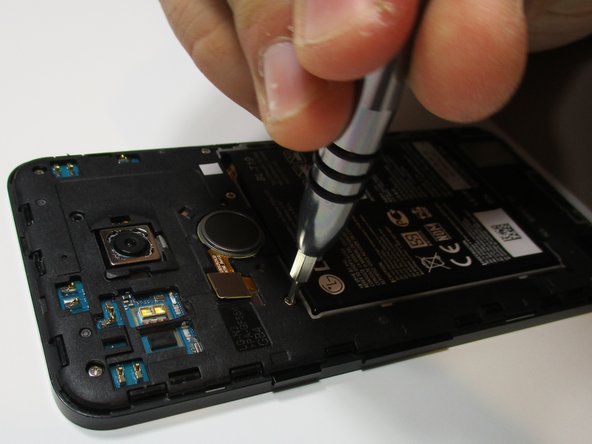
    • 使用Phillips #000号螺丝刀移除10个中框架螺丝。

  5. Nexus 5X 电池替换: step 5, image 1 of 1
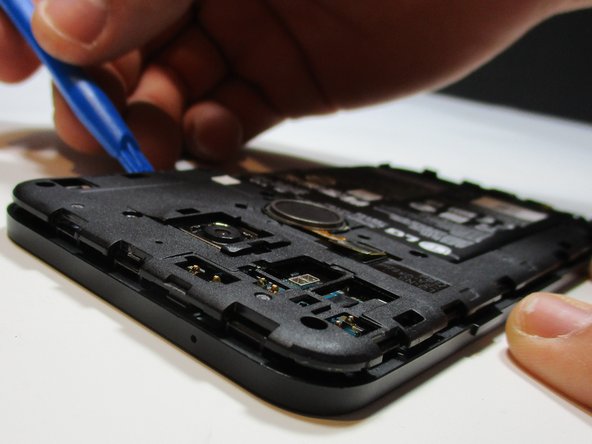
    • 从底部开始,使用塑料开启工具来把中面板翘起。

    • 小心的进行此操作因为如果你从上部分开始的话,中面板会裂成两半,你可能会撕裂两边的连接处。

  6. Nexus 5X 电池替换, 电池: step 6, image 1 of 2 Nexus 5X 电池替换, 电池: step 6, image 2 of 2
    • 使用塑料开启工具或者手指来轻轻的把电池线缆接头撬开,并从主板上分离。

  7. Nexus 5X 电池替换: step 7, image 1 of 3 Nexus 5X 电池替换: step 7, image 2 of 3 Nexus 5X 电池替换: step 7, image 3 of 3
    • 使用iOpener 工具箱(或者其他类似产品)来加热手机以便使胶水松动。

    • 小心地把一个平的尼龙撬棒插入电池的下方。

    • 施加足够的里来把电池从占有胶水的手机中分离。

    • 如果我们不希望因为胶水黏性过强而在我们分离的过程中损伤到主板,我们需要完全的把主板分离。并且这样我们就不必一定使用类似于iOpener之类的产品。

    • 在这个操作中我们务必需要十分小心,如果使用尖锐物品可能会刺穿电池。

Conclusion

若要重新组装你的设备,按照以下步骤逆序操作。

120 other people completed this guide.

Special thanks to these translators:

en zh

22%

eric is helping us fix the world! Want to contribute?
Start translating ›

Isaiah Schultz

Member since: 01/15/16

4,806 Reputation

6 Guides authored

Team

30 Comments

I replaced the battery with a stock LG OEM replacement. Now, 1. Lighting bolt indicator doesn't appear. 2. Doesn't read "Charging" or "Charging Rapidly" on the lock screen. 3. I lost rapid charge; it charges slooooowly. Help!

Thom - Reply

Is the battery supposed to be one hard piece or is it supposed to be squishy as in bendable?

danchee - Reply

I replaced the battery, but I'm still not getting an led or anything on the screen to show it's charging. What else could be the issue?

pocketdrummer - Reply

All went smooth here. Pulled the mainboard out and was able to gently pry the battery free without heat. Rapid charging is working fine. I got an LG battery off Amazon. Didn't cost much more than knock-offs.

Andrew Cook - Reply

worked great for me, in the end used brute force to get the battery off with a terrifying crack.

Terrence Benade - Reply

Add Comment

View Statistics:

Past 24 Hours: 4

Past 7 Days: 39

Past 30 Days: 186

All Time: 139,059