
Motorola Moto E6 Plus Loudspeaker Replacement

What you need

  1. Motorola Moto E6 Plus Loudspeaker Replacement, Unclip the back cover: step 1, image 1 of 2 Motorola Moto E6 Plus Loudspeaker Replacement, Unclip the back cover: step 1, image 2 of 2
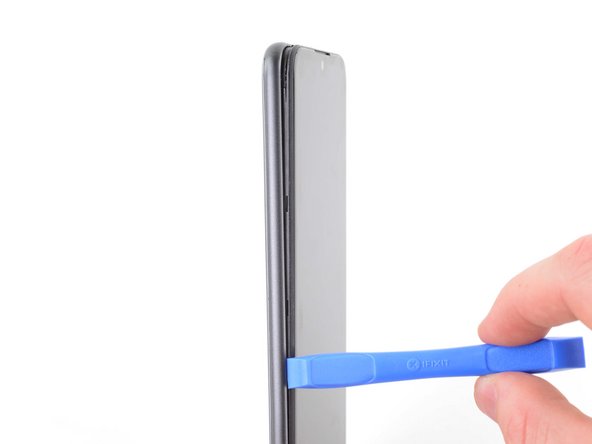
    • Use an opening tool or your fingernail to pry the back cover away from the frame using the notch at the bottom right corner.

  2. Motorola Moto E6 Plus Loudspeaker Replacement, Unclip the right edge: step 2, image 1 of 3 Motorola Moto E6 Plus Loudspeaker Replacement, Unclip the right edge: step 2, image 2 of 3 Motorola Moto E6 Plus Loudspeaker Replacement, Unclip the right edge: step 2, image 3 of 3
    • Use an opening tool or your fingernail to release the clips on the right edge by sliding up and around the top right corner.

  3. Motorola Moto E6 Plus Loudspeaker Replacement, Unclip the top edge: step 3, image 1 of 2 Motorola Moto E6 Plus Loudspeaker Replacement, Unclip the top edge: step 3, image 2 of 2
    • Continue to slide the opening tool or your fingernail across the top edge to release the clips securing the back cover to the frame.

  4. Motorola Moto E6 Plus Loudspeaker Replacement, Unclip the left edge: step 4, image 1 of 2 Motorola Moto E6 Plus Loudspeaker Replacement, Unclip the left edge: step 4, image 2 of 2
    • Continue to slide the opening tool or your fingernail down the left edge to release the clips.

  5. Motorola Moto E6 Plus Loudspeaker Replacement, Remove the back cover: step 5, image 1 of 3 Motorola Moto E6 Plus Loudspeaker Replacement, Remove the back cover: step 5, image 2 of 3 Motorola Moto E6 Plus Loudspeaker Replacement, Remove the back cover: step 5, image 3 of 3
    • Remove the back cover.

  6. Motorola Moto E6 Plus Loudspeaker Replacement, Remove the battery: step 6, image 1 of 3 Motorola Moto E6 Plus Loudspeaker Replacement, Remove the battery: step 6, image 2 of 3 Motorola Moto E6 Plus Loudspeaker Replacement, Remove the battery: step 6, image 3 of 3
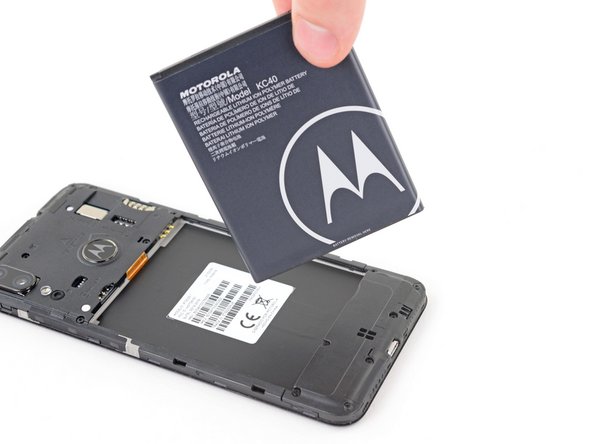
    • Use a spudger or your fingernail to pry the battery up using the notch near the bottom right corner.

    • Take care not to puncture or bend the battery with your tool—a punctured or bent battery may leak dangerous chemicals or cause a thermal event.

    • Remove the battery.

  7. Motorola Moto E6 Plus Loudspeaker Replacement, Remove the screws: step 7, image 1 of 1
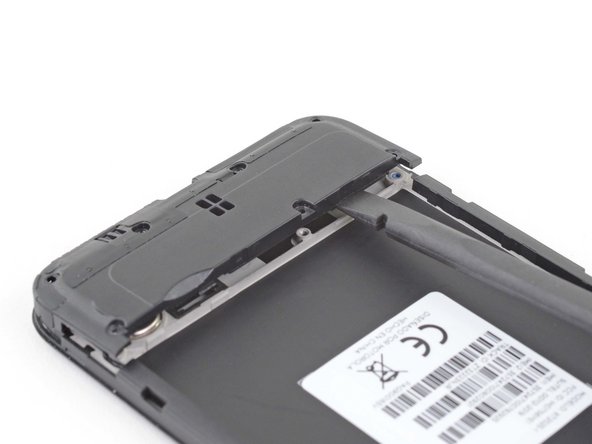
    • Use a Torx T3 driver to remove the three 3.6 mm-long screws securing the loudspeaker to the frame.

    • Use a Phillips screwdriver to remove the four 3.1 mm-long screws.

  8. Motorola Moto E6 Plus Loudspeaker Replacement, Unclip the loudspeaker: step 8, image 1 of 2 Motorola Moto E6 Plus Loudspeaker Replacement, Unclip the loudspeaker: step 8, image 2 of 2
    • Use a spudger to pry up the loudspeaker from the frame.

    • If you are having trouble releasing the clips securing the loudspeaker to the frame, use a spudger to pry around the loudspeaker to loosen it.

  9. Motorola Moto E6 Plus Loudspeaker Replacement, Remove the loudspeaker: step 9, image 1 of 1
    • Remove the loudspeaker.

Conclusion

To reassemble your device, follow these instructions in reverse order.

Take your e-waste to an R2 or e-Stewards certified recycler.

Repair didn’t go as planned? Try some basic troubleshooting, or ask our Motorola Moto E6 Plus Answers community for help.

Robert Boyd

Member since: 02/01/21

26,559 Reputation

94 Guides authored

0 Comments

Add Comment

View Statistics:

Past 24 Hours: 1

Past 7 Days: 2

Past 30 Days: 12

All Time: 664