
Moto C Plus Motherboard Cover Replacement

Prerequisite Only
This guide is only intended to be used as a prerequisite for other guides. It's incomplete by itself.

What you need

  1. Moto C Plus Motherboard Cover Replacement, Back Cover: step 1, image 1 of 3 Moto C Plus Motherboard Cover Replacement, Back Cover: step 1, image 2 of 3 Moto C Plus Motherboard Cover Replacement, Back Cover: step 1, image 3 of 3
    • Power off your phone before beginning disassembly.

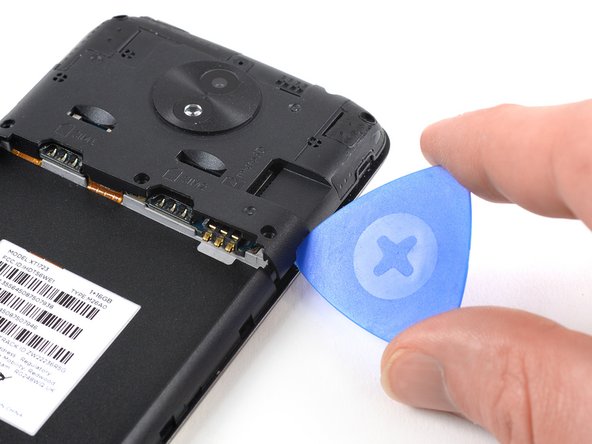
    • Insert a thumbnail, or spudger, into the notch on the bottom right to start separating the phone unit from the back cover.

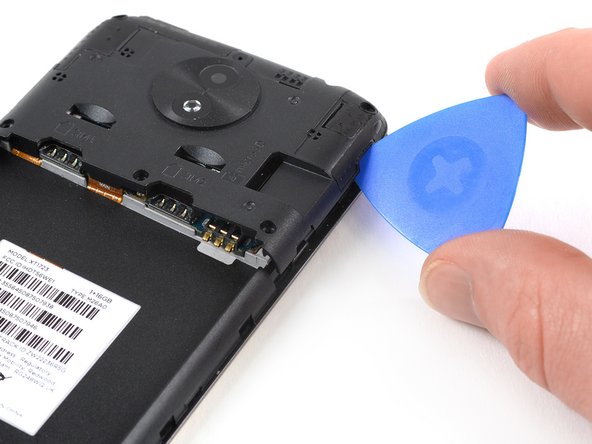
    • Move to the bottom left corner and pry the phone unit out of the back cover until you can get a good grip.

  2. Moto C Plus Motherboard Cover Replacement: step 2, image 1 of 2 Moto C Plus Motherboard Cover Replacement: step 2, image 2 of 2
    • Lift the phone out of the back cover.

  3. Moto C Plus Motherboard Cover Replacement, Battery: step 3, image 1 of 3 Moto C Plus Motherboard Cover Replacement, Battery: step 3, image 2 of 3 Moto C Plus Motherboard Cover Replacement, Battery: step 3, image 3 of 3
    • Use a spudger or fingernail to lift the battery starting at the notch on the bottom left.

    • Lever the battery out of its recess and remove it.

  4. Moto C Plus Motherboard Cover Replacement, Motherboard Cover: step 4, image 1 of 1
    • Remove the five 3.1 mm long Phillips #00 screws.

  5. Moto C Plus Motherboard Cover Replacement: step 5, image 1 of 3 Moto C Plus Motherboard Cover Replacement: step 5, image 2 of 3 Moto C Plus Motherboard Cover Replacement: step 5, image 3 of 3
    • Apply an opening pick to the bottom right corner of the motherboard cover.

    • Twist the opening pick to free the motherboard cover out of the plastic clamps on the right side of the phone.

  6. Moto C Plus Motherboard Cover Replacement: step 6, image 1 of 2 Moto C Plus Motherboard Cover Replacement: step 6, image 2 of 2
    • Repeat the previous step on the left side of the motherboard cover to free it out of the plastic clamps.

    • Pry up the motherboard cover until you can get a good grip.

    • Remove the motherboard cover.

Conclusion

To reassemble your device, follow these instructions in reverse order.

Dominik Schnabelrauch

Member since: 11/23/16

204,379 Reputation

682 Guides authored

Team

iFixit Member of iFixit

Staff

136 Members

17,299 Guides authored

0 Comments

Add Comment

View Statistics:

Past 24 Hours: 0

Past 7 Days: 0

Past 30 Days: 1

All Time: 17