Introduction
This guide is an internal prerequisite.
What you need
-
-
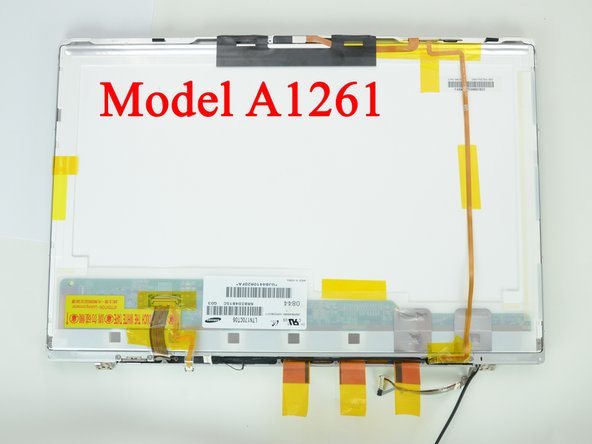
Use the flat end of a spudger to carefully peel off the three antenna straps stuck to the lower edge of the LCD.
-
-
-
Remove the five Phillips screws securing the clutch cover to the bottom edge of the front display bezel.
If you are replacing the LCD and not the front bezel, you really don't need to remove the clutch cover and clutch hinges. You have full access to the LCD screws and can remove it, skipping this step, as well as the steps 29, 30, 31, 32, 37 and 39. The clutch cover, inverter board and all cables will remain attached to the front bezel.
The cables didn't fit right when I put the clutch onto the front bezel so I tried to disassemble but the middle screw is stuck. The tiny little cable that's connected to this screw ripped :( If I do manage to get the screw out, not sure if I have to replace this whole cable even though it's just a small side cable connected to the inverter cable I think.
Finally got the screw out, and put the cables in the clutch assembly correctly. Works despite the isight/inverter cable's tiny second thread having been torn.
Take photos of what this looks like bc you have to make sure the cables fit in the clutch and are long enough to fit in the motherboard properly.
-
-
-
-
While pulling the clutch assembly away from the clutch hinge with one hand, insert an iPod opening tool between the clutch cover and the front display bezel to lift the clutch cover over the retaining pin on the front display bezel.
-
Pull the clutch assembly away from the front display bezel.
Before you completely detach the clutch assembly, take note of how everything is organized inside it, as you will be replicating it upon reassembly. The display data cable ended up being in the way as I was closing everything up and had to reopen everything to readjust it. Take pictures and see how it will fit into place before you reattach the clutch assembly and screw in the 5 screws.
-
-
-
Remove the clutch assembly from the front display bezel, minding any cables that may get caught.
-


To reassemble your device, follow these instructions in reverse order.
To reassemble your device, follow these instructions in reverse order.

Be careful pulling off the kapton tape. Because of the age of the computer and the continuous heating and cooling, the tape can become brittle and the adhesive will stick to the surface of the LCD and not the tape itself, making it unusable. If this happens, you can find small rolls of kapton tape on the internet or get it in the ifixit store.
Sheldon Carpenter - Reply