Introduction
Use this guide to replace the upper case. This procedure involves using adhesive remover to remove the battery. Do not reuse the battery after it has been removed, as doing so is a potential safety hazard. Replace it with a new battery.
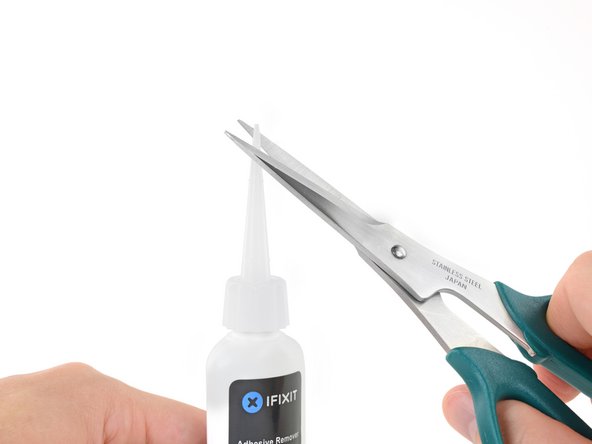
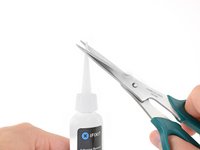
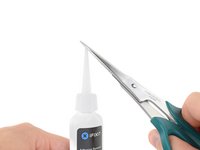
iFixit adhesive remover is highly flammable. Perform this procedure in a well-ventilated area. Do not smoke or work near an open flame during this procedure.
To minimize risk of damage, turn on your MacBook and allow the battery to fully discharge before starting this procedure. A charged lithium-ion battery can create a dangerous and uncontrollable fire if accidentally punctured. If your battery is swollen, take extra precautions.
What you need
-
Tool used on this step:Magnetic Project Mat$19.95
-
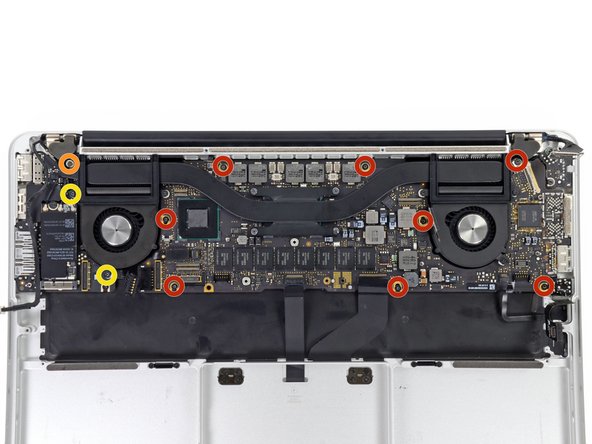
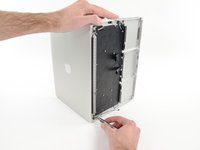
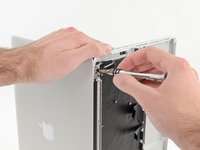
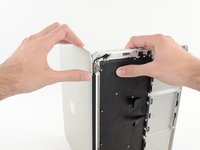
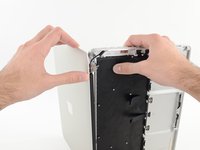
Remove the following ten screws securing the lower case to the upper case:
-
Two 2.3 mm P5 Pentalobe screws
-
Eight 3.0 mm P5 Pentalobe screws
-
-
Tool used on this step:Tweezers$4.99
-
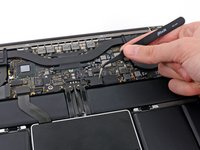
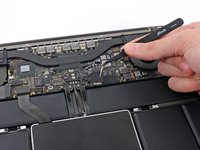
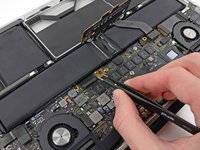
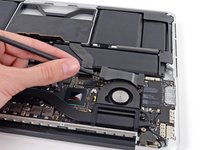
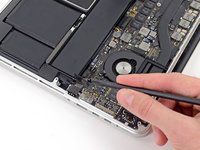
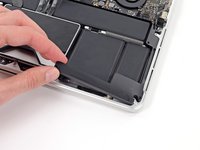
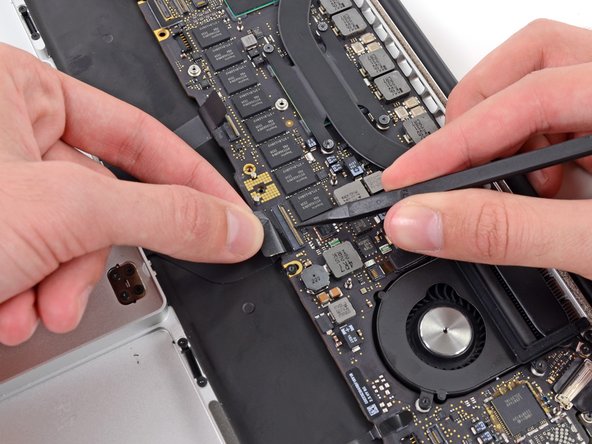
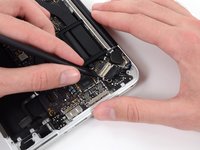
Grasp the Interposer with tweezers.
-
Lift the Interposer off the logic board and remove it.
-
-
-
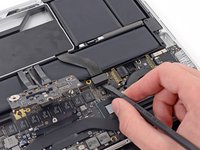
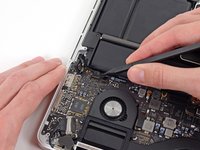
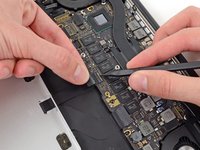
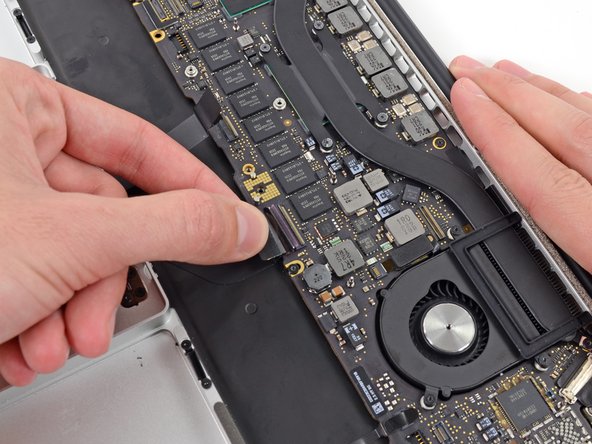
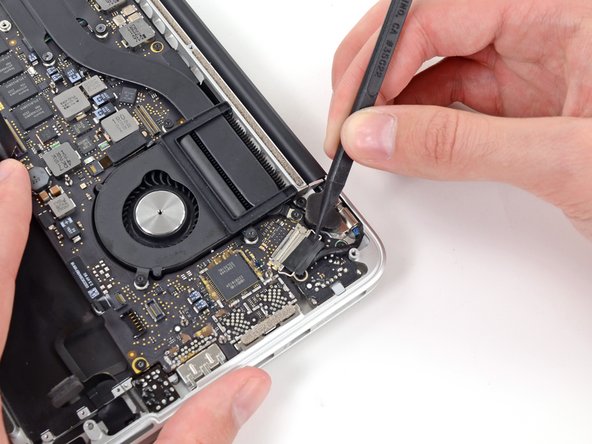
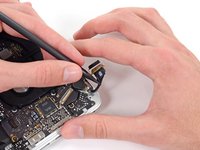
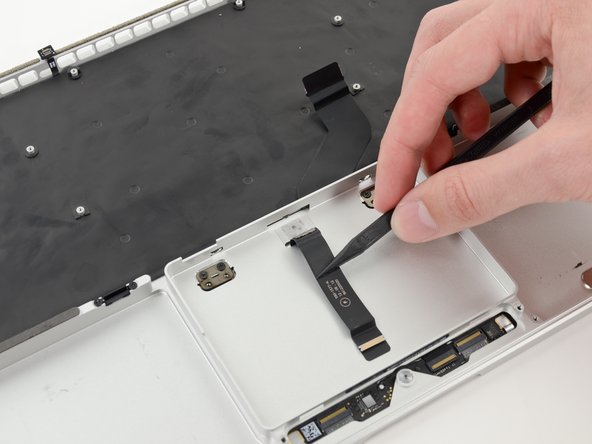
Use the flat end of a spudger to pry the right side of the I/O board data cable connector up off its socket on the I/O board.
-
-
-
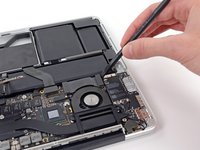
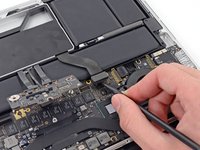
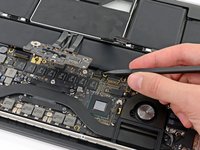
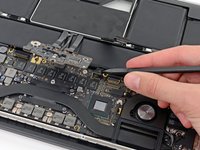
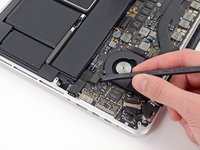
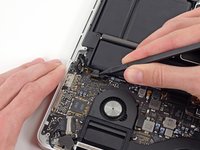
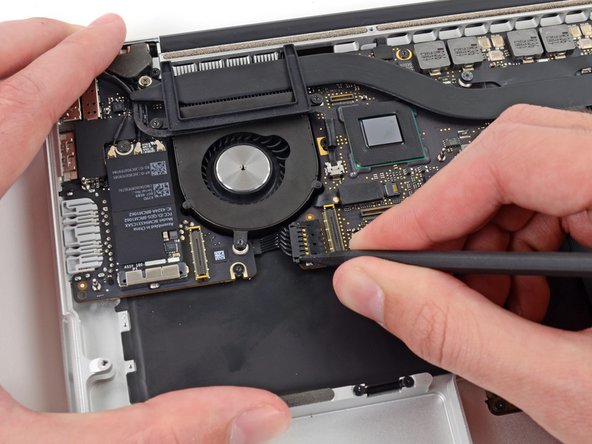
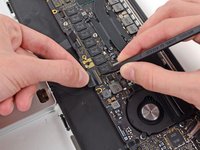
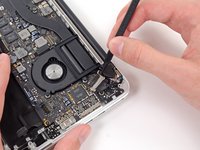
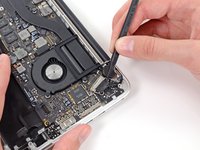
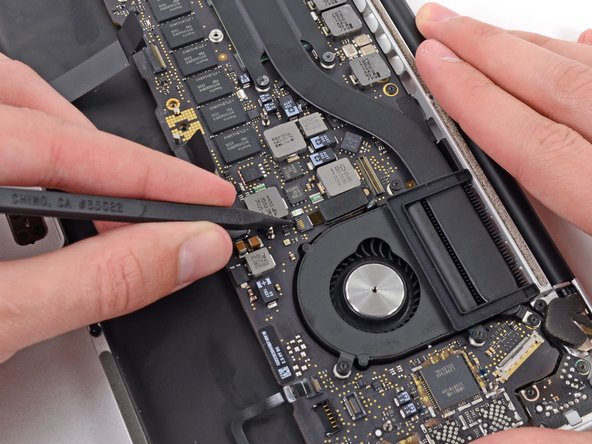
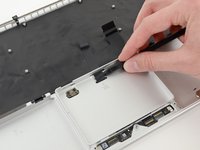
Use the flat end of a spudger to pry the SSD cable connector up from its socket on the logic board.
-
Move the SSD cable connector out of the way.
-
-
-
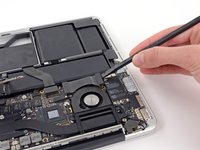
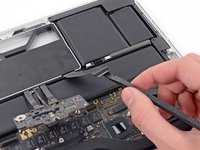
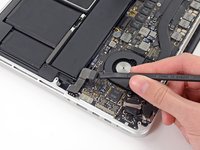
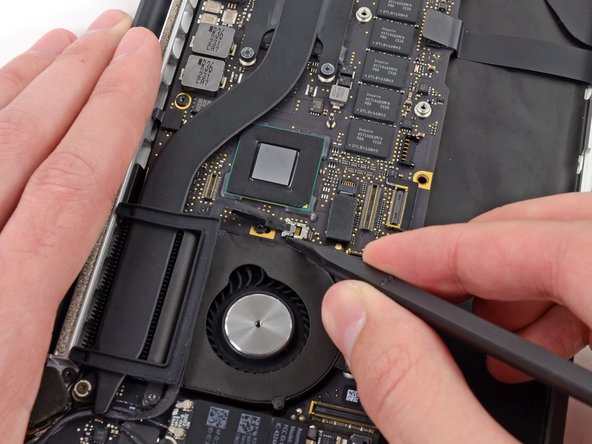
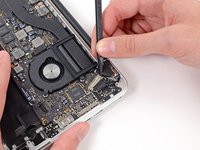
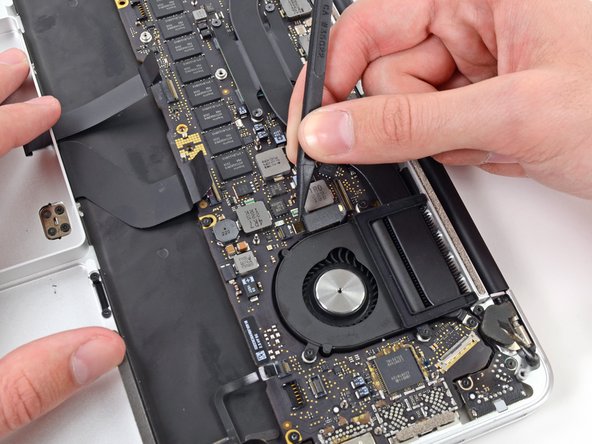
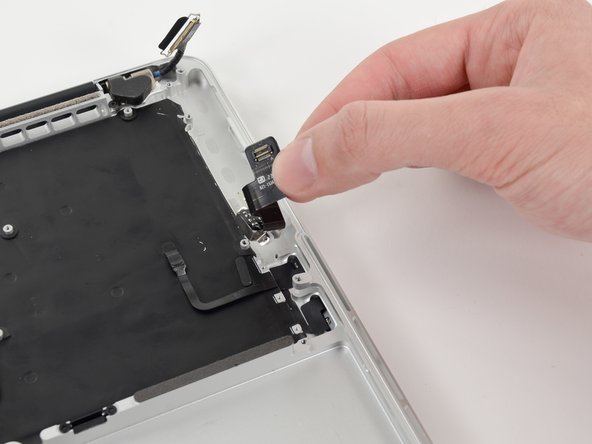
Use the flat end of a spudger to pry the headphone jack cable connector straight up off its socket on the logic board.
-
-
-
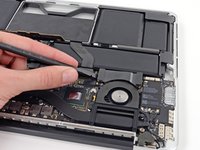
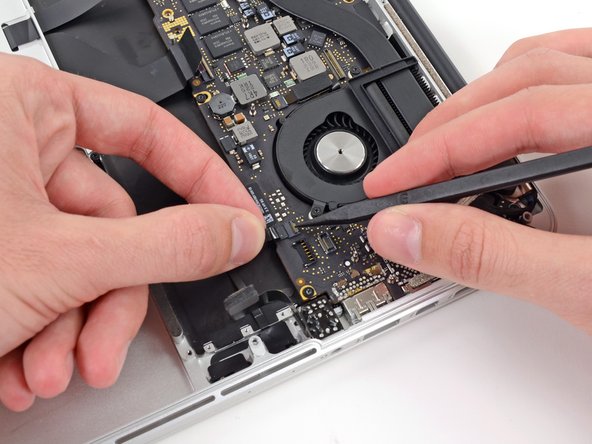
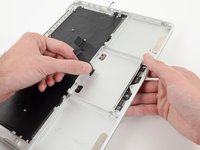
Use your thumb or finger to bend the plastic spring bar on the SSD tray, freeing the two clips at the front side of the device.
-
While holding the spring bar depressed, tilt the SSD assembly up out of its cavity.
-
-
-
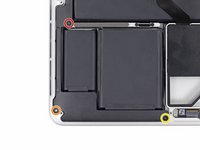
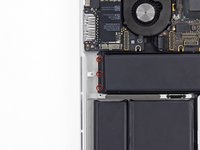
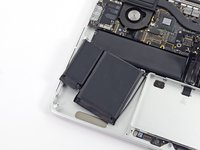
Remove three 2.2 mm T5 Torx screws from each side of the battery (six screws total).
-
-
-
-
Now that your MacBook Pro is fully prepped, it's time to prep yourself.
-
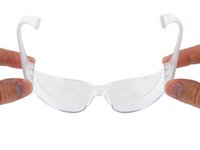
Wear eye protection when handling and applying the adhesive remover. (Eye protection is included in your kit.)
-
Do not wear contact lenses without eye protection.
-
Protective gloves are also included in your kit. If you are concerned about skin irritation, put your gloves on now.
-
-
Tool used on this step:Plastic Cards$2.99
-
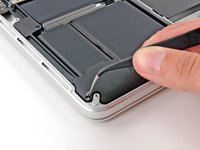
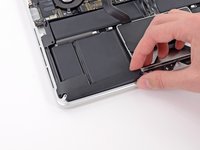
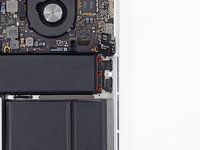
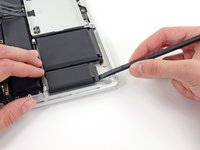
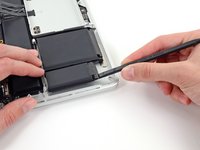
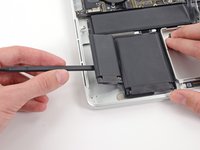
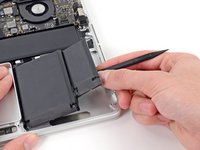
Insert the flat edge of a spudger or plastic card underneath the leftmost battery cell.
-
Run your tool along the bottom perimeter of the battery cell and lift to begin separating the adhesive.
-
-
-
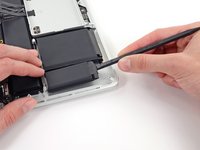
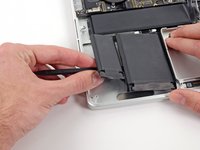
Repeat the above steps to separate the adjacent battery cell from its adhesive:
-
Apply a few drops of liquid adhesive remover under the battery cell.
-
Wait 2-3 minutes for the adhesive remover to penetrate and soften the adhesive.
-
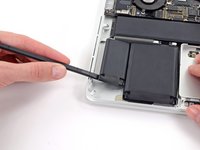
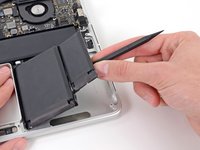
Carefully wedge a spudger or plastic card inwards, being careful to not damage the battery, and separate the battery cell from the adhesive securing it to your MacBook Pro.
-
-
-
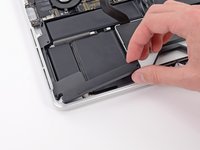
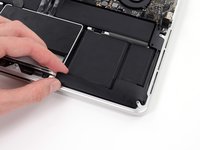
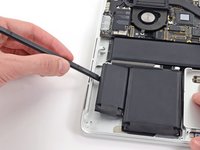
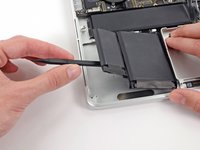
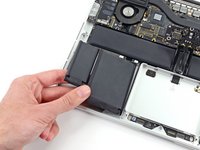
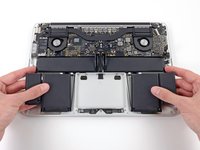
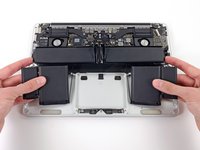
Lift the battery as a whole up out of the upper case, and remove the battery.
-
With a little luck, you can slowly pull out each strip of adhesive with your fingers.
-
Otherwise, soak each section of adhesive with a bit of adhesive remover for 2-3 minutes, and then scrape it out with an opening pick or one of the other tools in your kit. This can take quite a bit of work, so be patient.
-
Mop up any remaining adhesive remover and give your MacBook Pro a few minutes to air dry.
-
Calibrate your newly installed battery: charge it to 100%, and keep charging it for at least 2 more hours. Unplug and use it normally to drain the battery. When you see the low battery warning, save your work, and keep your laptop on until it goes to sleep due to low battery. Wait at least 5 hours, then charge your laptop uninterrupted to 100%.
-
-
-
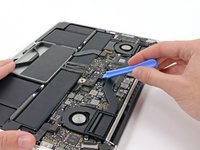
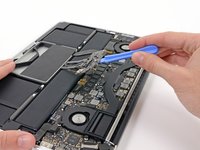
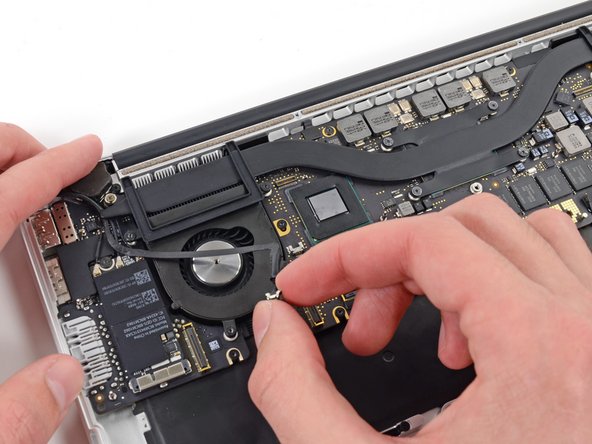
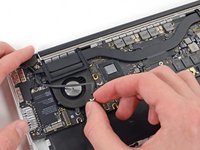
Use the tip of a spudger to push the edges of the I/O board connector straight out of its socket on the logic board.
-
-
-
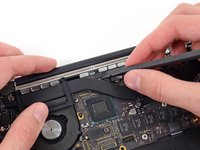
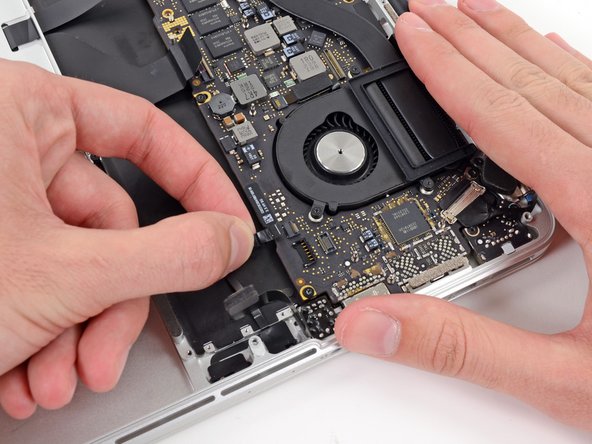
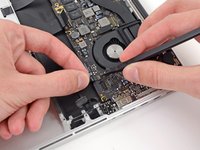
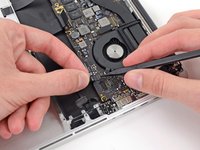
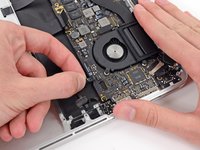
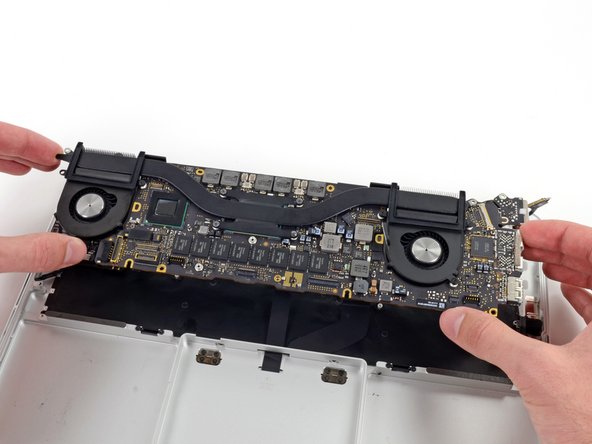
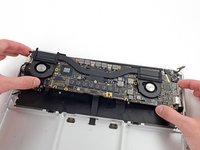
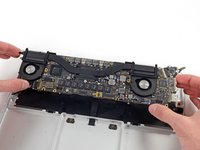
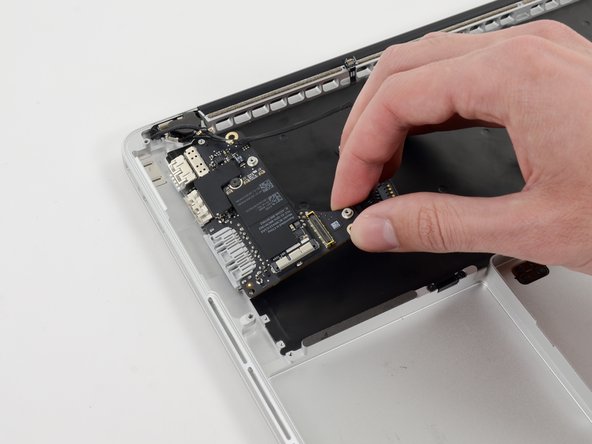
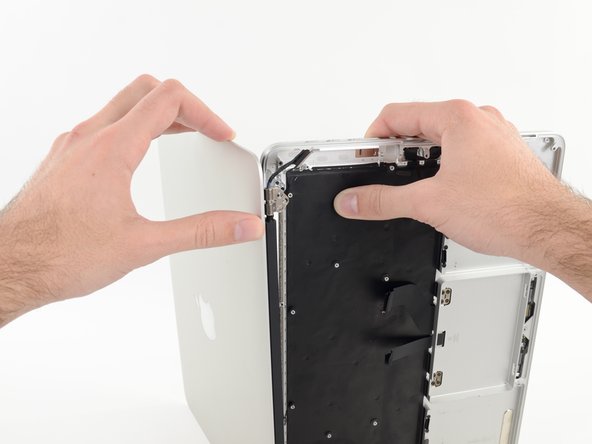
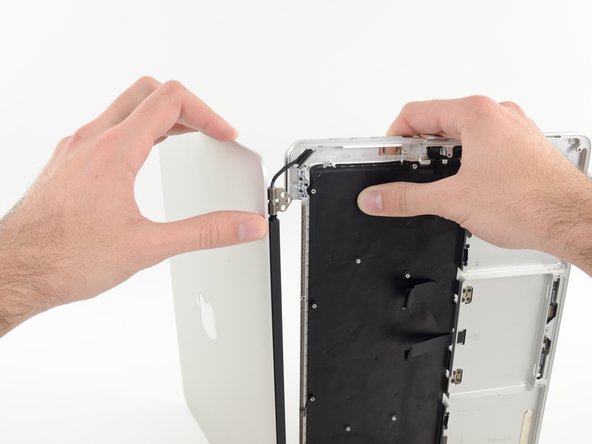
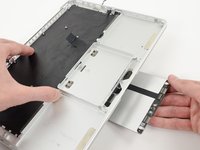
Carefully lift the logic board assembly from its left side and work it out of the upper case, minding any cables and the I/O ports that may get caught during removal.
-
Pull the right I/O port side of the logic board away from the side of the upper case and remove the logic board assembly.
-
-
-
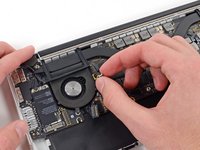
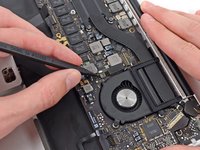
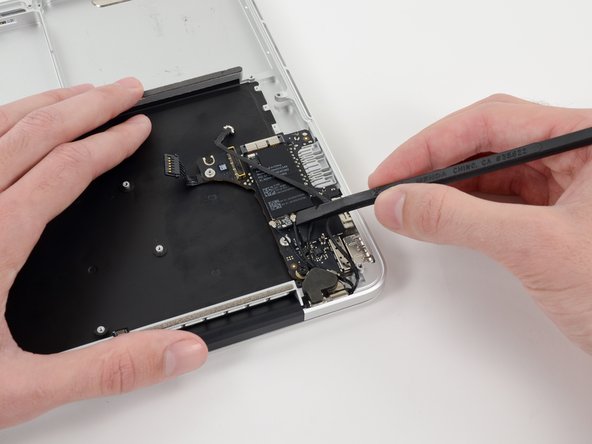
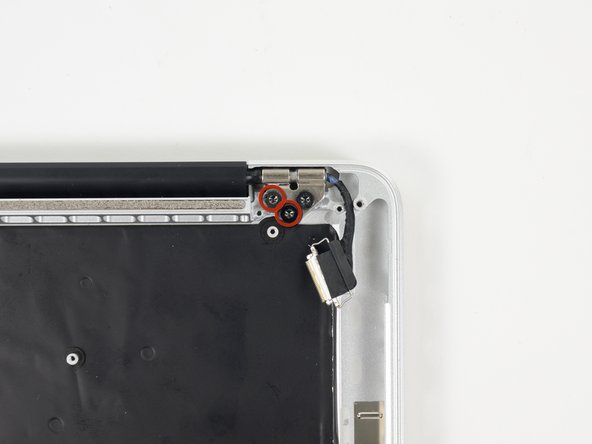
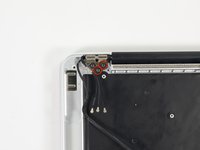
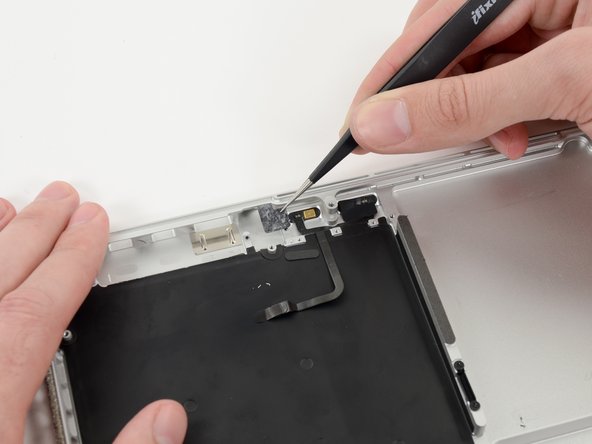
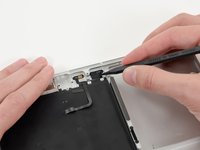
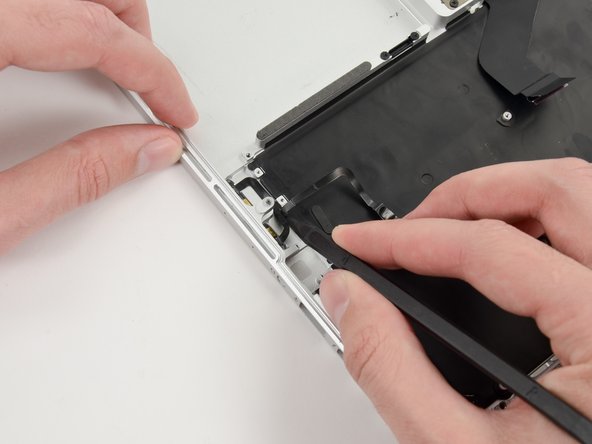
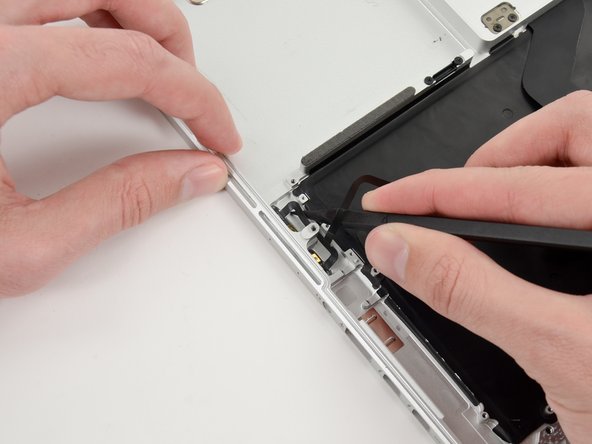
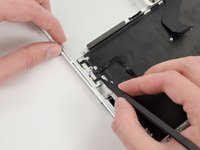
Use the flat end of a spudger to pry and disconnect the three antenna cable connectors from the AirPort board.
-
Connect the long-sleeved cable to the center socket.
-
The short-sleeved cable connects next to the screw.
-
The remaining cable has no sleeve, and connects in the last empty socket, next to the fan.
-
-
-
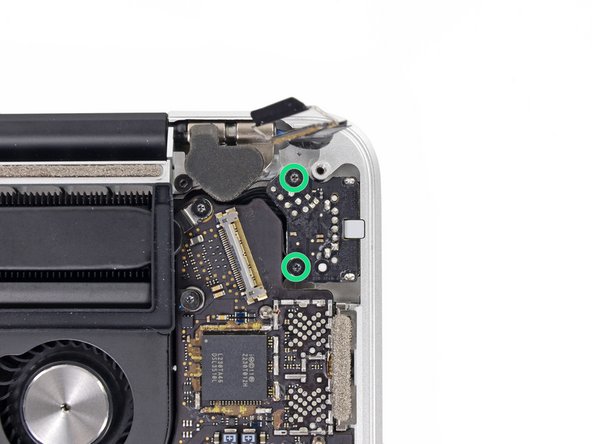
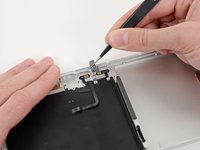
Remove the two 3.4 mm T5 Torx screws securing the headphone jack to the upper case.
-
-
Tool used on this step:Tweezers$4.99
-
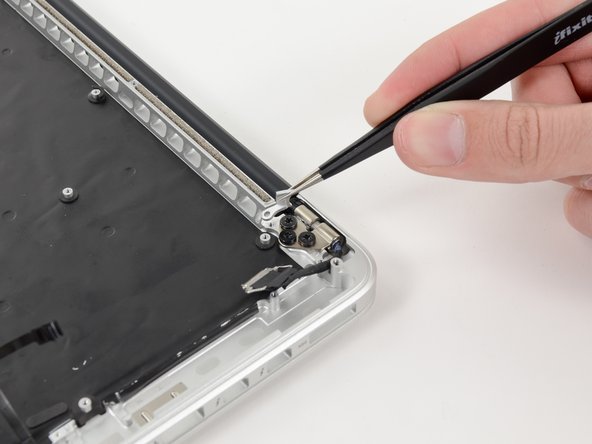
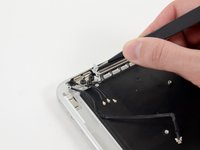
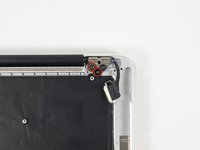
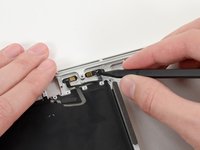
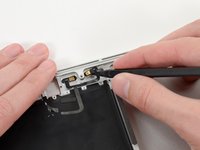
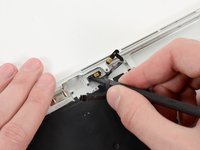
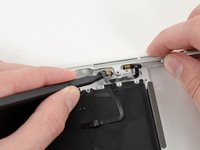
Use a pair of tweezers to lift the rubber hinge covers up off the right and left display hinges.
-
-
-
Remove the following screws securing the trackpad to the upper case:
-
Four 1.4 mm Phillips #000 screws
-
-
-
For this step, it is recommended to use a heat gun or hair dryer to soften the adhesive securing the microphone assembly to the upper case. You may be able to remove it without doing so, but will risk damaging the microphone cable.
-
With the heat gun set to low, heat the microphone assembly to loosen the adhesive attaching it to the upper case.
-


To reassemble your device, follow these instructions in reverse order.
Cancel: I did not complete this guide.
14 other people completed this guide.

2 Guide Comments
If uppercase Assembly(Includes Trackpad, keyboard, Palmrest & BATTERY) is being replaced, there is no need to remove battery from old uppercase assembly.