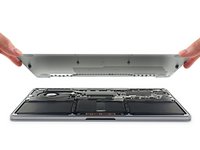
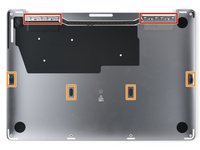
MacBook Pro 13" 2022 (M2) Lower Case Replacement

What you need

  1. MacBook Pro 13" 2022 (M2) Lower Case Replacement, Prepare your MacBook for disassembly: step 1, image 1 of 3 MacBook Pro 13" 2022 (M2) Lower Case Replacement, Prepare your MacBook for disassembly: step 1, image 2 of 3 MacBook Pro 13" 2022 (M2) Lower Case Replacement, Prepare your MacBook for disassembly: step 1, image 3 of 3
    • Allow your MacBook's battery to drain below 10% before starting this repair. A charged battery may catch fire if damaged during the repair.

    • Unplug all cables and fully shut down your MacBook.

    • Close the lid and flip your MacBook over. Keep the lid closed until you've physically disconnected the battery.

    • Opening the lid will power on your MacBook. If you're using macOS Big Sur v11.1 or earlier, disable this function using this guide.

  2. MacBook Pro 13" 2022 (M2) Lower Case Replacement, Unfasten the lower case: step 2, image 1 of 1
    Tool used on this step:
    FixMat
    $36.95
    Buy
    • Use a P5 Pentalobe driver to remove the six screws securing the lower case:

    • Two 6.8 mm screws

    • Two 5.3 mm screws

    • Two 3.4 mm screws

    • Throughout this repair, keep track of each screw and make sure it goes back exactly where it came from.

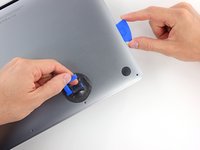
  3. MacBook Pro 13" 2022 (M2) Lower Case Replacement, Separate the lower case: step 3, image 1 of 2 MacBook Pro 13" 2022 (M2) Lower Case Replacement, Separate the lower case: step 3, image 2 of 2
    • Apply a suction handle near the front edge of the lower case, between the screw holes.

    • Pull up on the suction handle to create a gap between the lower case and the frame.

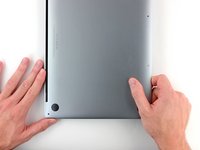
  4. MacBook Pro 13" 2022 (M2) Lower Case Replacement, Release the left clips: step 4, image 1 of 3 MacBook Pro 13" 2022 (M2) Lower Case Replacement, Release the left clips: step 4, image 2 of 3 MacBook Pro 13" 2022 (M2) Lower Case Replacement, Release the left clips: step 4, image 3 of 3
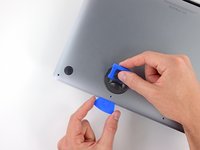
    • Insert an opening pick between the lower case and the frame.

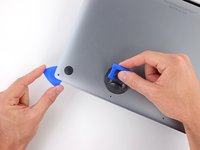
    • Slide the pick around the left corner to release the first set of clips.

    • You'll hear and feel a pop when each clip releases.

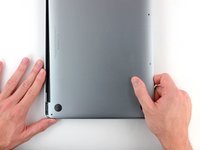
  5. MacBook Pro 13" 2022 (M2) Lower Case Replacement, Release the right clips: step 5, image 1 of 3 MacBook Pro 13" 2022 (M2) Lower Case Replacement, Release the right clips: step 5, image 2 of 3 MacBook Pro 13" 2022 (M2) Lower Case Replacement, Release the right clips: step 5, image 3 of 3
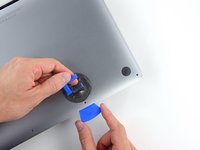
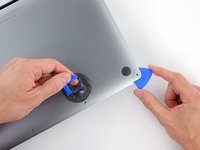
    • Slide your opening pick around the right corner to release the second set of clips securing the lower case.

  6. MacBook Pro 13" 2022 (M2) Lower Case Replacement, Pry the lower case up: step 6, image 1 of 3 MacBook Pro 13" 2022 (M2) Lower Case Replacement, Pry the lower case up: step 6, image 2 of 3 MacBook Pro 13" 2022 (M2) Lower Case Replacement, Pry the lower case up: step 6, image 3 of 3
    • Insert your opening pick between the lower case and the frame near the middle left screw hole.

    • Firmly twist the pick until the clip releases.

    • Repeat this procedure for the clip near the middle right screw hole.

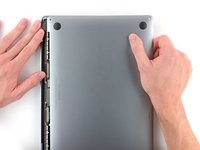
  7. MacBook Pro 13" 2022 (M2) Lower Case Replacement, Release the remaining clips: step 7, image 1 of 3 MacBook Pro 13" 2022 (M2) Lower Case Replacement, Release the remaining clips: step 7, image 2 of 3 MacBook Pro 13" 2022 (M2) Lower Case Replacement, Release the remaining clips: step 7, image 3 of 3
    • Firmly pull the lower case away from the screen hinges to release the last clips securing it to the frame.

    • This motion requires significant force. Don't pull the lower case up, as you may bend the clips.

    • If it feels stuck, pull one corner at a time.

  8. MacBook Pro 13" 2022 (M2) Lower Case Replacement, Remove the lower case: step 8, image 1 of 2 MacBook Pro 13" 2022 (M2) Lower Case Replacement, Remove the lower case: step 8, image 2 of 2
    • Remove the lower case.

    • To reinstall the lower case:

    • Set it in place and align the sliding clips near the display hinges. Press down and slide the lower case toward the hinges.

    • Once the lower case is secured near the hinges, press down firmly to engage the remaining four clips.

    • You'll hear and feel a pop when each clip engages.

Conclusion

Compare your new replacement part to the original part—you may need to transfer remaining components or remove adhesive backings from the new part before installing.

To reassemble your device, follow these instructions in reverse order.

Repair didn’t go as planned? Try some basic troubleshooting or search our Answers community for help.

2 other people completed this guide.

Clay Eickemeyer

Member since: 09/19/22

66,478 Reputation

453 Guides authored

Team

iFixit Member of iFixit

Staff

135 Members

16,820 Guides authored

0 Comments

Add Comment

View Statistics:

Past 24 Hours: 6

Past 7 Days: 39

Past 30 Days: 149

All Time: 1,437