Introduction
Prerequisite only guide to remove the keyboard in a MacBook Neo.
-
-
-
Use a Torx Plus 3IP driver to remove the two 1.7 mm‑long screws securing the USB ports connector cover.
 Ask FixBot
-
-
-
Use the flat end of a spudger to disconnect the USB ports press connector.
-
-
-
Use a Torx Plus 5IP driver to remove the four 2.8 mm‑long screws securing the USB ports.
-
-
-
Set the USB ports into the frame, then use a Torx Plus 5IP driver to partially install the four 2.8 mm‑long screws securing them.
-
Plug both ends of a USB‑C to USB‑C cable into the ports. If either port feels stiff, shift the port and reconnect the cable until it feels smooth.
-
Fully tighten the screws securing the USB ports, and disconnect the cable from both.
-
-
-
Insert the point of a spudger beneath the right speaker connector, located on the left side of the logic board directly above the battery, and pry it straight up to disconnect it.
-
-
-
Repeat to disconnect the headphone jack and left speaker connectors, located on the opposite end of the logic board.
-
-
-
Gently lift the speaker cables out of their channels around the battery.
-
-
-
Gently peel up the headphone jack cable and lift it out of its channel around the battery.
-
-
-
Use tweezers to peel up the black sticker over the keyboard cable, just until it comes off the socket on the board. Make sure it stays attached to the cable.
-
-
-
Use the flat end of a spudger to flip up the hinged locking flap on the keyboard cable ZIF connector.
-
-
-
Use tweezers or your fingers to gently grip the keyboard cable by its cover and slide the cable out of its socket.
-
-
-
Flip up the hinged locking flap and disconnect the microphone cable ZIF connector, adjacent to the keyboard cable.
-
-
-
-
Repeat to disconnect the trackpad cable ZIF connector, adjacent to the microphone cable.
-
-
-
Repeat to disconnect the Touch ID cable ZIF connector, located on the left edge of the logic board.
-
-
-
Use a Torx Plus 3IP driver to remove the five 1.7 mm‑long screws securing the logic board.
-
-
-
Carefully lift the logic board around the cables and out of the MacBook.
-
-
-
Keyboard, microphone, and trackpad cables
-
Audio board cable
-
USB ports cable
-
Touch ID board cable (if present)
-
-
-
Use a Torx Plus 5IP driver to remove the eighteen 2.8 mm‑long screws securing the battery.
-
Don't remove the four tall screws marked in yellow.
-
-
-
Insert the flat end of a spudger beneath the battery's left edge and lift it until you can grab it with your fingers.
-
Tilt the top edge of the battery upwards to a roughly 45‑degree angle and remove it.
-
-
-
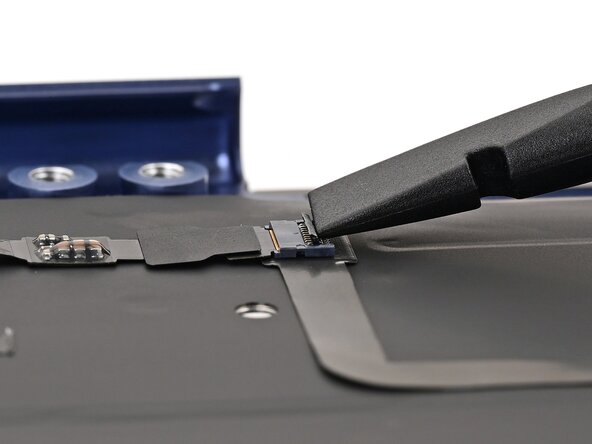
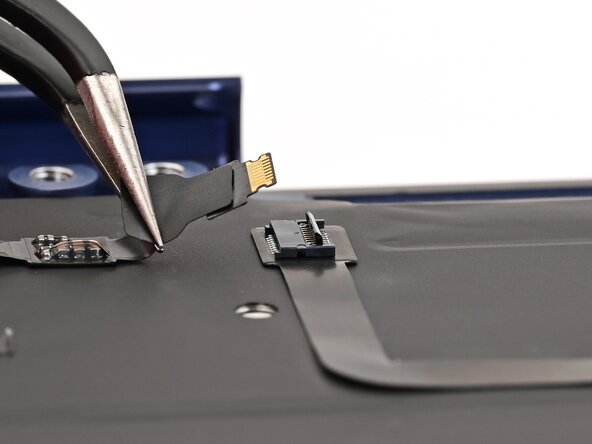
Use the flat end of a spudger to lift the hinged locking flap on the trackpad cable ZIF connector.
-
Use tweezers or your fingers to gently pull the trackpad cable out of its socket.
-
-
-
Slowly peel up the trackpad cable to separate the light adhesive securing it to the keyboard shield.
-
Remove the trackpad cable.
-
-
-
Peel up the keyboard cable on the top edge of the keyboard shield.
-
-
-
Peel up and remove the three foam strips on the Touch ID cable and keyboard shield.
-
-
-
Use the flat end of a spudger to pry up the hinged locking flap on the Touch ID interconnect cable.
-
Use tweezers or your fingers to pull the Touch ID cable out of its socket.
-
-
-
Peel up the Touch ID interconnect cable off the keyboard shield.
-
-
-
Use the flat end of a spudger to gently lift the Touch ID cable off the keyboard shield.
-
Position the cable over the edge of the frame so it's out of the way.
-
-
-
Use the point of a spudger to pry up the keyboard shield until you can grab it with tweezers.
-
-
-
Use tweezers to slowly peel up an entire edge of the keyboard shield so you can grab it with your fingers.
-
-
-
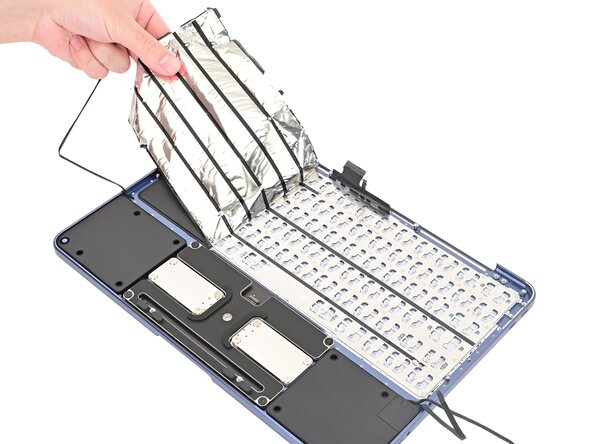
Peel up the keyboard shield at a low angle. Try to lift it in one large piece.
-
-
-
Peel off the entire keyboard shield. Try to keep it in one piece.
-
If the shield tears, peel up any remnants off the laptop.
-
-
-
Set the new keyboard shield in place so the holes in the shield are aligned with the posts on the keyboard.
-
Use the flat end of a spudger to press the entire perimeter of the keyboard shield into place.
-
Remove any remaining liners off the keyboard shield.
-
-
-
To install a new keyboard shield:
-
Clean up any residual adhesive off the frame of the laptop.
-
Remove the adhesive liner off the bottom (shiny side) of the new keyboard shield.
-
-
-
Use a Torx Plus 3IP driver to remove the four 1.9 mm‑long screws securing the Touch ID sensor.
-
Use a Torx Plus 1IP driver to remove the four 2.2 mm‑long screws securing the Touch ID backplate.
-
-
-
Lift the laptop frame to let the Touch ID sensor fall out.
-
Remove the Touch ID sensor and set the laptop back down.
-
-
-
Use tweezers to lift any residual adhesive covering any of the screws securing the keyboard.
-
-
-
Use a Torx Plus 1IP driver to remove the forty‑one 1.7 mm‑long screws securing the keyboard.
-
If the laptop doesn't have Touch ID, use a Torx Plus 1IP driver to remove the remaining four screws securing the keyboard.
-
-