Introduction
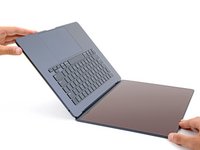
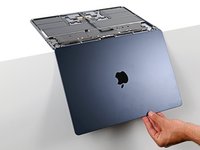
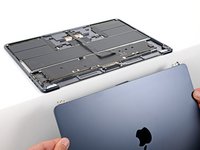
Use this guide to replace a broken or cracked screen on your MacBook Air 15" 2023.
Replacing your screen will disable its True Tone functionality.
Before starting this repair, check if your replacement screen has a lid angle sensor pre‑installed on the hinge. If it doesn't, you'll need a 1IP Torx Plus bit to remove and transfer the sensor.
What you need
-
-
Unplug all cables and fully power off your MacBook.
-
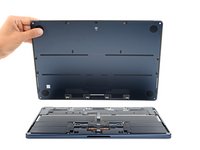
Close the display and lay your MacBook upside down. Keep your laptop closed until you've physically disconnected the battery.
 Ask FixBot
-
-
Tool used on this step:FixMat$36.95
-
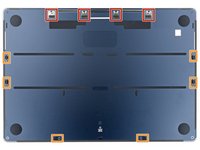
Use a P5 pentalobe screwdriver to remove the four 6.4 mm‑long screws securing the lower case.
-
-
-
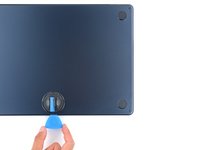
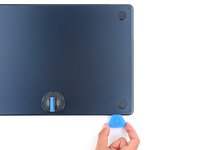
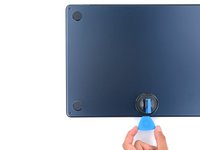
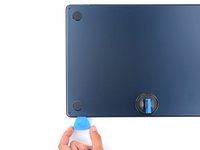
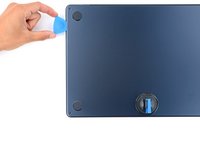
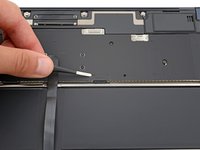
Apply a suction handle to the center of the lower case's front edge.
-
Pull up on the suction handle to create a gap between the lower case and the frame.
-
Insert an opening pick into the gap.
-
-
-
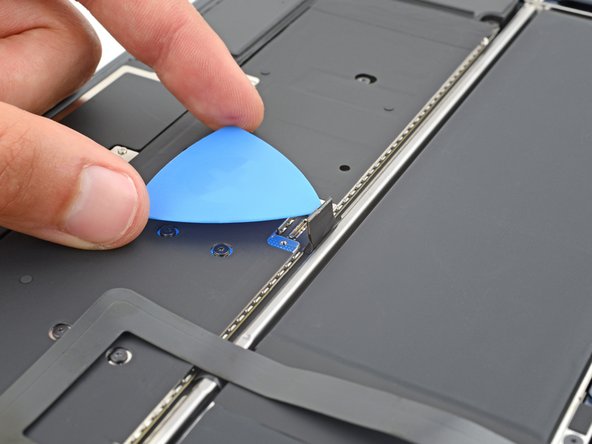
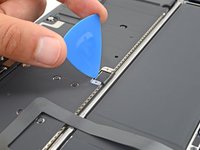
Slide the pick to the bottom right corner to release the first clip.
-
Slide the pick around the corner and up the right edge to release the next two clips.
-
-
-
Insert the opening pick in the original gap created with the suction handle.
-
Slide the opening pick to the bottom left corner and up the left edge to release the three remaining snapping clips.
-
-
-
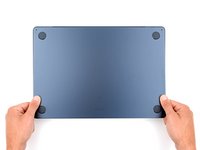
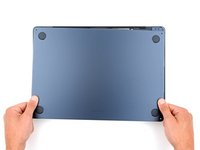
Keep the lower case flat to the frame and firmly slide it straight away from the back edge, one corner at a time, to disengage the sliding tabs.
-
-
-
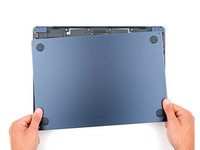
Remove the lower case.
-
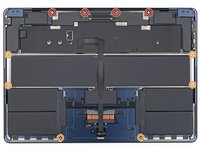
Set the lower case in place and align the sliding tabs with the screw heads they slide over. Press down and slide the lower case toward the back edge to engage the tabs—it'll stop sliding as the tabs engage.
-
Once the lower case is flush with the frame, press down firmly along the perimeter to engage the six snapping clips.
-
-
Tool used on this step:Tweezers$4.99
-
Use blunt nose tweezers or your fingers to remove the piece of tape covering the battery connector cover.
-
-
-
Use a 3IP Torx Plus screwdriver to remove the two 1.5 mm‑long screws securing the battery connector cover.
-
Remove the cover.
-
-
-
Use an opening pick to pry up and disconnect the battery connector.
-
-
-
Use a 3IP Torx Plus screwdriver to remove the following screws:
-
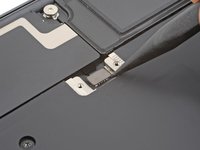
Two 2.6 mm‑long screws securing the left hinge cover
-
Two 1.5 mm‑long screws securing the speaker cable cover
-
-
-
-
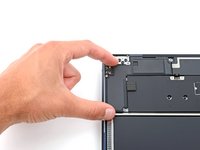
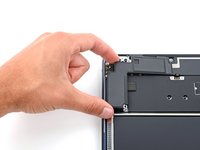
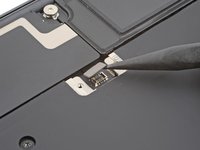
Insert the point of a spudger into one of the left hinge cover's screw holes.
-
Push the hinge cover away from the back edge to dislodge it.
-
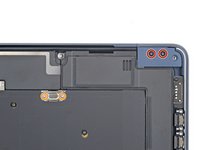
Remove the hinge cover.
-
-
-
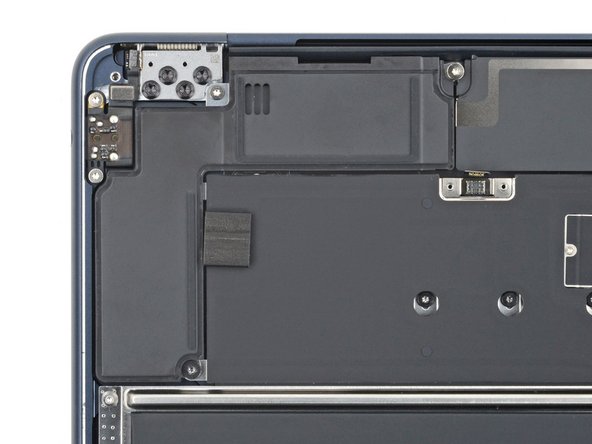
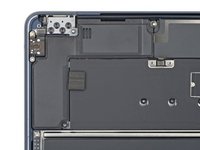
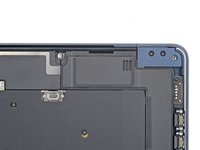
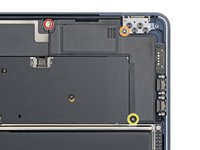
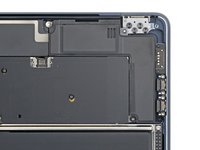
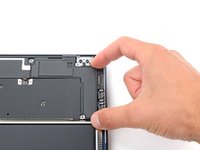
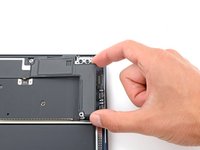
Use the point of a spudger to pry up and disconnect the right speaker press connector.
-
-
-
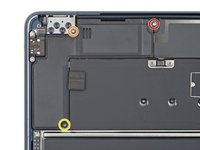
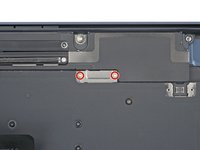
Remove the three screws securing the right speaker:
-
One 5.5 mm‑long 4IP Torx Plus screw
-
One 2.7 mm‑long 4IP Torx Plus screw
-
One 3.5 mm‑long T6 Torx screw
-
-
-
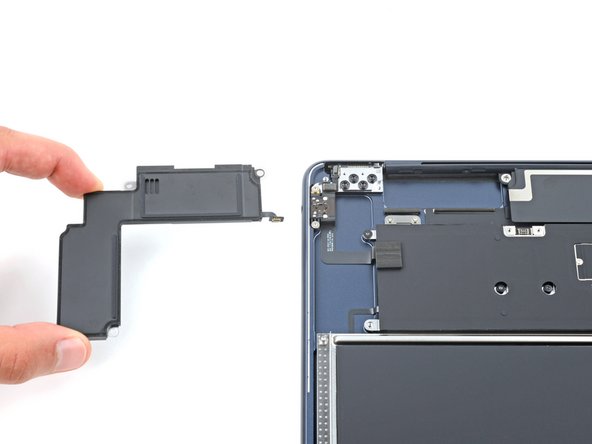
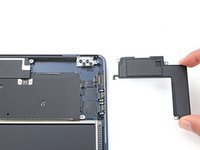
Lift the speaker's left edge over the frame and slide it to the left to remove it.
-
-
-
Use a 3IP Torx Plus screwdriver to remove the following screws:
-
Two 2.6 mm‑long screws securing the right hinge cover
-
Two 1.5 mm‑long screws securing the speaker cable cover
-
-
-
Insert the point of a spudger into one of the right hinge cover's screw holes.
-
Push the hinge cover away from the back edge to dislodge it.
-
Remove the hinge cover.
-
-
-
Use the point of a spudger to pry up and disconnect the left speaker press connector.
-
-
-
Remove the three screws securing the right speaker:
-
One 5.5 mm‑long 4IP Torx Plus screw
-
One 2.7 mm‑long 4IP Torx Plus screw
-
One 3.5 mm‑long T6 Torx screw
-
-
-
Lift the speaker's right edge over the frame and slide it to the right to remove it.
-
-
-
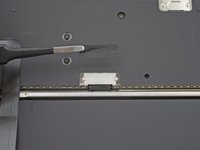
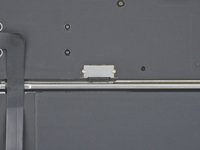
Use a 3IP Torx Plus screwdriver to remove the two 1.5 mm‑long screws securing the antenna cables cover.
-
Remove the cover.
-
-
Tool used on this step:Tweezers$3.99
-
Insert one arm of a pair of angled tweezers under the metal neck of one of the antenna connectors and lift straight up to disconnect it.
-
Disconnect the other antenna.
-
-
-
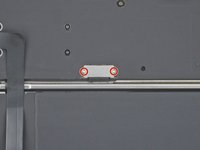
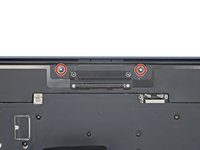
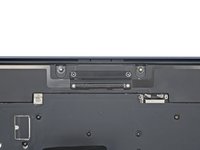
Use a 4IP Torx Plus screwdriver to remove the two 5.5 mm‑long screws securing the antenna bar.
-
-
Tool used on this step:Tesa 61395 Tape$2.95
-
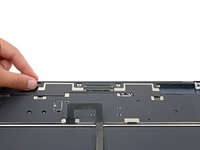
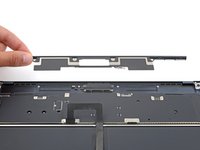
Use tweezers or your fingers to remove the foam pad from the cover.
-
-
-
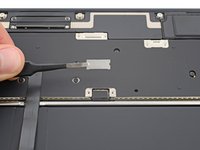
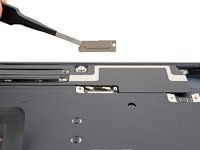
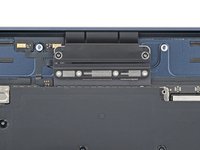
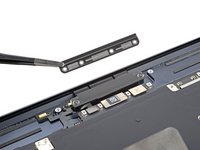
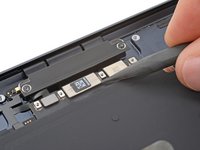
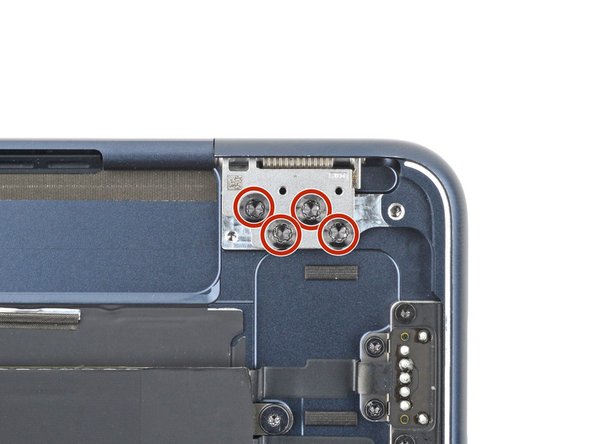
Use a 3IP Torx Plus screwdriver to remove the four 1.5 mm‑long screws securing the display and camera cables cover.
-
Remove the cover.
-
-
-
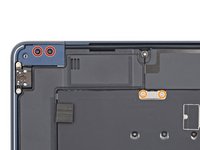
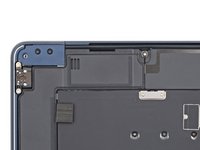
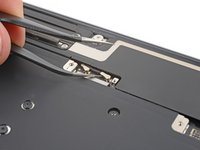
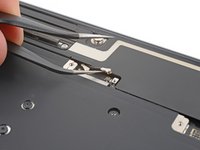
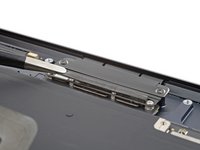
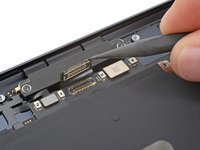
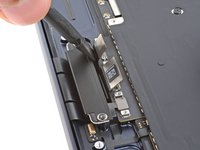
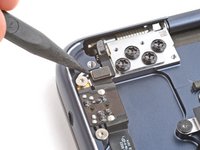
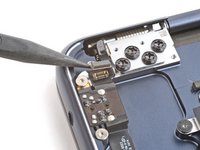
Use a spudger to pry up and disconnect the display and camera cable press connectors.
-
-
-
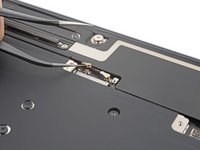
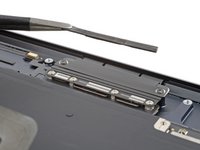
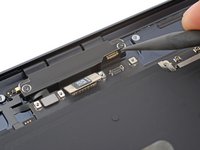
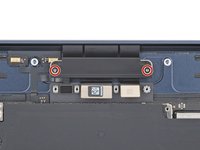
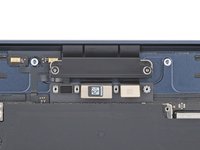
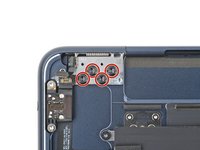
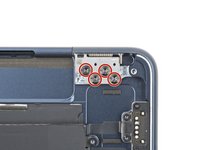
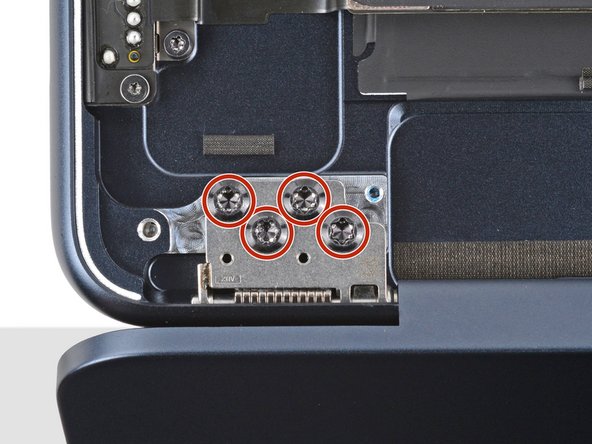
Use a 3IP Torx Plus screwdriver to remove the two 2.8 mm‑long screws securing the display and camera cables to the frame.
-
-
-
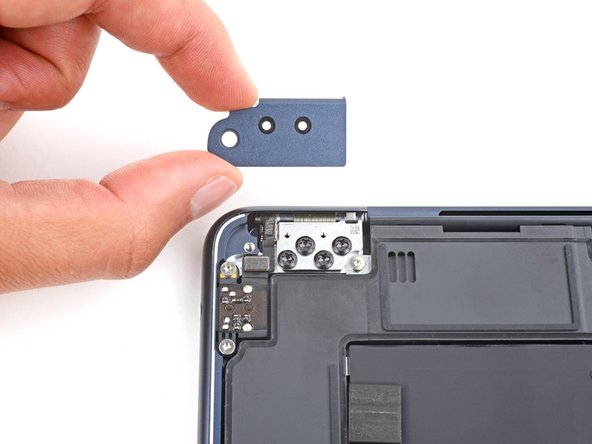
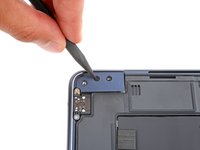
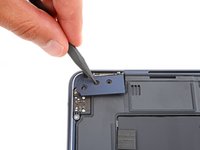
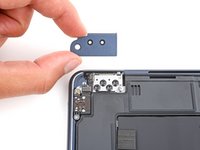
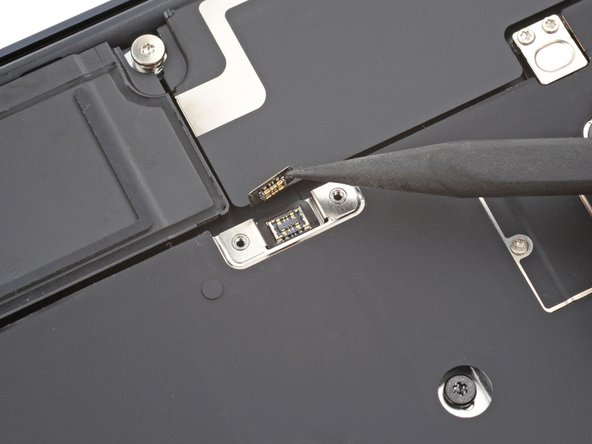
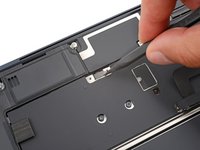
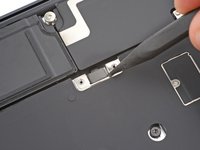
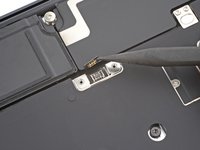
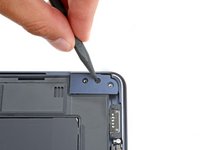
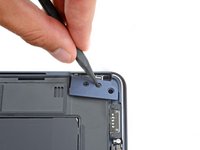
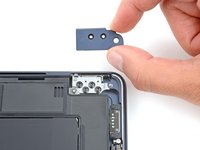
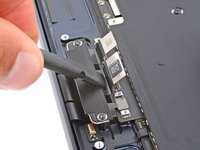
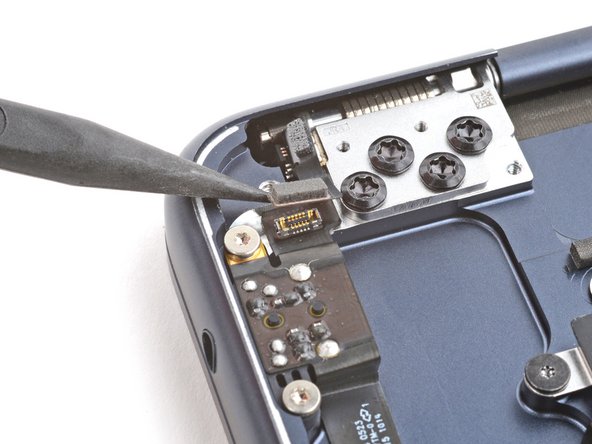
Use the point of a spudger to pry up and disconnect the lid angle sensor from the top left corner of the MacBook.
-
-
-
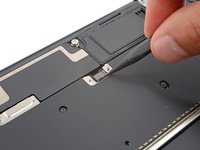
Use an 8IP Torx plus screwdriver to loosen (not remove) the eight hinge screws.
-
-
-
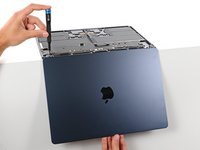
Fully open your MacBook and gently place it keyboard side down on a table so the screen hangs over the edge.
-
-
-
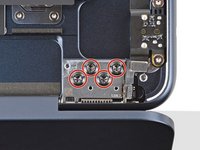
Support the screen with one hand and use your free hand to remove the eight 4.7 mm‑long 8IP Torx Plus screws securing the hinges.
-
-
-
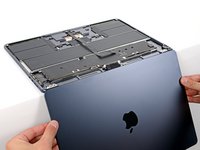
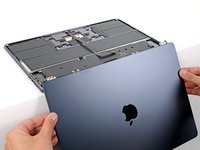
Hold the screen with both hands and lift the hinges out of their recesses to remove the screen.
-
Make sure the screen hinges are fully open and guide them into their recesses in the frame.
-
Install and partially tighten the eight hinge screws.
-
Close your laptop and make sure the screen is properly aligned. If it clicks or snaps, readjust the alignment.
-
Fully tighten the hinge screws.
-


To reassemble your device, follow these instructions in reverse order.
Take your e-waste to an R2 or e-Stewards certified recycler.
Repair didn’t go as planned? Try some basic troubleshooting, or ask our Answers community for help.
Cancel: I did not complete this guide.
8 other people completed this guide.


6 Guide Comments
hi, I looked for the exact answer to the question in many places, but I couldn't find it. I understand that the display replacement problem only affects the 14" mbp because of the chip, correct?
Hi! This guide is for the MacBook Air 15" 2023. We swapped screens between two of these models and found no artifacts. The same is true for the MacBook Air 2022.
You're correct about the MacBook Pros. As this article explains, the problem is with the 14" M1 and M2 MacBook Pro models. The 16" models didn't have artifacts.
Is it possible to switch screens between a2941 same model 8gb - 256 base model to 16gb - 1tb model ? well my 1 tb one has broken screen and i am thinking to buy a second hand base model to se its screen.
Excellent Guide! It would have been helpful to have a bit better picture of the location of the screen position sensor screw. Everything was perfectly accurate.
Will a color change, a Starlight screen on a Space Gray body, work? Just looking for available screens and would like the best quality and don't care about color mismatch.