
MacBook Air 13" Late 2020 USB-C Board Replacement

Last updated on May 7, 2024
Views: 94K
View statistics:
- Past 24 Hours:
- 80
- Past 7 Days:
- 392
- Past 30 Days:
- 1,836
- All Time:
- 93,971
Comments: 58
30 comments on steps, 28 guide comments.
Go to guide commentsCompleted: 51 52
51 people have marked this guide "completed." Will you be next?
52 people have marked this guide "completed." Including you — great job!
Favorites: 8 9
8 people have favorited (and subscribed to) this guide. Will you be next?
9 people have favorited (and subscribed to) this guide — including you!
Introduction
Go to step 1 ↓Use this guide to remove or replace the USB-C board in a Late 2020 MacBook Air (M1).
What you need


-
-
Tool used on this step:Magnetic Project Mat$19.95
-
If your MacBook is running Big Sur v11.1 or later, disabling Auto Boot may not work. You can proceed normally, but make sure to disconnect the battery as soon as you're inside.
-
Use a P5 driver to remove the following screws:
-
Two 7.9 mm screws
-
Two 7.3 mm screws
-
Six 2.6 mm screws
 Ask FixBot
-
-
-
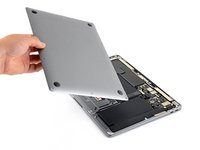
Wedge your fingers between the display and the lower case and pull upward to pop off the lower case.
-
Remove the lower case.
-
Set it in place and press firmly to engage the two hidden clips underneath. You should feel and hear them snap into place.
-
-
-
-
-
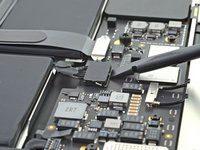
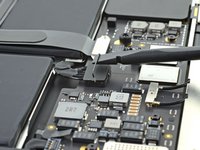
Use the flat end of a spudger to pry up and unlatch the metal locking arm on the battery connector.
-
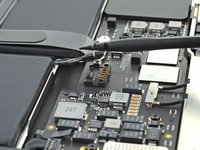
Lift straight up on the metal locking arm to pull the battery connector out of its socket on the logic board.
-
If necessary, push the rear, wire side of the connector into place first, then rock the front of the connector into place.
-
-
-
-
-
-
Use a T3 Torx driver to remove the two 1.4 mm screws securing the USB-C connector cover.
-
-
-
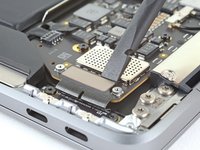
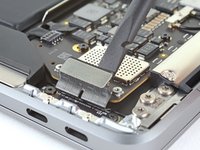
Use the flat end of a spudger to pry the USB-C cable connector up and out of its socket on the logic board.
-
-
-
Use a T5 Torx driver to remove the two 2.9 mm screws securing the USB-C board.
-
-
Tool used on this step:Tweezers$4.99
-
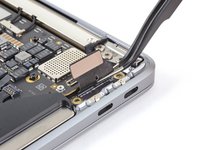
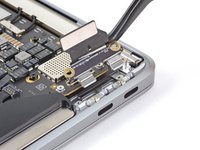
Use a pair of tweezers to remove the USB-C board.
-
-








Compare your new replacement part to the original part—you may need to transfer remaining components or remove adhesive backings from the new part before installing.
To reassemble your device, follow the above steps in reverse order.
Once you've completed your repair, your laptop may not power back on until connected to power.
Take your e-waste to an R2 or e-Stewards certified recycler.
Repair didn’t go as planned? Check out our Answers community for troubleshooting help.
Cancel: I did not complete this guide.
51 other people completed this guide.


28 Guide Comments
This guide was excellent. Easy & painless, even though it was the most complex repair I've taken on myself. Thanks for saving time & money.
Do you sell the screws for the usb c board? I have lost one of the 1.4mm torx screws which hold down the connector of the usb board.
This was quite easy, thanks so much Carsten!
where can I get the part for my computer MacBook Air M1 2020 Usb-C connector model A2337 EMC 3598 serial CO2FN1R2Q6LC.
Where can I buy it online....
If you're in selected countries in Europe or the USA, you can now order this part from Apple directly using their Self Service Repair store :)
